VMware Cloud on AWS HCX
What is Hybrid Cloud Extension (HCX)

Hybrid Cloud Extension abstracts on-premises and cloud resources and presents them to the apps as one continuous hybrid cloud. On this, Hybrid Cloud Extension provides high-performance, secure and optimized multi-site interconnects. The abstraction and interconnects create infrastructure hybridity. Over this hybridity, Hybrid Cloud Extension facilitates secure and seamless app mobility and disaster recovery across on-premises vSphere platforms and VMware Clouds. Hybrid Cloud Extension is a multi-site, multi cloud service, facilitating true hybrid cloud.
Hybrid Cloud Extension Features
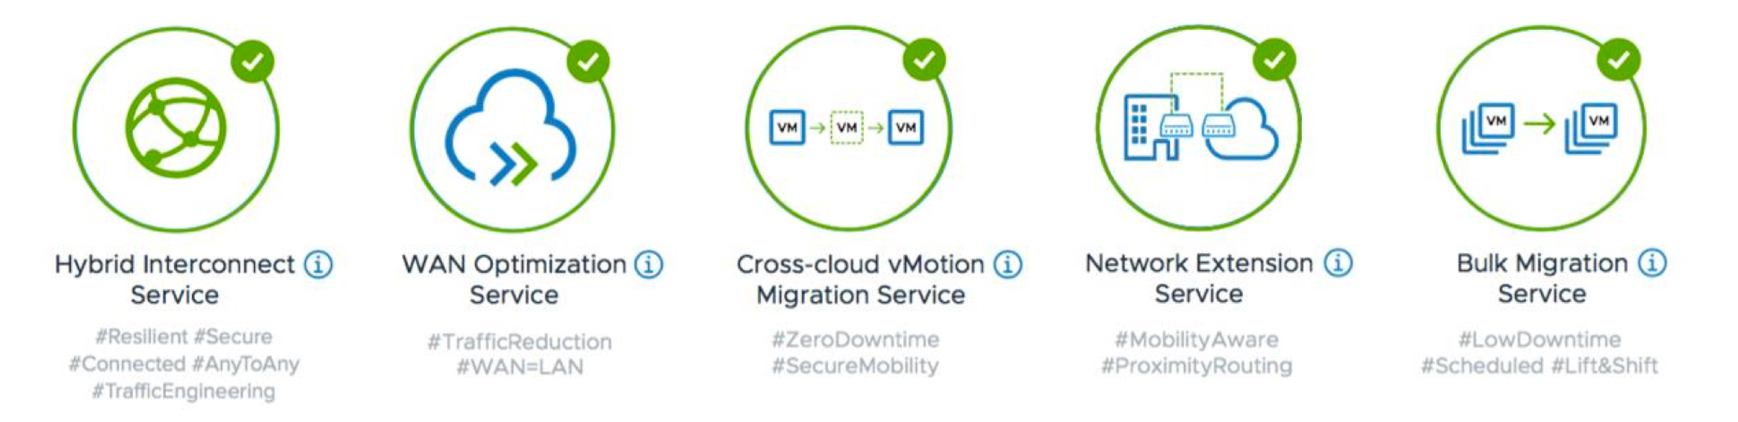
Any-to-Any vSphere Cloud App Mobility
- Rapidly move existing workloads from a vSphere platform to the latest SDDC
- Reduce upfront planning time for cost and resource analysis
- Accelerate cloud adoption and avoid retrofitting on-premises environment Business Continuity with Lower TCO
Business Continuity with Lower TCO
- IP and MAC address remapping is not required
- No need to retrofit existing VM environment
- Hybrid Cloud Extension provides warm and cold bulk migration, and bidirectional migration
- Hybrid Cloud Extension simplifies your operational model
Architected for Security
- Ensure highly secure tethering of private and public clouds
- Protect resources with resilient disaster recovery capabilities
- Hybrid Cloud Extension hybrid DMZ enables portability of enterprise network and security practices to the cloud
- Security policies migrate with applications High-Performance Infrastructure Hybridity
High Performance Infrastucture Hybridity
- In-built WAN optimization is tuned for the needs of hybrid use cases
- Hybrid Cloud Extension provides agile, intelligent routing
- Traffic load balancing overlay is policy-enforced
- Multiple VM migration models (including vMotion, warm, cold) make it easy to migrate to and from the cloud without any changes
Configure HCX
Click on the link below to walk through on how to install and configure HCX within your on-prem vCenter environment.
HCX Install and Configuration{:target=”_blank”}
HCX - vMotion Migration
Now that you are familiar with installing and configuring HCX. Let’s do an actual vMotion (live) migration of a virtual machine to VMware Cloud on AWS.
{% capture notice-1 %} Note: Be aware that the following exercise will use a pre-configured on-premise and VMware Cloud on AWS environment to demonstrate HCX migrations, the migrated VMs will not appear in your own Student SDDC you have been using. {% endcapture %}
Log into On-Prem vCenter
We have provided an on-prem vCenter with virtual machines to migrate. Based on your student ## please select the appropriate VM to migrate.
From your Horizon desktop (desktop.vmc.ninja) open Google Chrome and access the on-prem vCenter
{% capture notice-2 %} Note: Refer to the Student Access{:target=”_blank”} page to log into your Horizon desktop {% endcapture %}
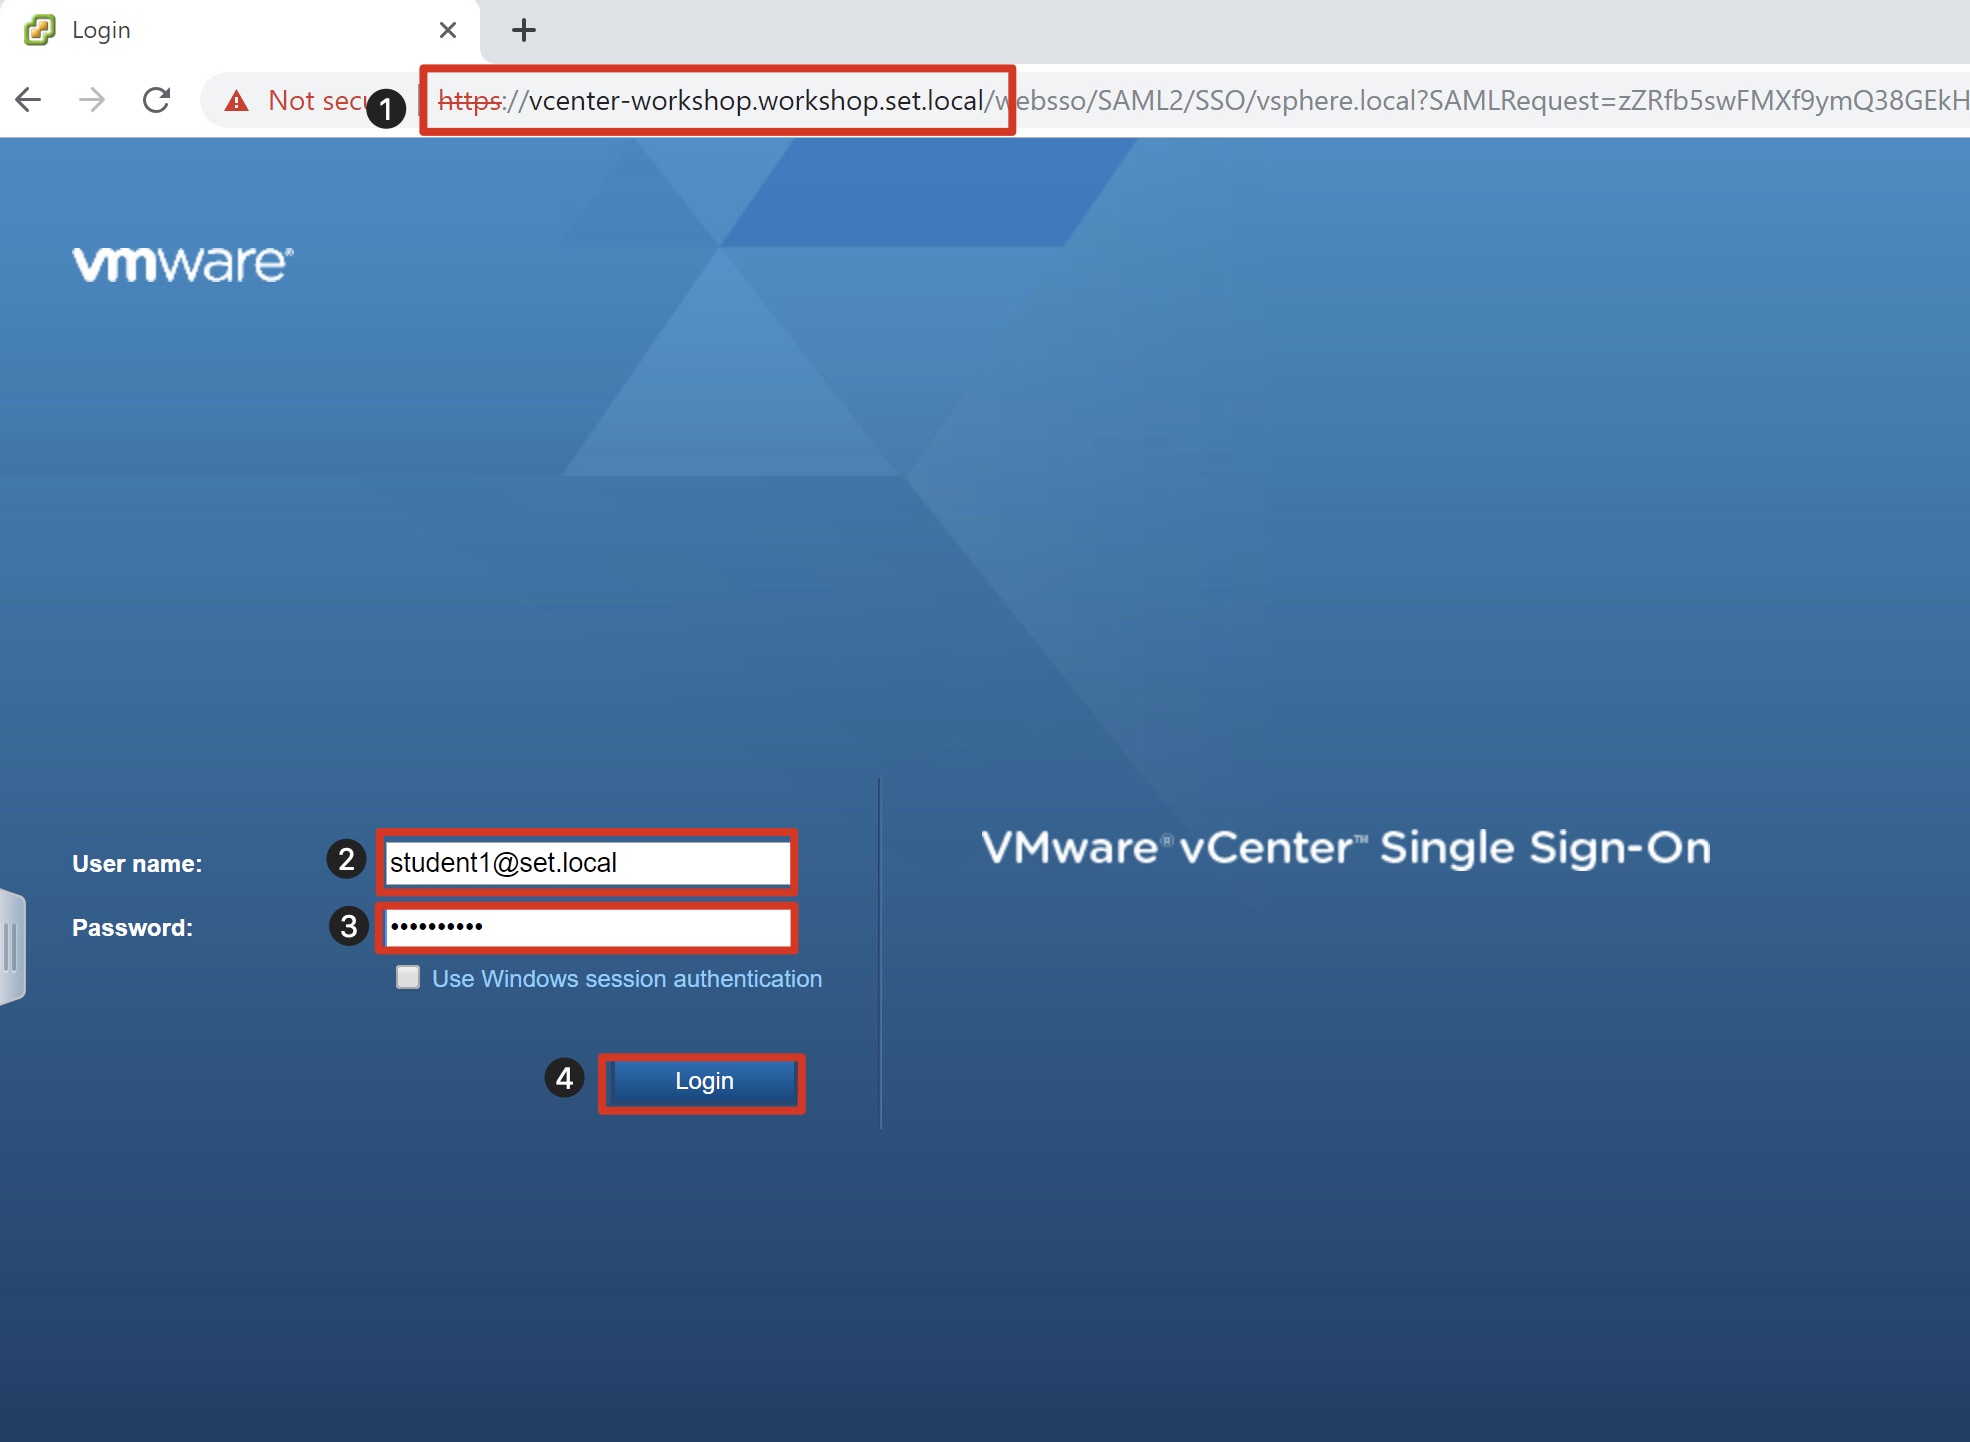
- Open Google Chrome and enter https://vcenter-workshop.workshop.set.local/ui for the URL.
- Type in your student (student#@set.local) credentials.
- Type in your password assigned to you.
- Click Login to continue.
Migrate Virtual Machine to the Cloud
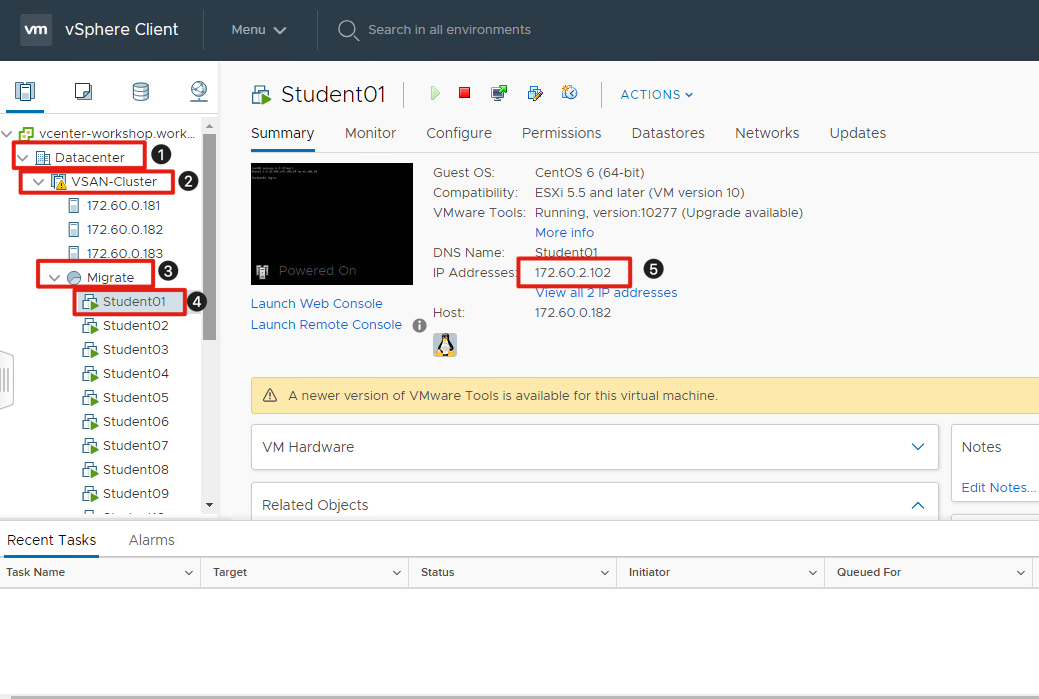
- Click the arrow to expand Datacenter.
- Click the arrow to expand VSAN-Cluster cluster.
- Click the arrow to expand Migrate resource pool.
- Click on the Student## virtual machine.
- Make note of the IP Address to ping later.
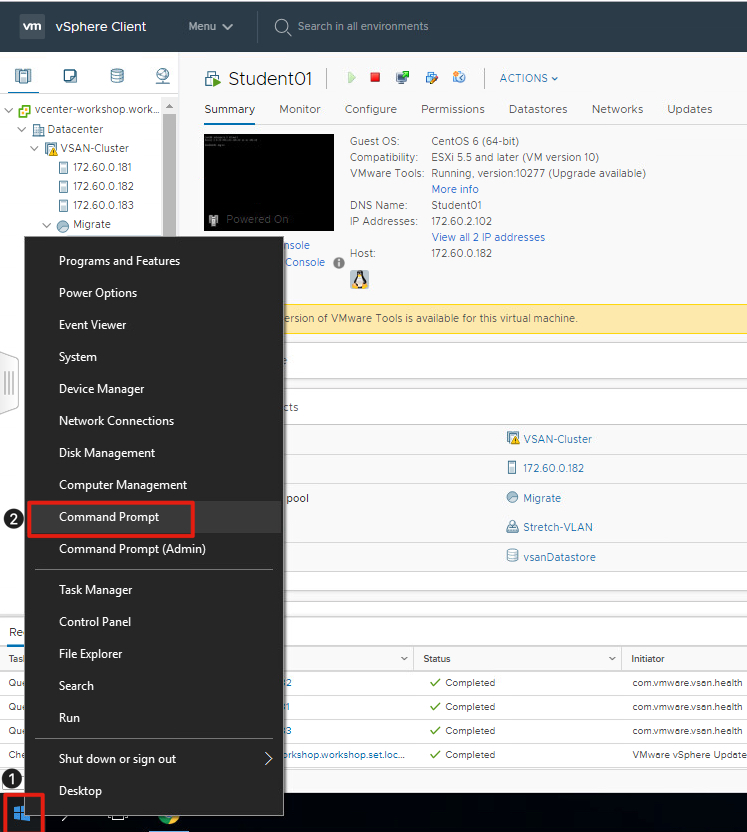
- Right click on the Windows Icon in the lower left of your desktop.
- Click on Command Prompt.
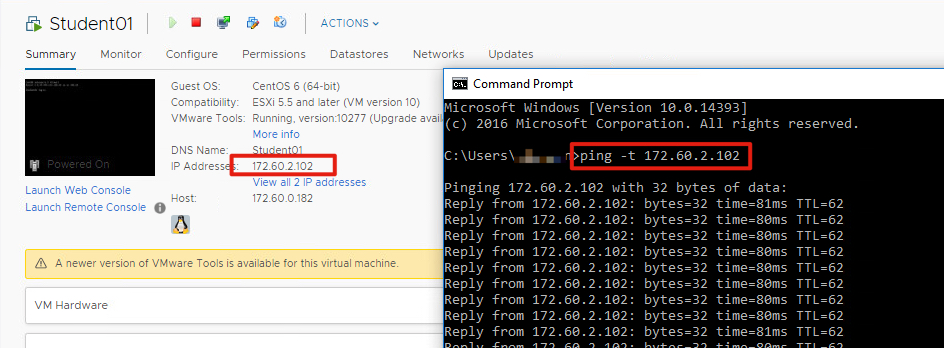
- In case you didn’t capture the IP Address of the virtual machine.
- Type in the command prompt ping -t 172.60.2.xxx.

- Go back to vCenter console and right click on your Student## virtual machine.
- Hover your mouse over Hybridity Actions.
- Click on Migrate to the Cloud.
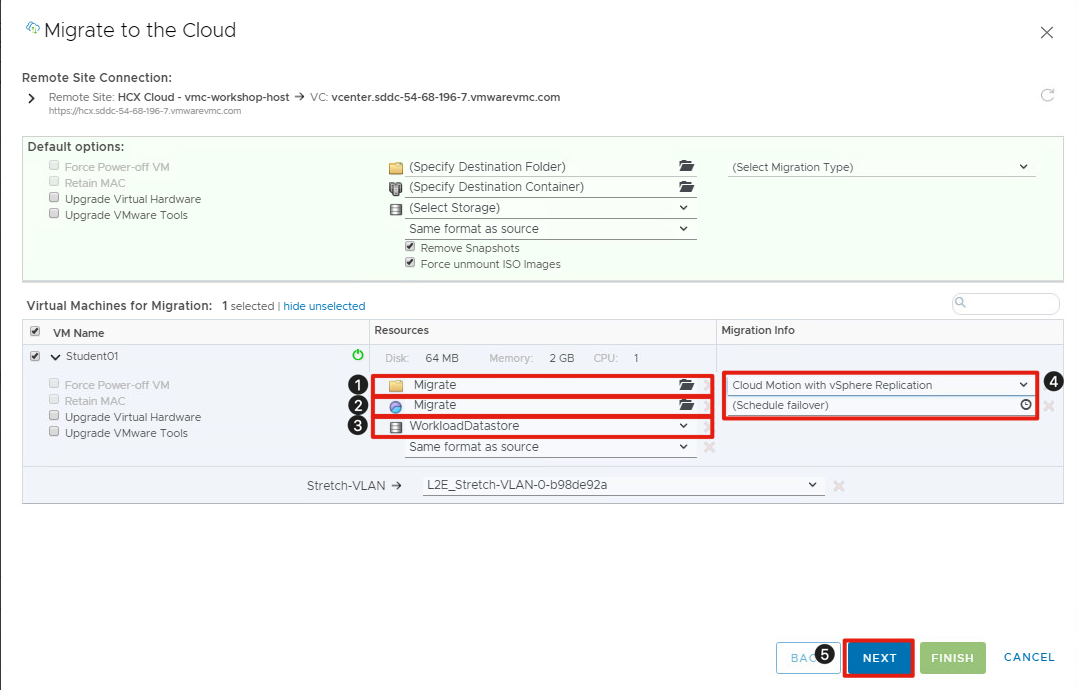
To migrate your virtual machine VMware Cloud on AWS you will have to select the destinations for the folder, resource pool and datastore.
Note: Make sure to select the Migrate folder and resource pool to ensure you can find the same virtual machine when migrating back to on-prem.
- Click on Specify Destination Folder and select the Migrate folder.
- Click on Specify Destination Container and select the Migrate resource pool.
- Click on Select Storage and select the WorkloadDatastore datastore.
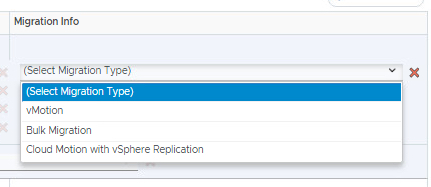
- Click on Select Migration Type and select Cloud Motion with vSphere Replication. Leave the schedule failover as is to make sure the migration happens immediately.
- Click Next to validate your selection.
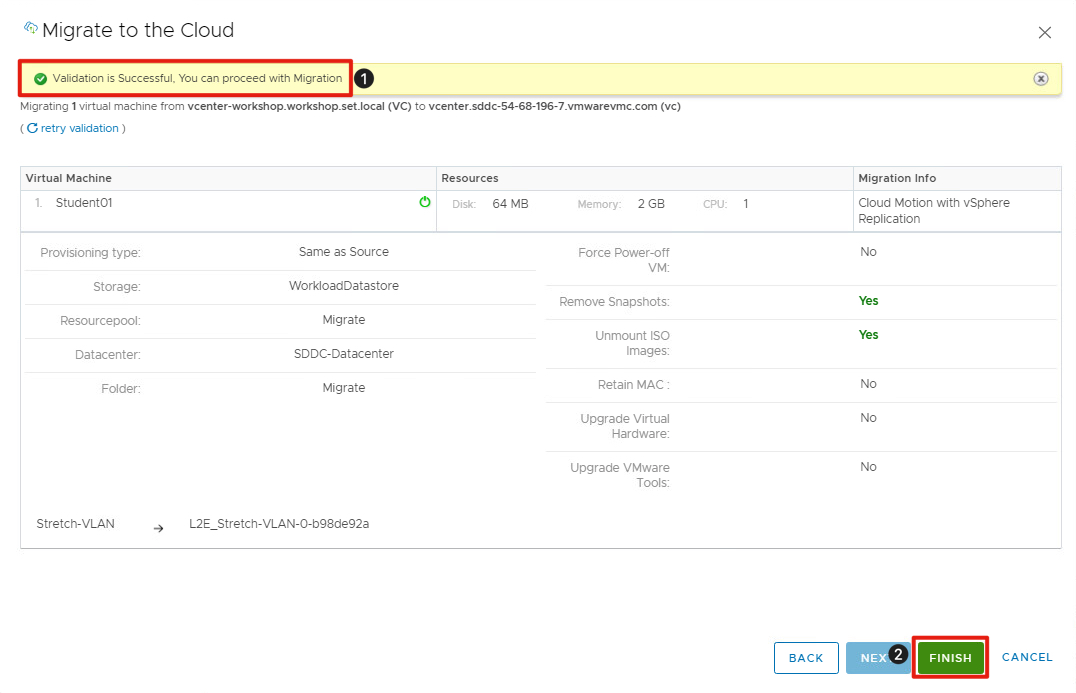
- Verify the validation is successful.
- Click on Finish to migrate your virtual machine to VMware Cloud on AWS.
Check Migration Progress
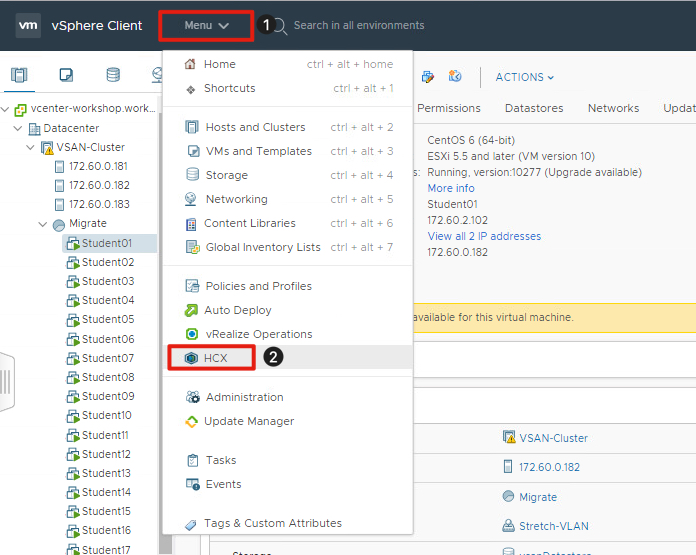
- Click on Menu.
- Click on HCX.
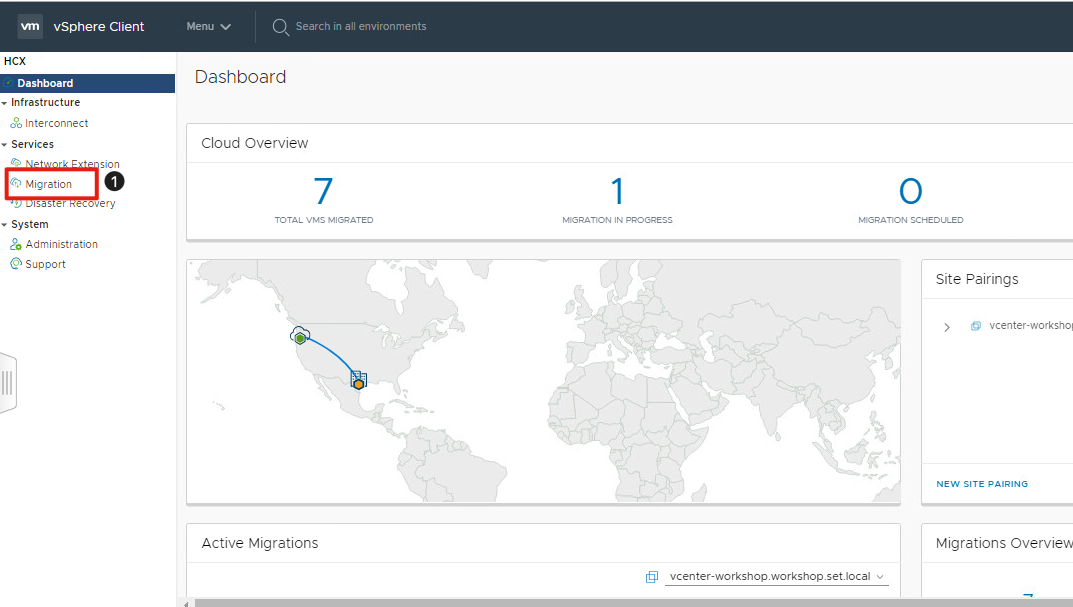
Dashboard gives you the number of virtual machines migrated, in progress and scheduled.
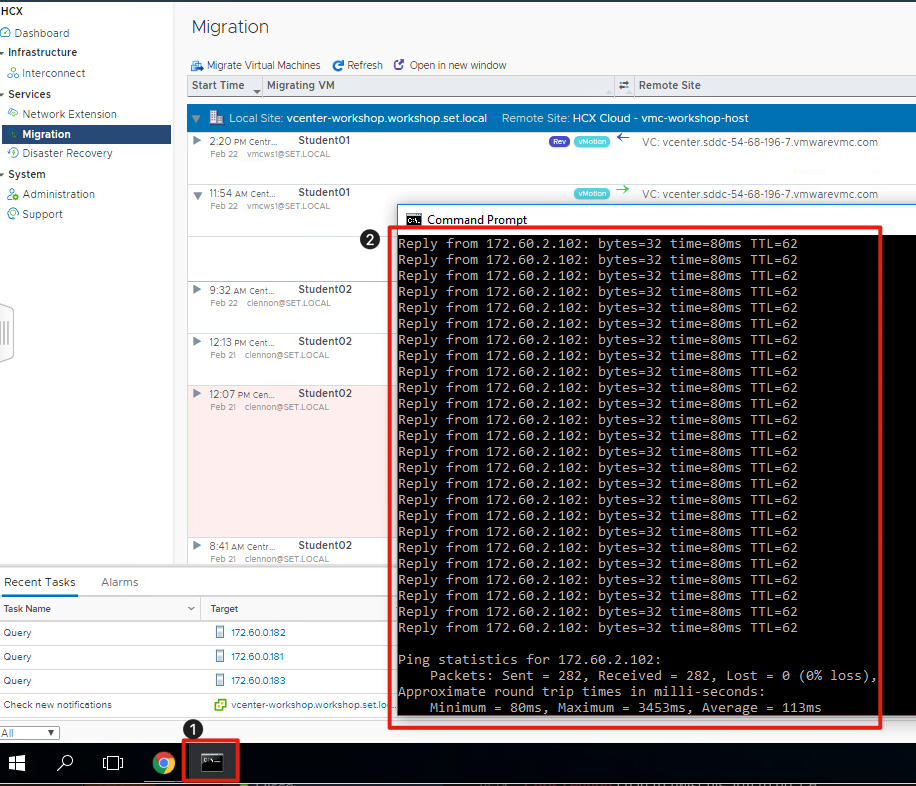
- Click on Migration on the left side.
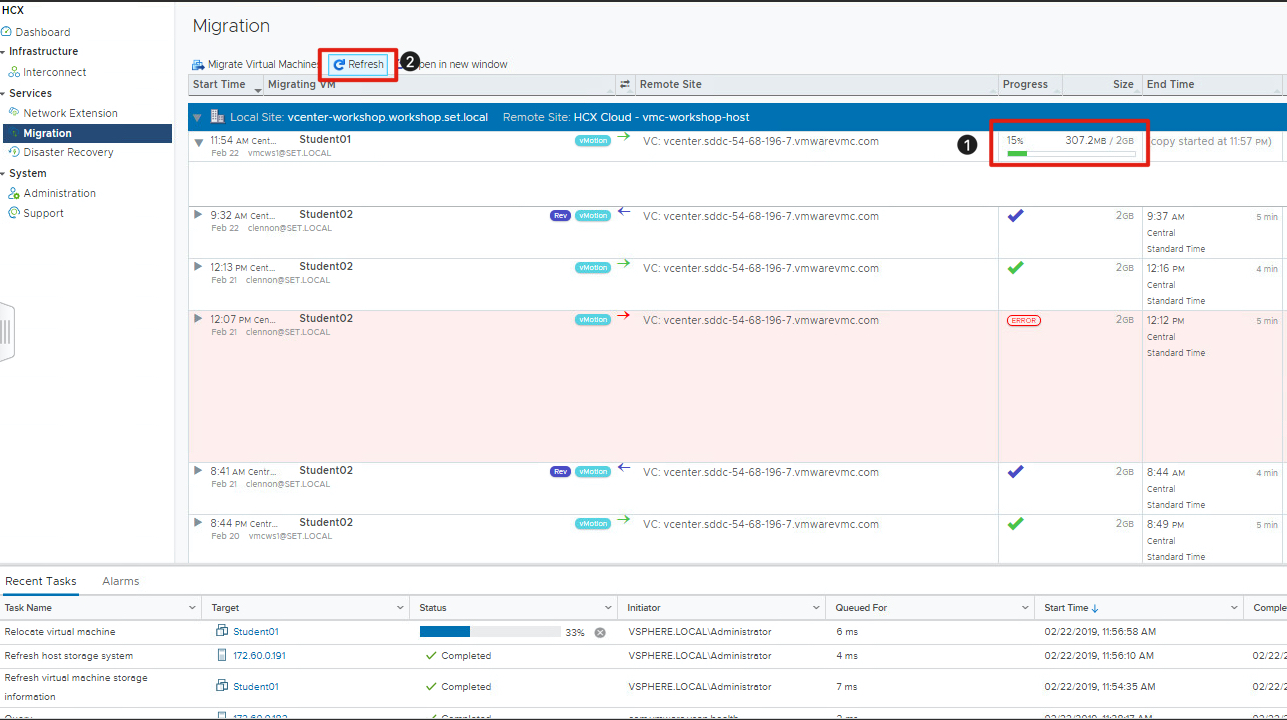
- Make note of the progress of the vMotion migration.
- Click on the Refresh button to update the progress.
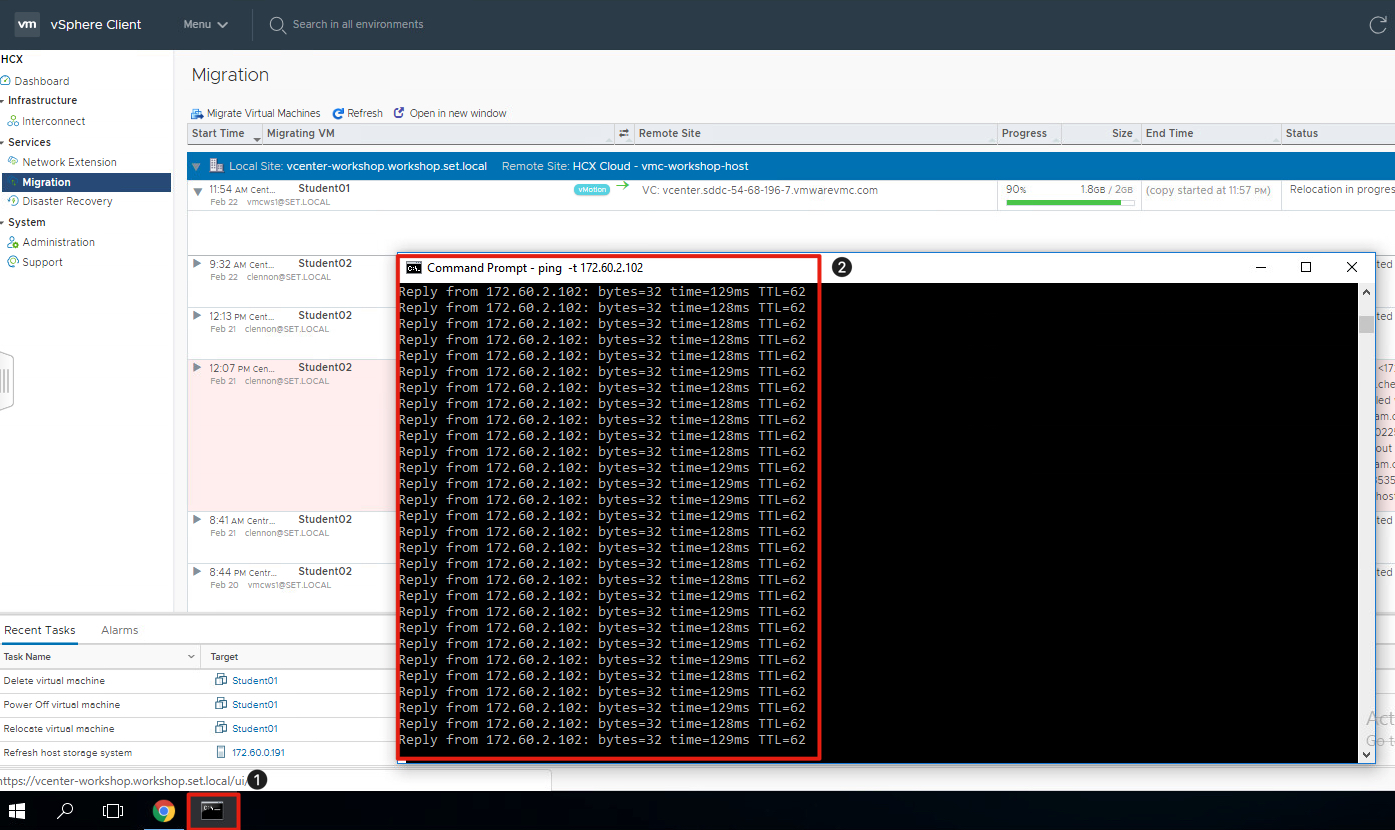
While the migration is in progress lets look at the ping response.
- Click on the Command Prompt to return to the ping test.
- Observe the ping test left running from a previous step and notice it hasn’t dropped.
Note: Make sure the migration is successful before continuing on to the next step.
Once the virtual machine has been successfully migrated to VMware Cloud on AWS, lets take the same virtual machine and migrate it back to the on-prem vCenter.
Migrate Virtual Machine Back to On-Prem Datacenter
We will use vMotion to migrate the virtual machine back to the on-prem vCenter. Please note that this is a serialized operation and depending on how many are being vMotioned back it could take some time to complete.
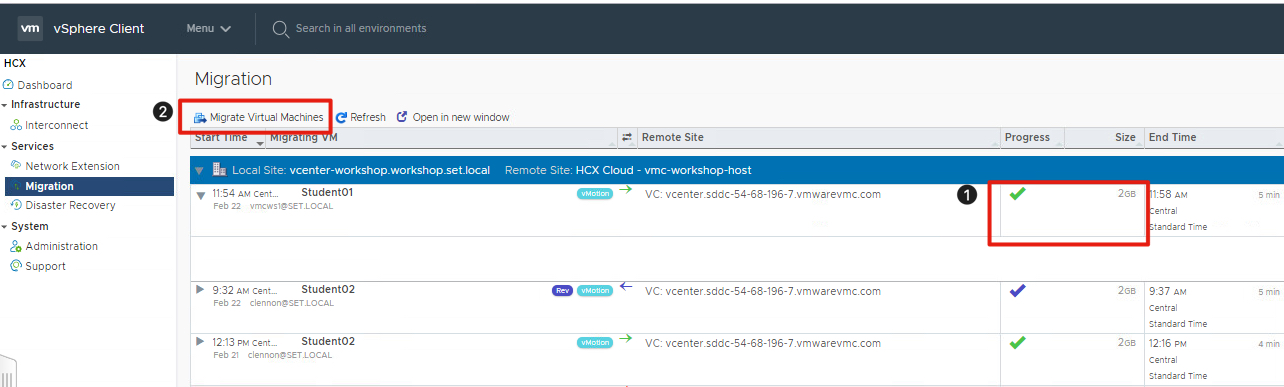
- Verify the virtual machine has been migrated to the SDDC in VMware Cloud on AWS.
- Click on Migrate Virtual Machines button.

- Click on Reverse Migration checkbox to switch to the VMware Cloud on AWS vCenter.
- Click on Migrate resource pool to display the migrated virtual machines.
- Click on your Student##.
- Click on Specify Destination Folder and select the Migrate folder.
- Click on Specify Destination Container and select the Migrate resource pool.
- Click on Select Storage and select the vsanDatastore datastore.
- Click on Select Migration Type and select vMotion.
- Click Next to validate your selection.

- Verify the validation is successful.
- Click on Finish to migrate your virtual machine back to your on-prem vCenter.

- Make note of the progress of the vMotion migration.
- Click on the Refresh button to update the progress.
{% capture notice-2 %} Optional Exercises {% endcapture %}
- Click on the Command Prompt to return to the ping test.
- Observe the ping test left running from a previous step and notice it hasn’t dropped while migrating back to on-prem vCenter.
- Use ctrl-c to cancel ping.
Other Migration Methods
Feel free to try the other migration Types. Use the same virtual machine Student## and follow the same steps but instead of vMotion try Bulk Migration or vMotion.
Cloud Motion with vSphere Replication
This latest option provides zero downtime for workload mobility from source to Destination. First, the workload disks get replicated to the destination site. The replication is handled using the HCX built-in vSphere replication. This process is dependent on the amount of data and available network bandwidth. Once the data sync is complete the HCX switchover initiates a vMotion. The vMotion migrates the workload to the destination site and synchronizes only the remaining data (delta) and workload memory state. There is an option to schedule a maintenance window for the vMotion data sync swithcover otherwise it happens immediately.
Bulk Migration
Bulk Migration creates a new virtual machine on the destination site. This can either be on-premises or VMC and retains the workload UUID. Then it uses vSphere Replication to copy a snapshot of the workload from source to destination site while the workload is still powered on. In this case, a snapshot is a point of the time of the workload disk state, but not the traditional vSphere snapshot. The Bulk Migration is managed by the HCX interconnect cloud gateway proxy. During the data sync, there is no interruption to the workloads. The data sync is dependent on the amount of data and available bandwidth. There is an option to schedule a maintenance window for the switchover otherwise, the switchover happens immediately. Once the initial data sync completes, a switchover takes place (unless scheduled). The source site workloads are quiesced and shut down leveraging VMware Tools. If VMware Tools is not available, HCX will prompt you to force power off the workload(s) to initiate the switchover. During the switchover process, a delta sync occurs based on changed block tracking (CBT) to sync the changes since the original snapshot. The workloads on the destination site will begin to power on once the data sync is complete (including delta data changes). There are checks in place to ensure resources are available to power on the workloads. If a destination workload cannot power on due to resources, the source workload will get powered back on.
vMotion “Live Migration”
HCX supports the vMotion we know and love today. The workloads are migrated live with no downtime similar to Cloud Motion with vSphere Replication. vMotion should not be used to migrate hundreds of workloads or workloads with large amounts of data. Instead, use Cloud Motion with vSphere Replication or Bulk Migration. Usually, a vMotion network needs to be configured and routed to the target vSphere host, in this case, the vMotion traffic is handled by the HCX Interconnect cloud gateway for cross-cloud vMotion. vMotion through HCX encapsulates and encrypts all traffic from source to destination removing network complexity of routing to cloud.
HCX has a built-in option to retain the workloads MAC address. If this option is not checked, the workloads will have a different MAC on the destination site. Workloads must be at compatibility (hardware) version 9 or greater and 100 Mbps or above of bandwidth must be available. With vMotion and bi-directional migration, it’s important to consider Enhanced vMotion Compatibility (EVC). The good news here is HCX also handles EVC. The workloads can be migrated seamlessly and once rebooted will inherit the CPU features from the target cluster. This allows a cross-cloud vMotion between different chipset versions (e.g. Sandy Bridge to Skylake) but within the same CPU family (e.g. Intel). Also, an important thing to note is vMotion is done in a serialized manner. Only one vMotion occurs at a time and queues the remaining workloads until the current vMotion is complete.
Feedback
Was this page helpful?
Glad to hear it! Please tell us how we can improve.
Sorry to hear that. Please tell us how we can improve.