Site Recovery Manager (SRM) Lab
Introduction
In this lab you will pair up with another student in order to simulate the setup and configuration tasks for VMware Site Recovery Manager
Activate the Site Recovery Add On
Important Instructions for Site Recovery Exercises
PLEASE BE AWARE THAT THESE EXERCISES MUST BE PERFORMED FROM THE ASSIGNED HORIZON DESKTOP YOUR INSTRUCTORS ASSIGNED OR THE JUMP HOST THAT YOU WILL CREATE AS PART OF THE LAB. IF YOU TRY TO PERFORM SOME OF THE EXERCISES OUTSIDE OF THE HORIZON SESSION OR THE JUMP HOST AS INSTRUCTED, YOU WILL EXPERIENCE SOME FAILURES.
Activate Site Recovery
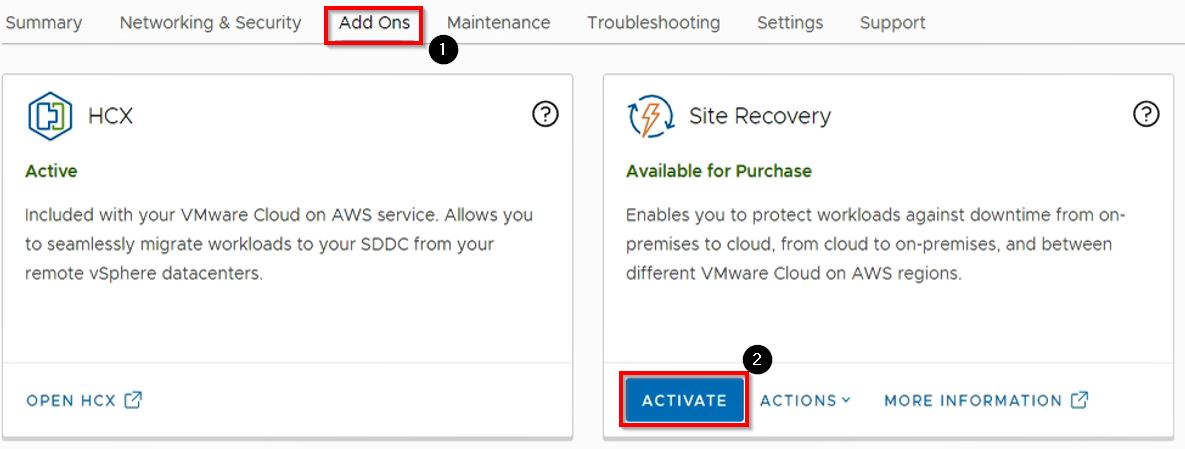
- Click on the Add Ons tab
Under the Site Recovery Add On, Click the ACTIVATE button
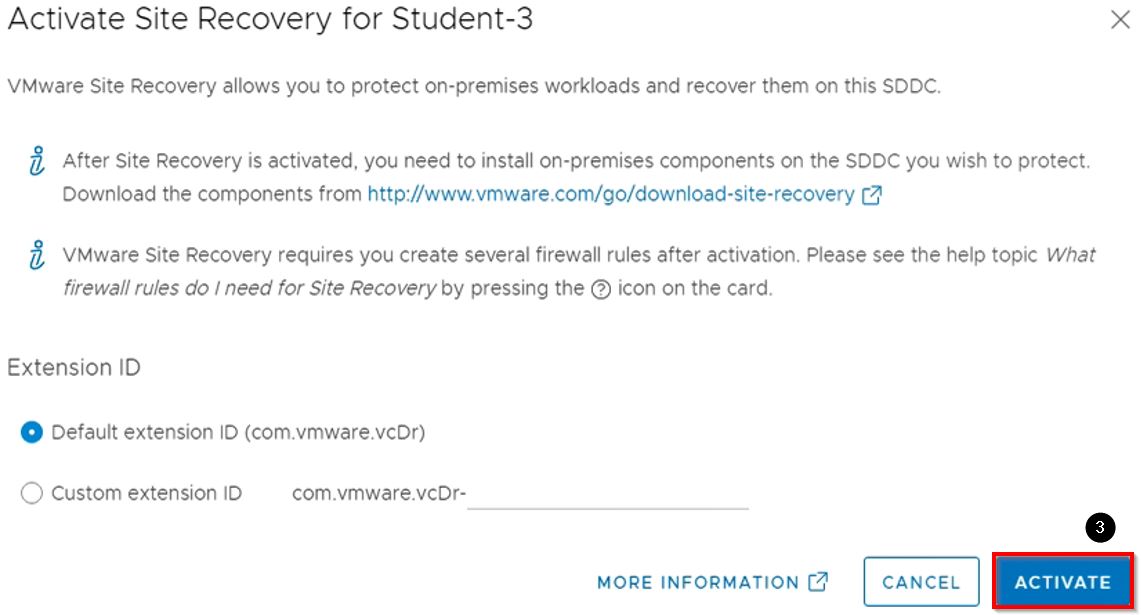
In the pop up window Click ACTIVATE again
What is VMware Site Recovery

VMware Site Recovery brings VMware enterprise-class Software-Defined Data Center (SDDC) Disaster Recovery as a Service to the AWS Cloud. It enables customers to protect and recover applications without the requirement for a dedicated secondary site. It is delivered, sold, supported, maintained and managed by VMware as an on-demand service. IT teams manage their cloud-based resources with familiar VMware tools without the difficulties of learning new skills or utilizing new tools and processes.
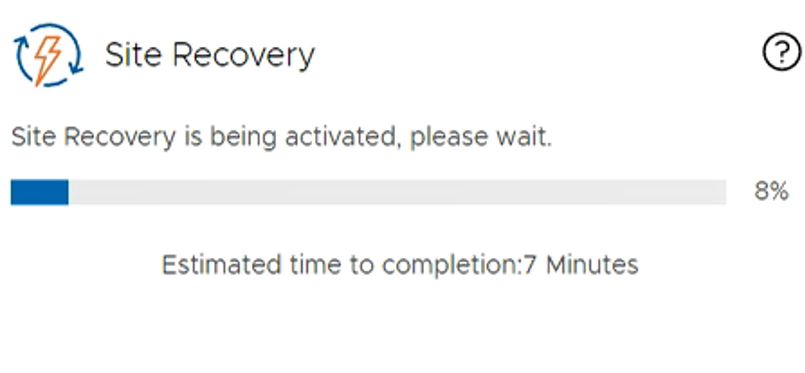
Wait until the Site Recovery Add On has been activated. This process should take ~10 minutes to complete.
VMware Site Recovery is an add-on feature to VMware Cloud on AWS. VMware Cloud on AWS integrates VMware’s flagship compute, storage, and network virtualization products: VMware vSphere, VMware vSAN, and VMware NSX along with VMware vCenter Server management. It optimizes them to run on elastic, bare-metal AWS infrastructure. With the same architecture and operational experience on-premises and in the cloud, IT teams can now get instant business value via the AWS and VMware hybrid cloud experience.
The VMware Cloud on AWS solution enables customers to have the flexibility to treat their private cloud and public cloud as equal partners and to easily transfer workloads between them, for example, to move applications from DevTest to production or burst capacity. Users can leverage the global AWS footprint while getting the benefits of elastically scalable SDDC clusters, a single bill from VMware for its tightly integrated software plus AWS infrastructure, and on-demand or subscription services like VMware Site Recovery Service. VMware Site Recovery extends VMware Cloud on AWS to provide a managed disaster recovery, disaster avoidance and non-disruptive testing capabilities to VMware customers without the need for a secondary site, or complex configuration.
VMware Site Recovery works in conjunction with VMware Site Recovery Manager and VMware vSphere Replication to automate the process of recovering, testing, re-protecting, and failing-back virtual machine workloads. VMware Site Recovery utilizes VMware Site Recovery Manager servers to coordinate the operations of the VMware SDDC. This is so that, as virtual machines at the protected site are shut down, copies of these virtual machines at the recovery site startup. By using the data replicated from the protected site these virtual machines assume responsibility for providing the same services.
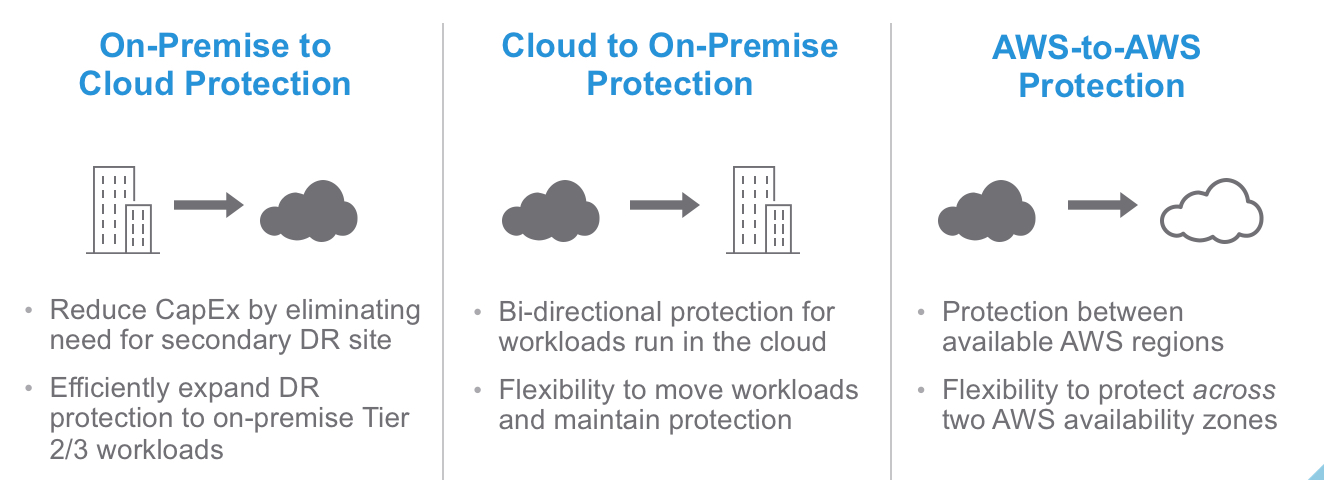
VMware Site Recovery can be used between a customers datacenter and an SDDC deployed on VMware Cloud on AWS or it can be used between two SDDCs deployed to different AWS availability zones or regions. The second option allows VMware Site Recovery to provide a fully VMware managed and maintained Disaster Recovery solution. Migration of protected inventory and services from one site to the other is controlled by a recovery plan that specifies the order in which virtual machines are shut down and started up, the resource pools to which they are allocated, and the networks they can access.
VMware Site Recovery enables the testing of recovery plans, using a temporary copy of the replicated data, and isolated networks in a way that does not disrupt ongoing operations at either site. Multiple recovery plans can be configured to migrate individual applications or entire sites providing finer control over what virtual machines are failed over and failed back. This also enables flexible testing schedules. VMware Site Recovery extends the feature set of the virtual infrastructure platform to provide for rapid business continuity through partial or complete site failures.
Create a Cross SDDC VPN
We will be setting up an IPSEC VPN connection between your VPC and the VPC of the person you were paired with. Each student needs to complete the steps for your SDDC.
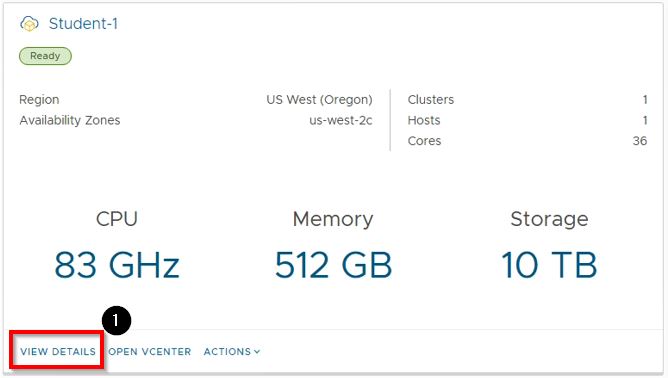
Navigate back to ALL SDDCs and click on VIEW DETAILS for the paired student’s SDDC. For example, if you are Student-1, you will view the details for the Student-2 SDDC.
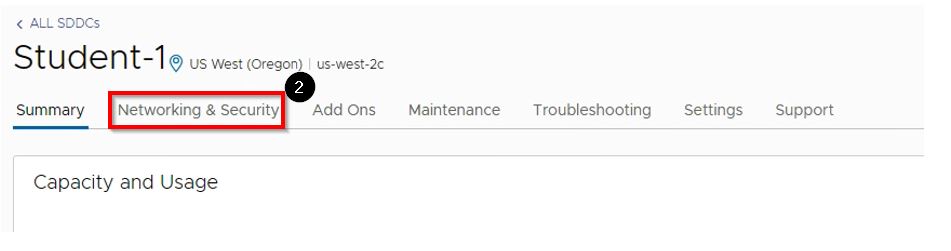
Click on the Networking & Security
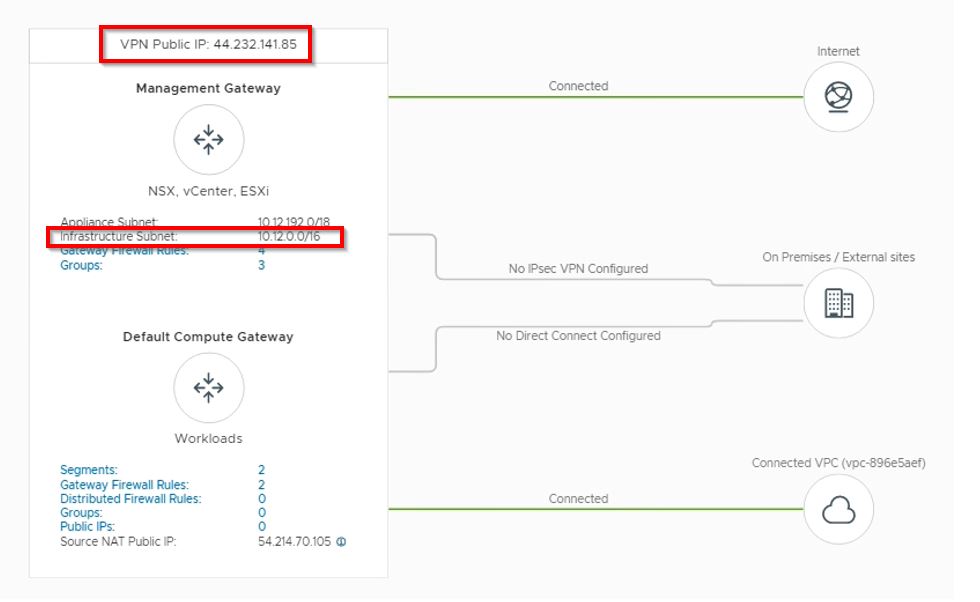
In the Management Gateway section, make a note of the VPN Public IP and the Infrastructure Subnet CIDR
Create a Policy Based VPN
Navigate back to the VIEW DETAILS section of YOUR SDDC to create the VPN to the *Paired Student’s SDDC*
On the Networking & Security tab
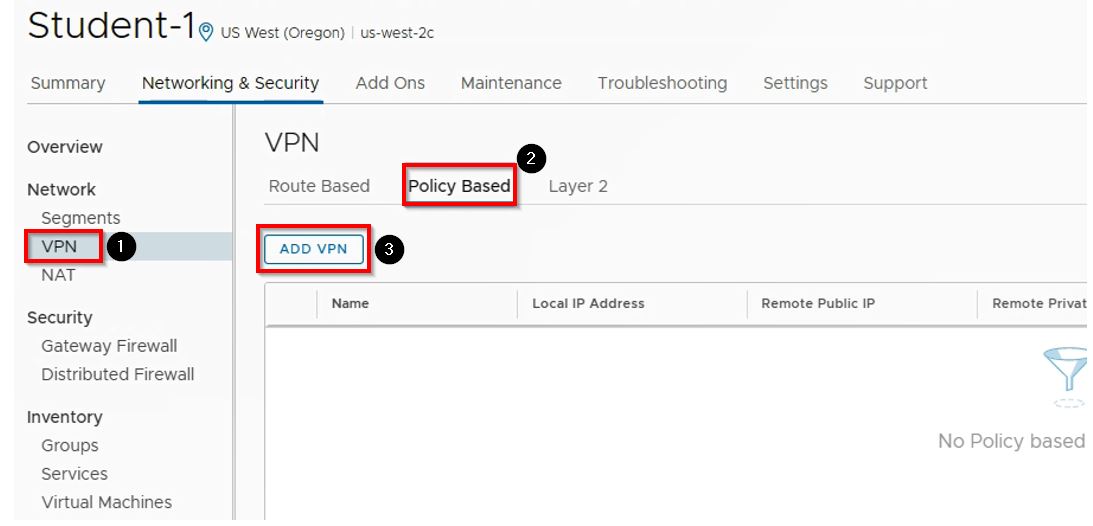
- Click VPN on the left-hand menu under Network
- Click Policy Based
Click on ADD VPN
Note that all workloads deployed in the module will be deployed to the Demo-Net Network Segment that was created in the Working with your SDDC module
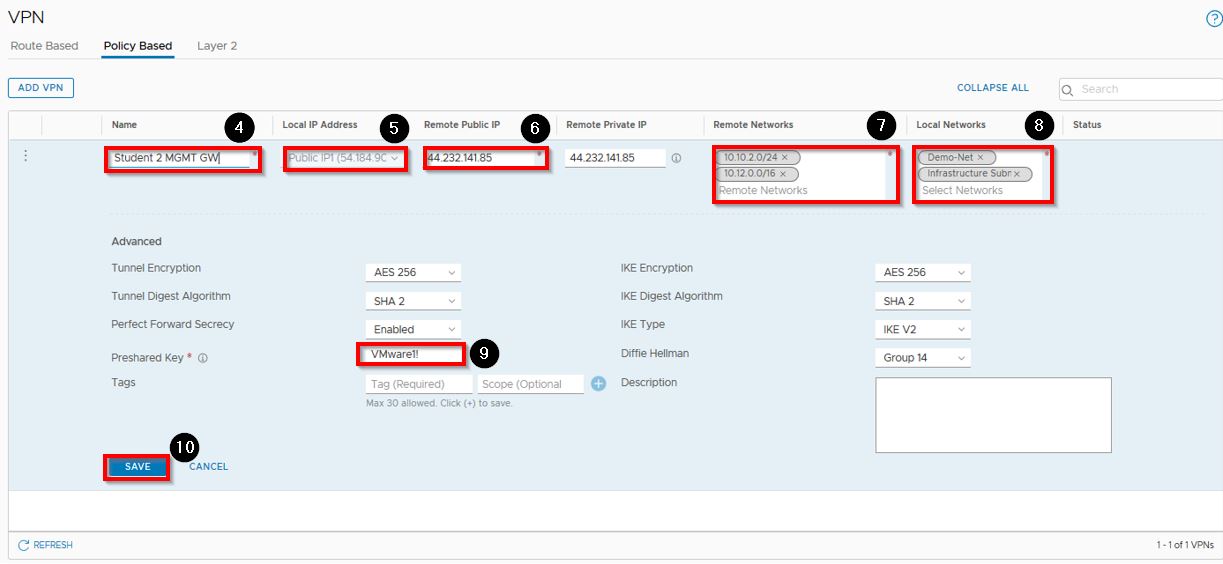
Fill in the following information:
Enter Student # MGMT GW (where # is your peer’s student number) in the Name field
Select Public IP for Local IP Address
Enter the VPN Public IP address of the persons Management Gateway you were paired with for Remote Public IP
Enter the paired student’s Demo-Net Network Segment CIDR 10.10.x.0/24 where X is the paired student’s number and enter the paired student’s Infrastructure Subnet CIDR you noted earlier in the Remote Networks field
Click the Local Networks field and select both Demo-Net and Infrastructure Subnet
Enter VMware1! in the Preshared Key field
Click SAVE

When both you and the person you were paired with have completed these steps you should see the status of the VPN turn to Success
Deploy a Windows Jump Host
DRaaS requires a form of private connectivity, not just between the two sites (SDDCs in this workshop environment) but also between the Site Recovery UI and the location you open it from. As a result, accessing Site Recovery over the internet via public IP will not work. To address this, we will create a Windows Jump Host in our SDDC and RDP to that jump host to work with Site Recovery.
Create a New Content Library
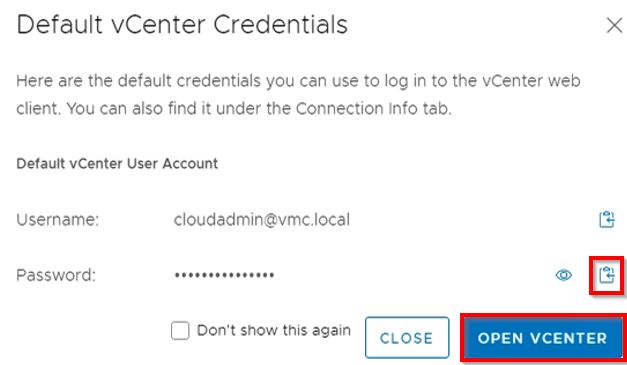
From your SDDC copy the cloudadmin password and click OPEN VCENTER
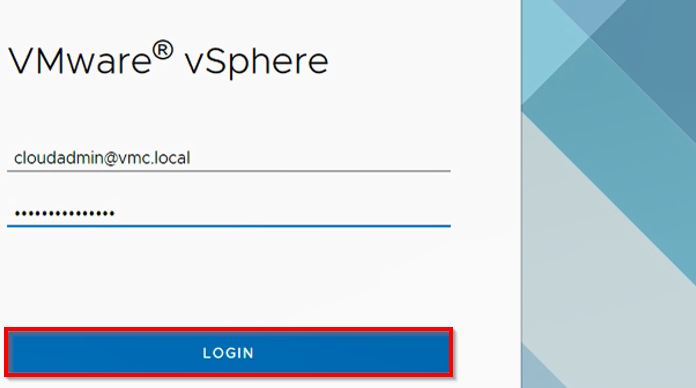
Enter the cloudadmin credentials and click LOGIN
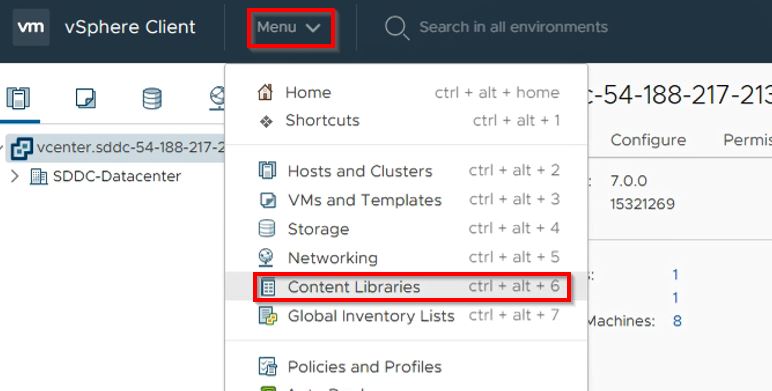
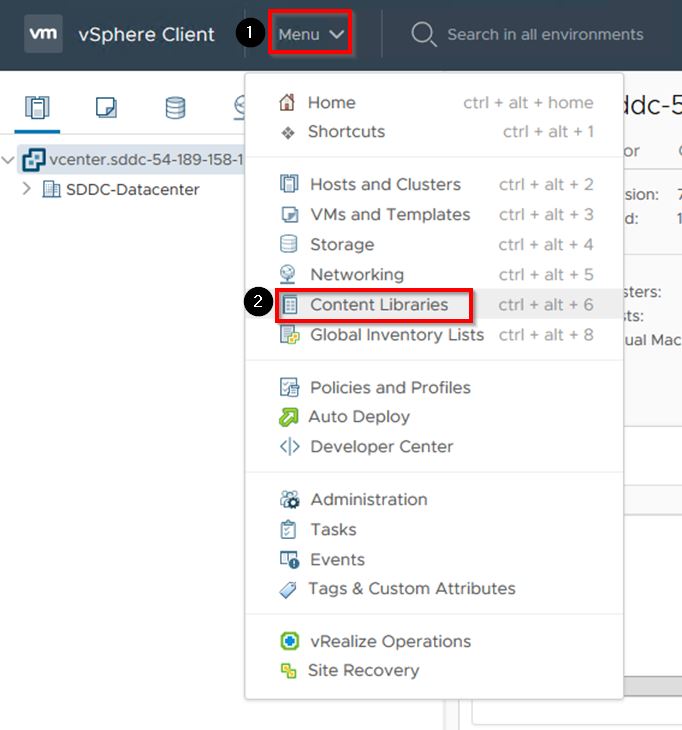
In the vSphere Client, click the Menu dropdown and click Content Libraries
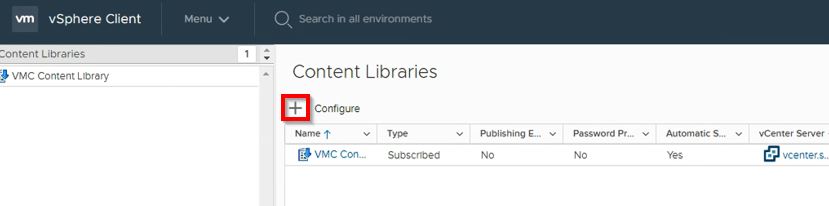
Click the + to add a new Content Library
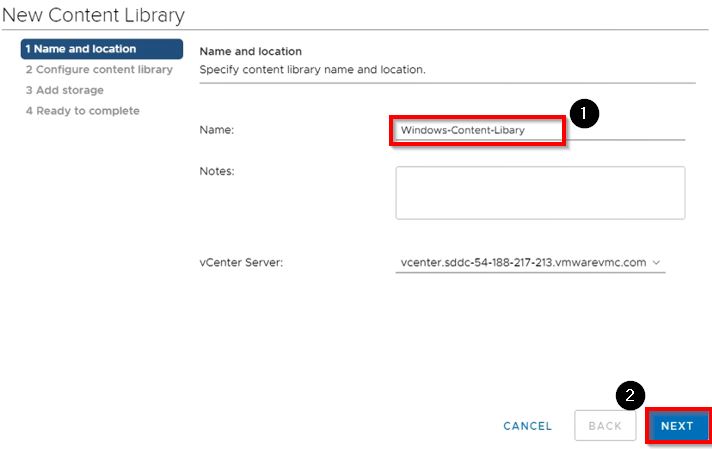
- Enter Windows-Content-Library in the Name field
Click NEXT
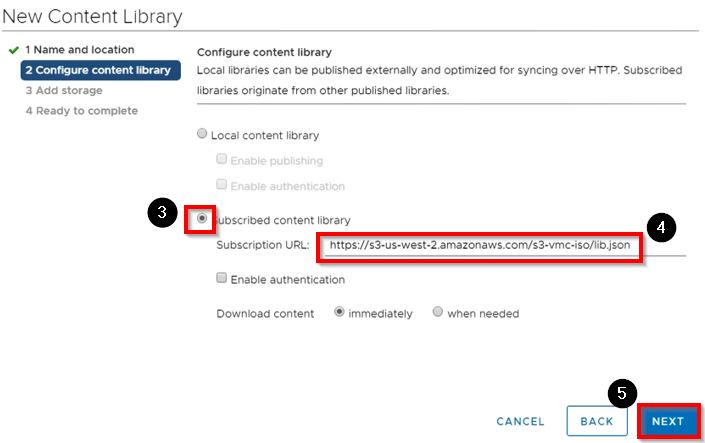
Click the radio button next to Subscribed content library
Enter https://s3-us-west-2.amazonaws.com/s3-vmc-iso/lib.json in the Subscription URL field
Click NEXT
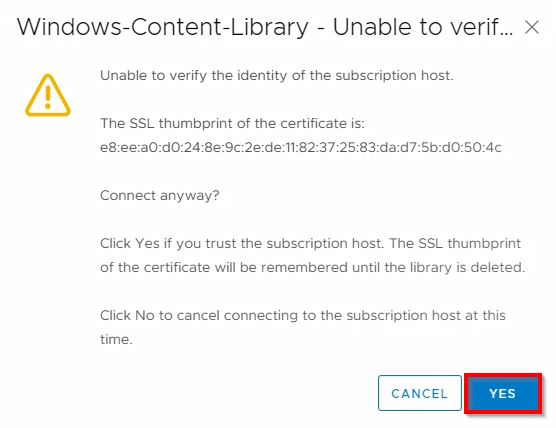
If you get a warning, click YES
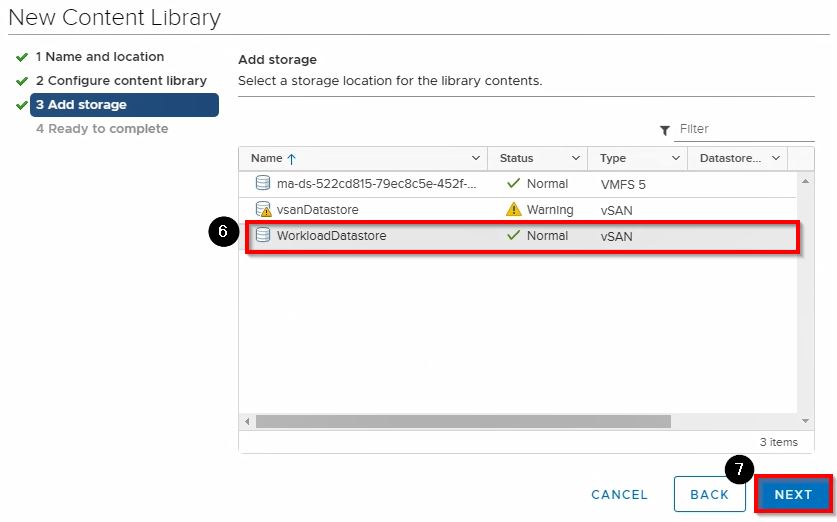
Select Workload Datastore for the storage location
Click NEXT
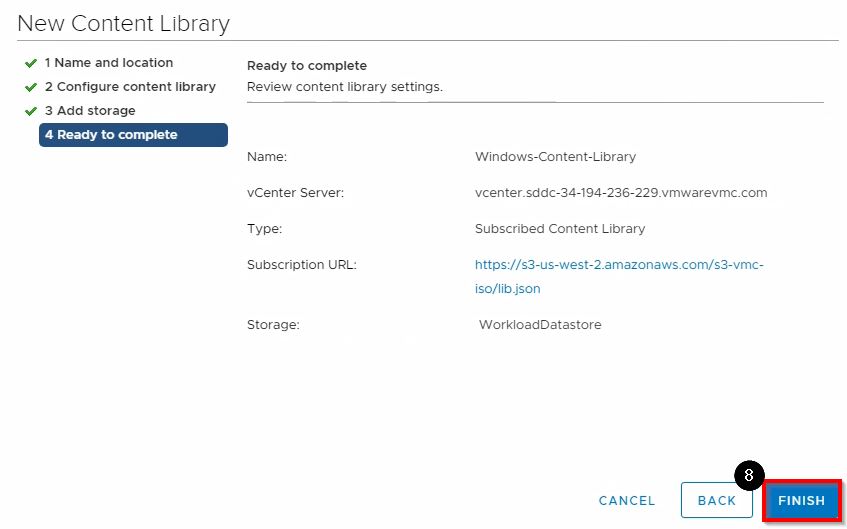
Click FINISH
Deploy a VM from Content Library
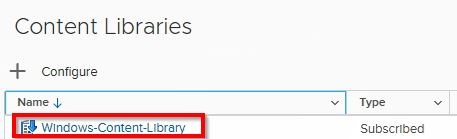
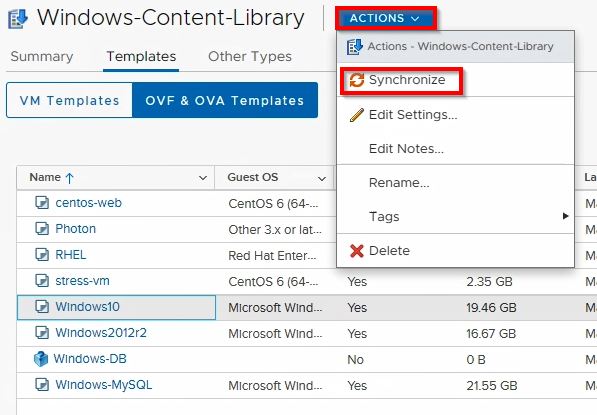
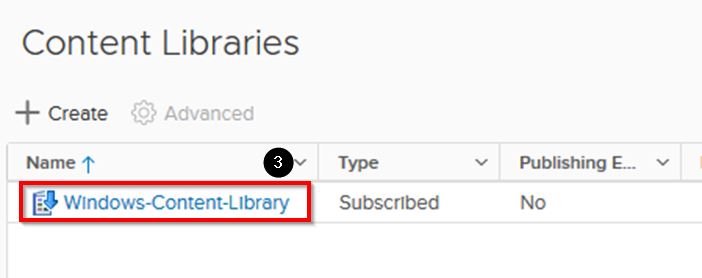
Click on your Windows-Content-Library that you just created
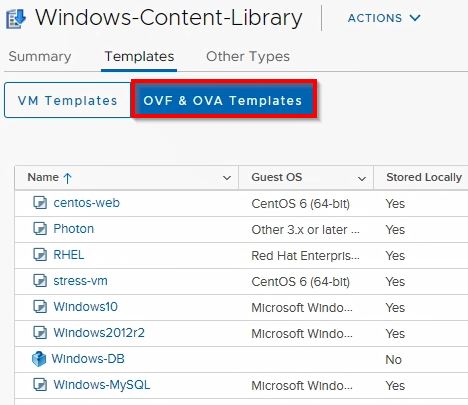
Click OVF & OVA Templates (wait a few seconds if all of the templates aren’t listed, particularly the Windows2012r2 template)

- Right-click on the Windows10 template
- Select New VM from This Template…
If you do not have the menu item to deploy a New VM from this template, Click the ACTIONS dropdown menu for the content library and click Synchronize (shown below) and wait until the sync is complete.
Deploy a Windows VM
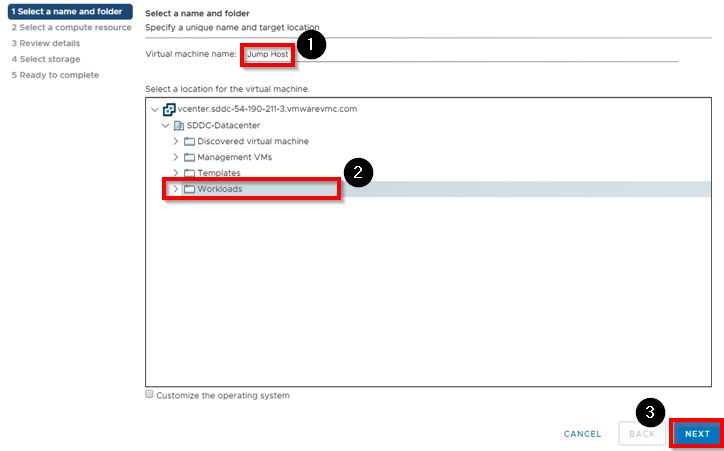
- Enter Jump Host for the Virtual machine name
- Select the Workloads folder
Click NEXT
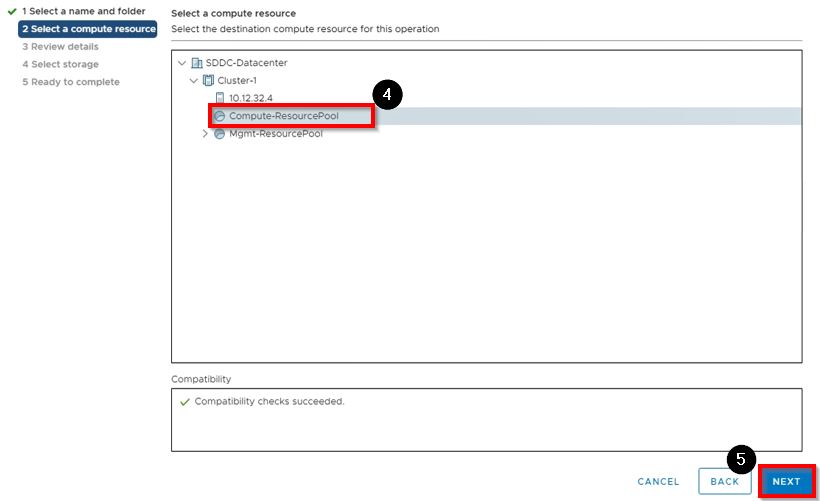
Select the Compute-ResourcePool
Click NEXT
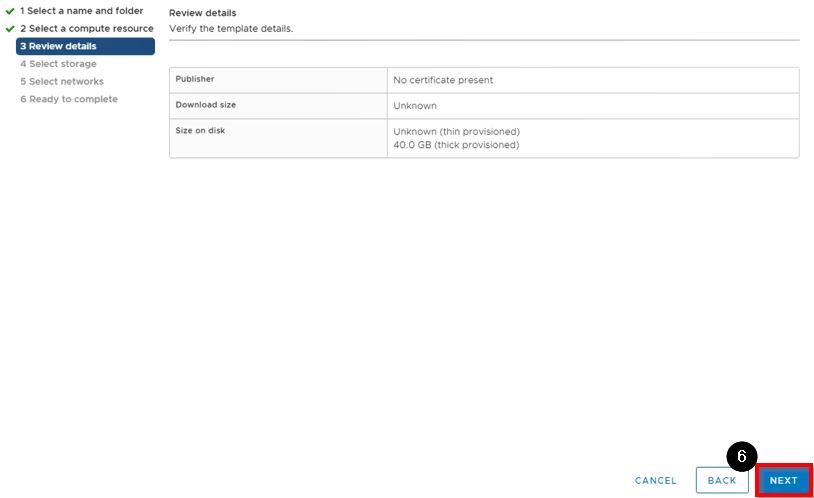
Click NEXT
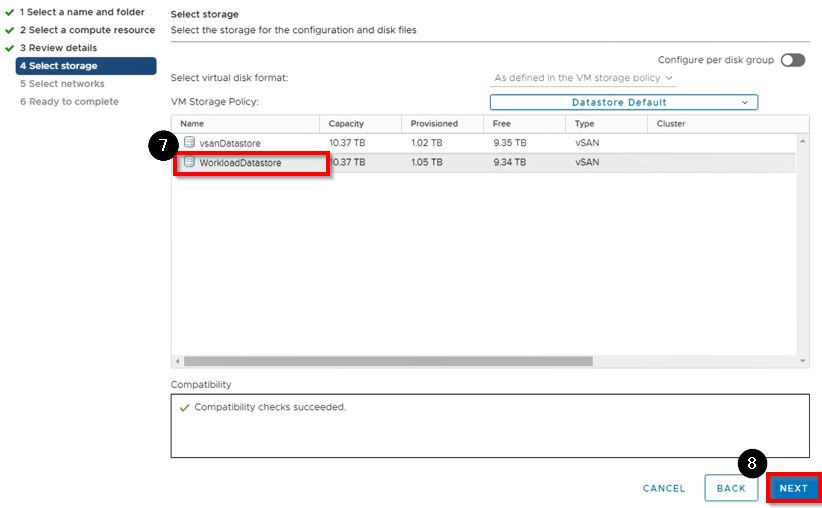
Select the WorkloadDatastore
Click NEXT
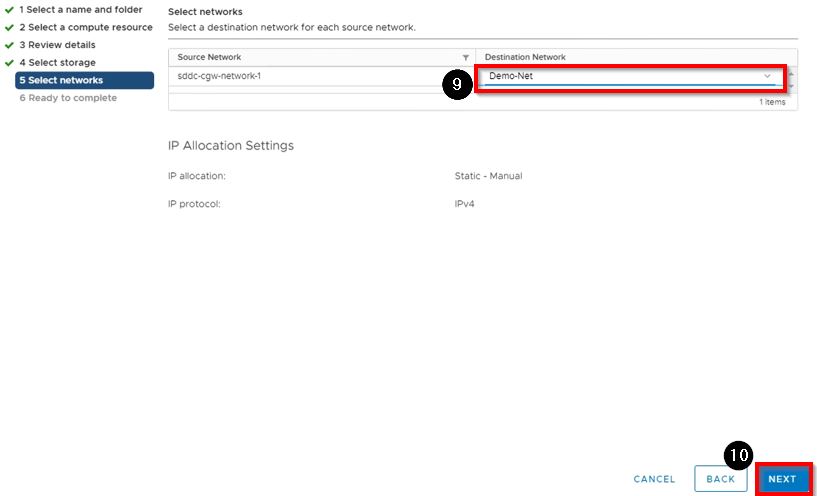
Select Demo-Net from the Destination Network dropdown list (this network was created in the Working With Your SDDC module)
Click NEXT
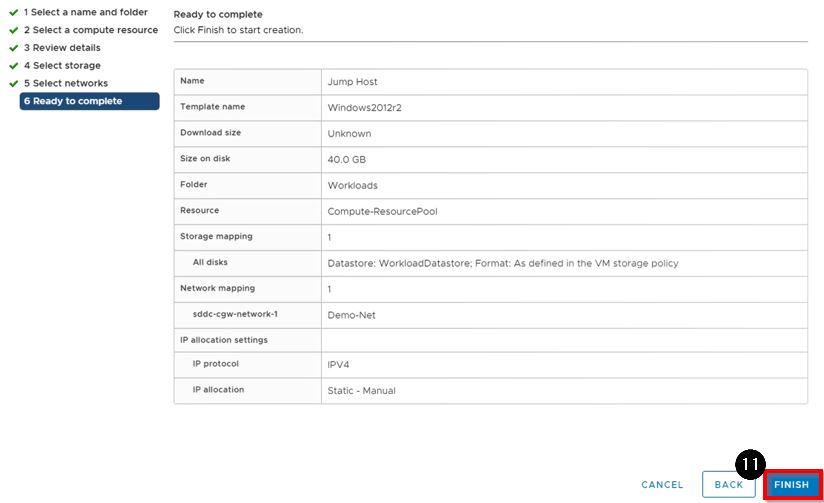
Click FINISH
Request a Public IP for the Jump Host
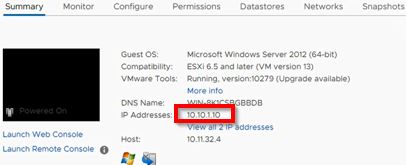
Navigate to the Jump Host VM you just deployed, power it on and note the IP Address
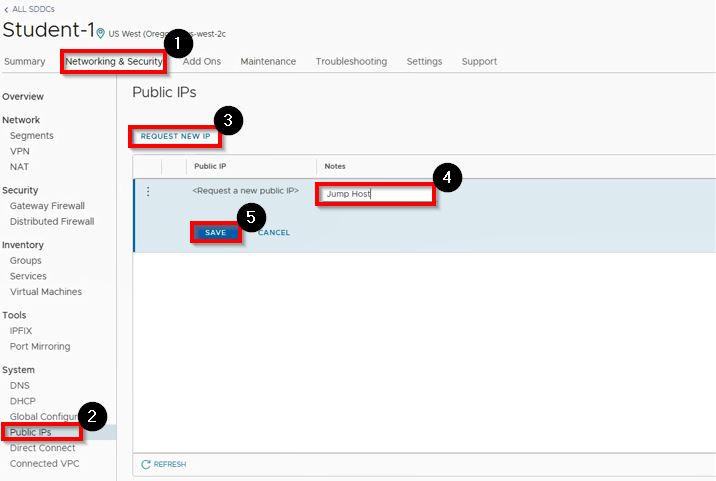
- Back in your SDDC, navigate to Networking & Security
- Click Public IPs in the left-hand navigation menu
- Click REQUEST NEW IP
- Enter Jump Host in for the Notes
- Click SAVE
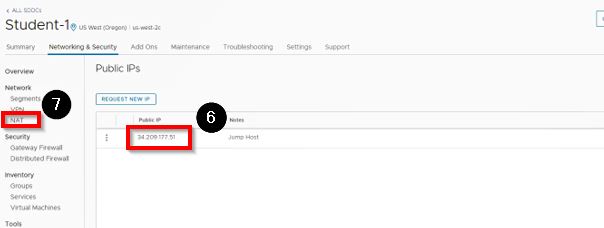
- Note the Public IP that was just provided
- Click NAT in the left-hand navigation menu
Create a NAT rule for the Jump Host
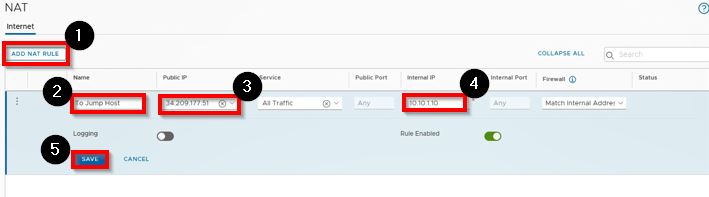
- Click ADD NAT RULE
- Enter To Jump Host in the Name field
- Enter the noted Public IP in the Public IP field (it should be pre-populated)
- Enter the noted internal IP Address for your Jump Host VM in the Internal IP field
- Click SAVE
Create a Compute Gateway FW Rules to allow RDP to the Jump Host VM
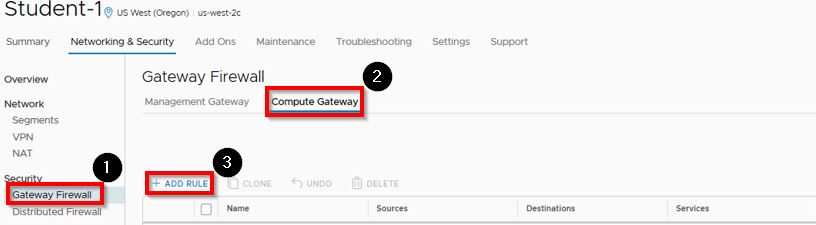
- Click Gateway Firewall in the left-hand navigation menu
- Click Compute Gateway
Click ADD RULE

We will add a rule that will allow us to connect to our jump host via RDP
Enter RDP to Jump Host in the Name field
Hover over the Destinations field and click the pencil icon
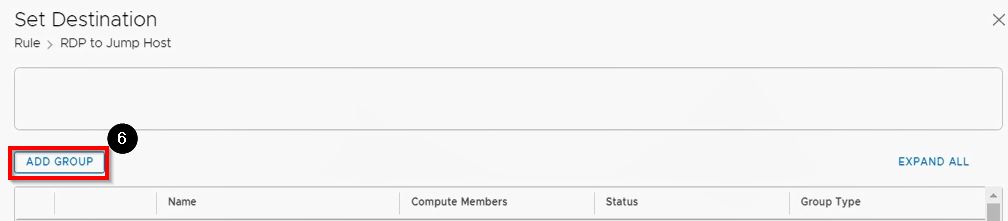
We will add a group that contains our jump host’s internal IP address
Click “ADD GROUP”
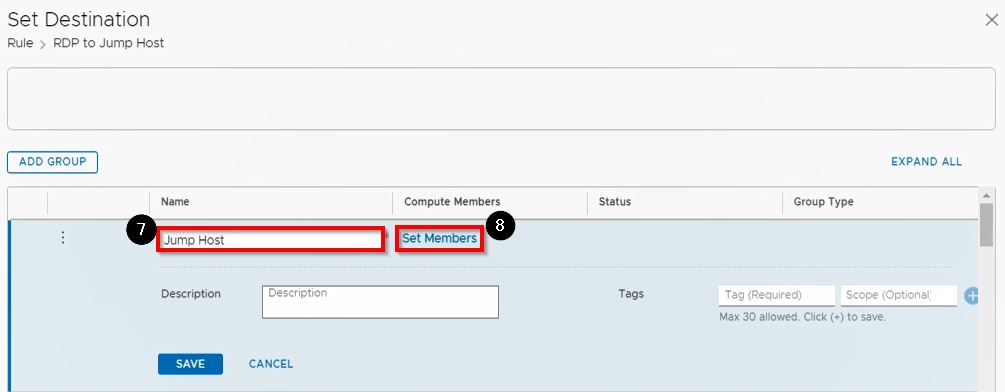
Enter Jump Host in the Name field
Click Set Members
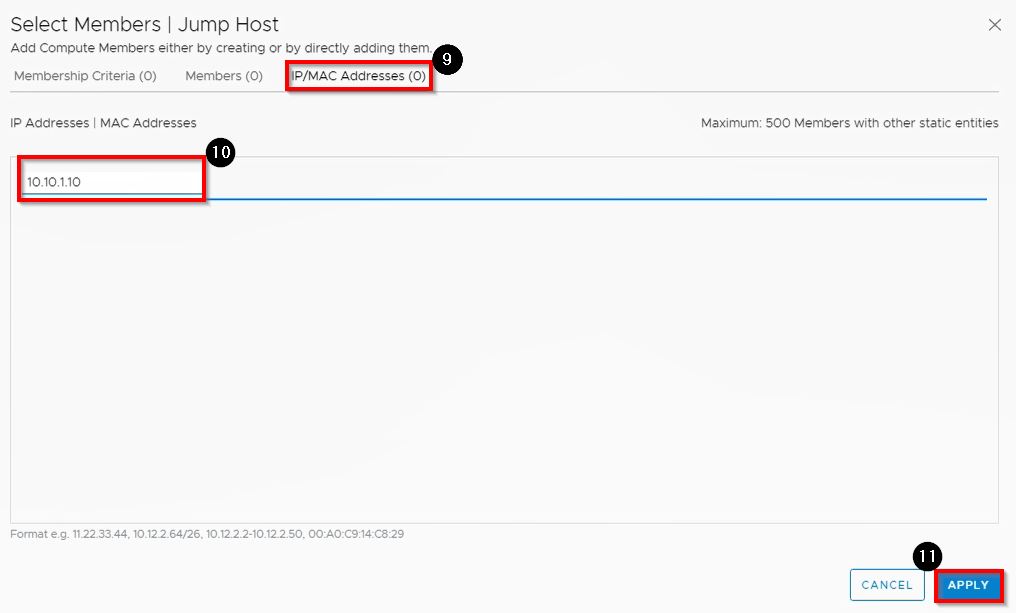
Click IP/MAC Addresses
Click in the IP/MAC Addresses field and enter the interal IP of your jump host
Click APPLY
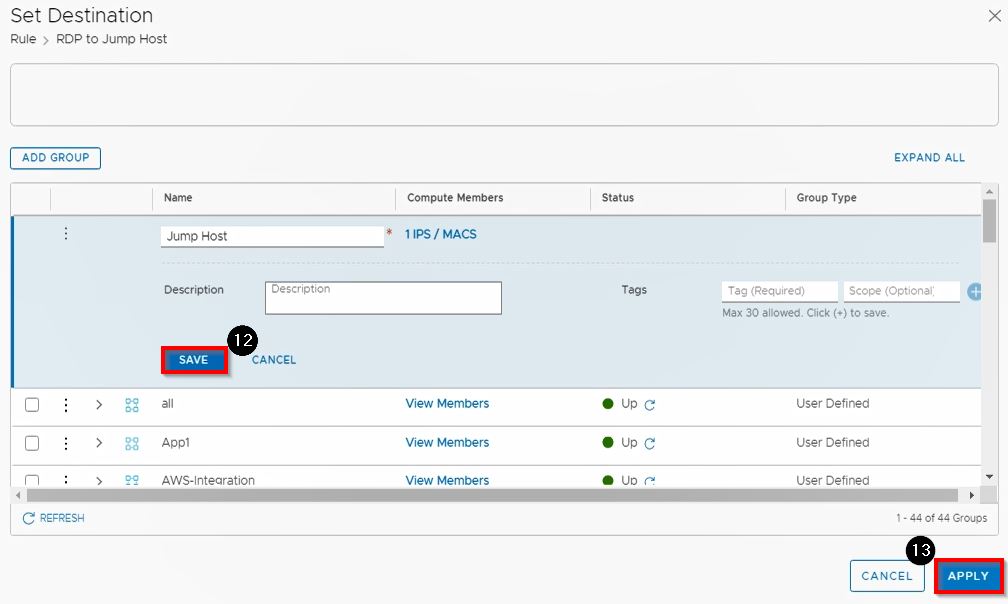
Note that under Compute Members it now shows 1 IPs/MACS
Click SAVE
Click APPLY

Hover over the Services field and click the pencil icon
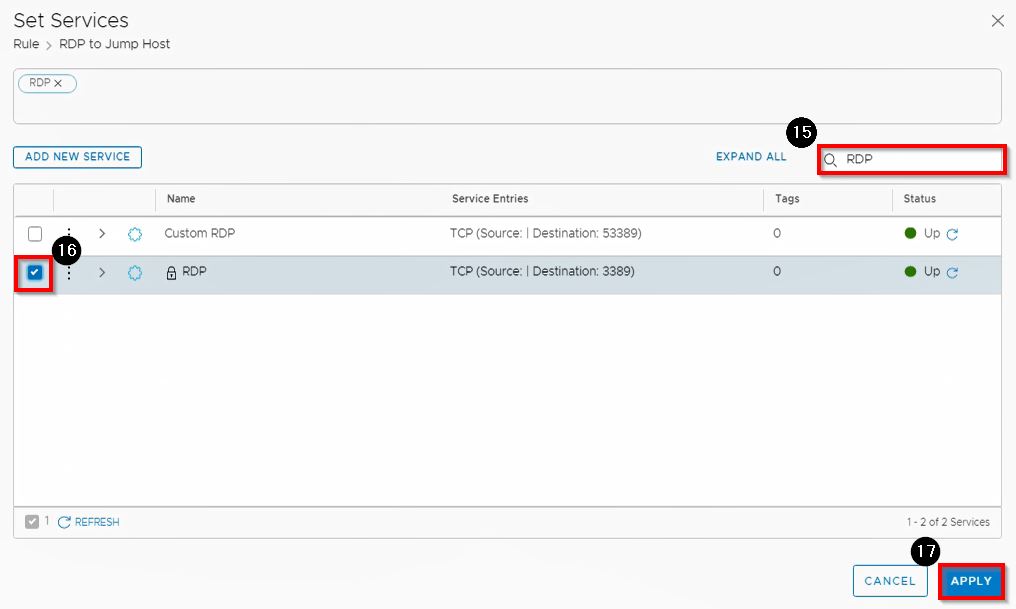
Enter RDP into the Search field
Click the checkbox next to RDP
Click APPLY

Click PUBLISH to publish this new rule

We will add another rule that will allow outbound traffic from our jump host
Click ADD RULE
Enter Jump Host Outbound into the Name field
Select the Jump Host group you created previously for Sources
Click PUBLISH

Click Management Gateway
If your vCenter Inbound rule does not have ICMP ALL under Services, modify the rule to allow that service and PUBLISH the rule when complete.
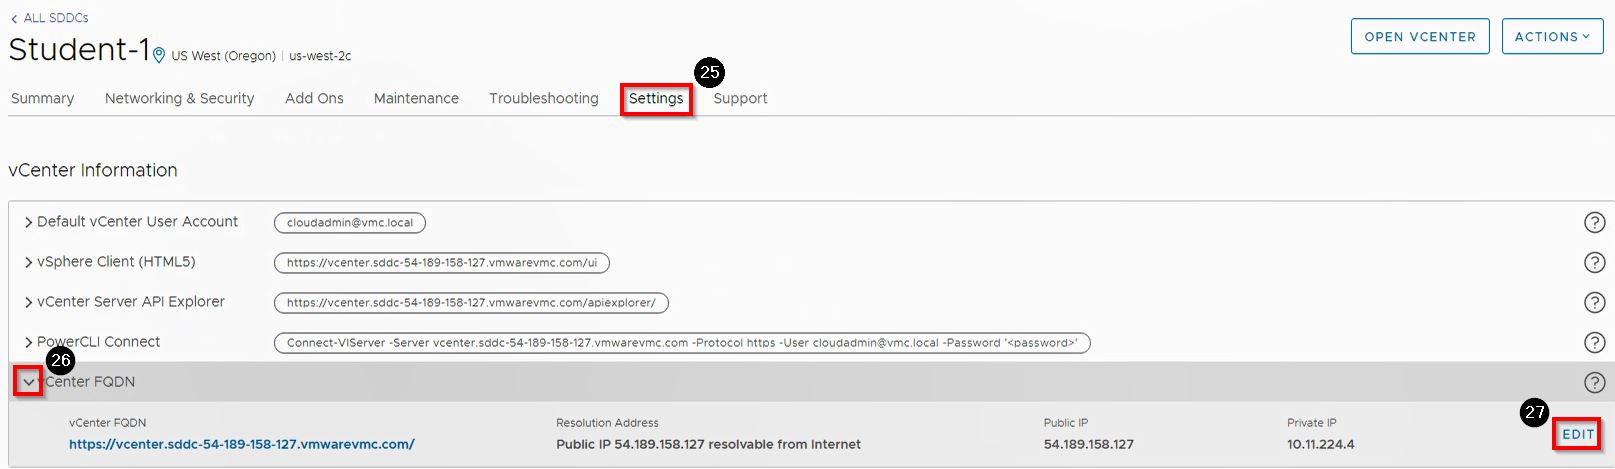
Click Settings for your SDDC
Click the > arrow next to vCenter FQDN
Click EDIT

Select the Private IP in the Resolution Address dropdown
Click SAVE

Open REMOTE DESKTOP CONNECTION from YOUR desktop. Do not open it from within the virtual desktop.
Enter the Public IP Address that was allocated for your jump host
Log in with Administrator/VMware1!
Click Connect (Click YES if you get a certificate error)
Install Firefox or Chrome into the Windows VM
Internet Explorer does not work well, so you’ll need to download and install Firefox or Chrome into your Jump Host VM.
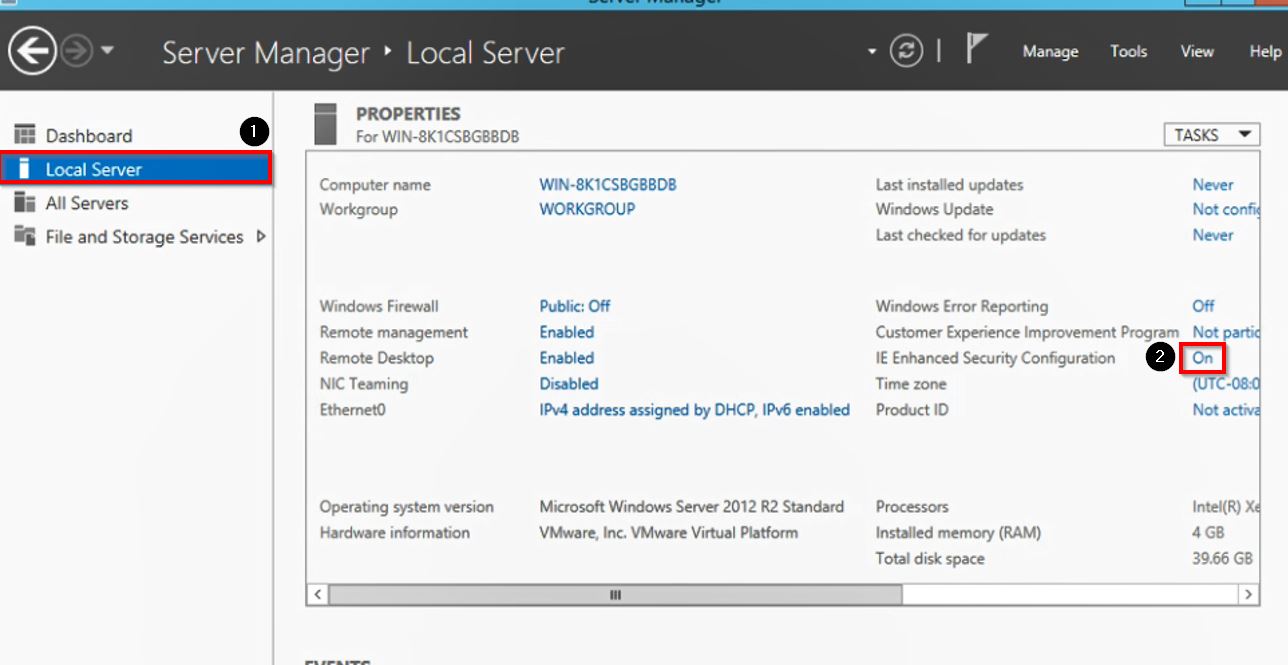
If Server Manager does not automatically open, open it.
- Click Local Server
Click On next to IE Enhanced Security Configuration
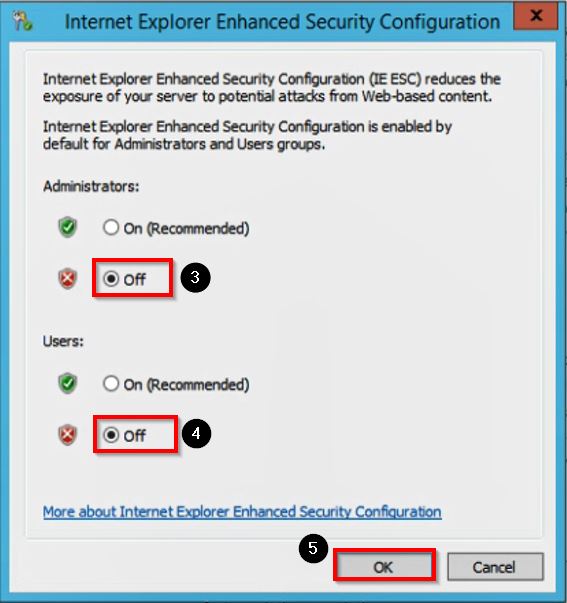
Click the radio button next to Off under Administrators
Click the radio button next to Off under Users
Click OK
Test Connectivity
Download and install Firefox or Chrome in your Jump Host
Open your browser and enter the FQDN, found under Settings, for your vCenter server in your SDDC
Open another tab and enter the FQDN for the vCenter for your paired SDDC
If you can navigate to both vCenters via their FQDN’s, all connectivity is established correctly. The remainder of the work can be completed from your Remote Desktop connection to your Jump Host.
If you have issues connecting to the VMware Cloud on AWS console from your RDP session, connect to it from your Horizon desktop.
Prepare and Pair Site Recovery
Firewall Rules for Site Recovery
We will need to create Management Gateway firewall rules to allow for additional management gateway traffic including Site Recovery and vSphere Replication traffic. This needs to be done in both SDDCs.
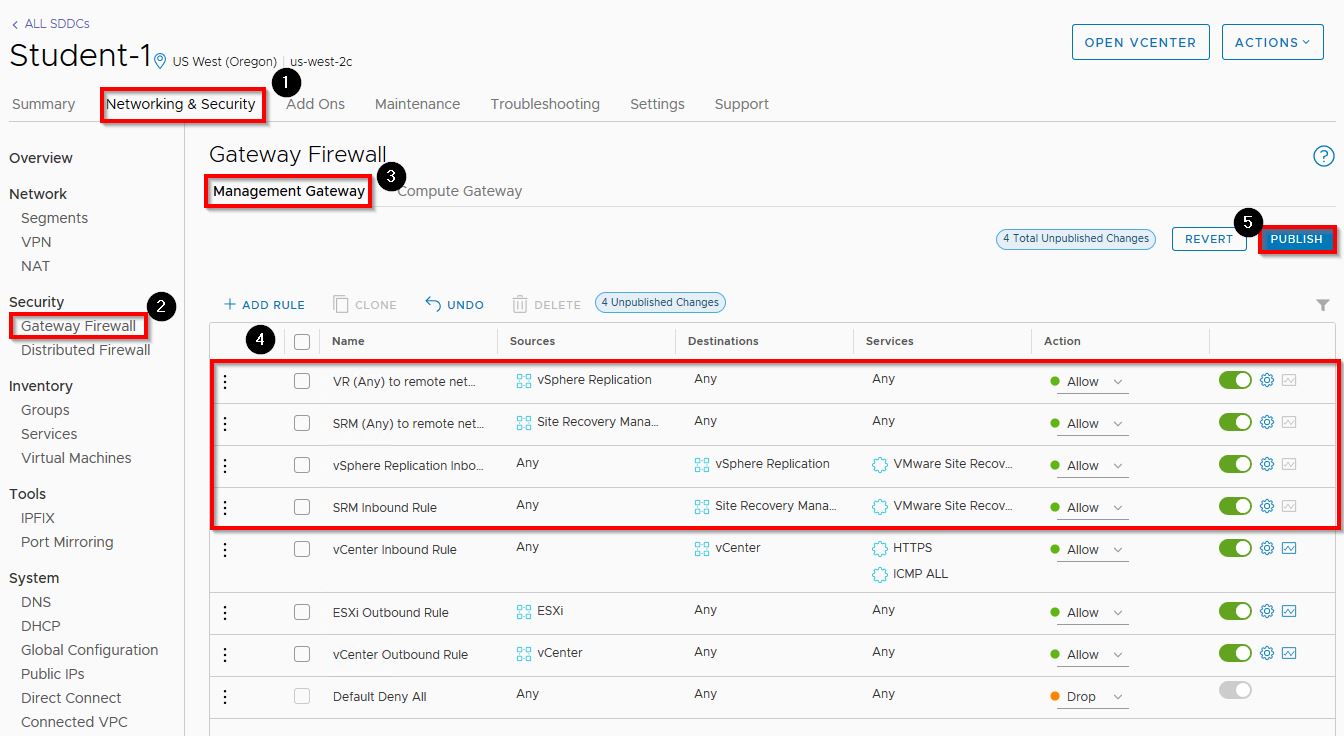
- In your SDDC, click Networking & Security
- Click Gateway Firewall in the left-hand navigation menu
- Click Management Gateway
- Add the additional four rules that are shown above. Ask your instructor if you need assistance with creating the management gateway firewall rules.
- Click PUBLISH
VMware Site Recovery - Site Pairing
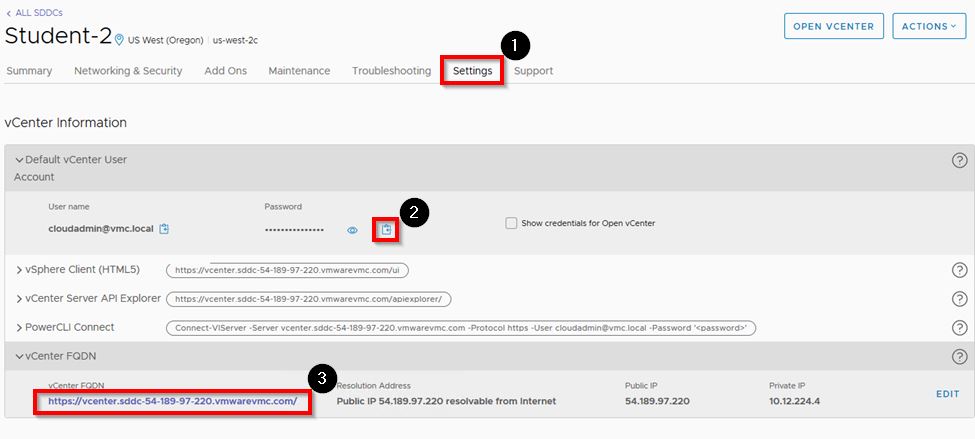
You will be pairing to the other SDDC that is in your workshop organization. Before beginning, each student needs to navigate to their partner’s SDDC and save the vCenter FQDN and cloudadmin password.
Click Settings for your partner’s SDDC
The username on both sides (yours and your peer) will always be cloudadmin@vmc.local
Copy your partner’s cloudadmin password and save it to notepad
Copy your partners vCenter FQDN. Before saving it to notepad, change the format from what is displayed to what will be used, as shown below:
DISPLAYED:
https://vcenter.sddc-xx-xxx-xx-xx.vmc.vmware.com/uiUSED:
vcenter.sddc-xx-xxx-xx-xx.vmc.vmware.com

*IMPORTANT NOTE*: Only one person can do the Site Pairing exercise. Please decide between you and your partner who performs this step.
- Navigate to the SDDC of the student that will do the site pairing and click Add Ons
Click OPEN SITE RECOVERY (If necessary, login with the cloudadmin credentials for that SDDC)

Click NEW SITE PAIR
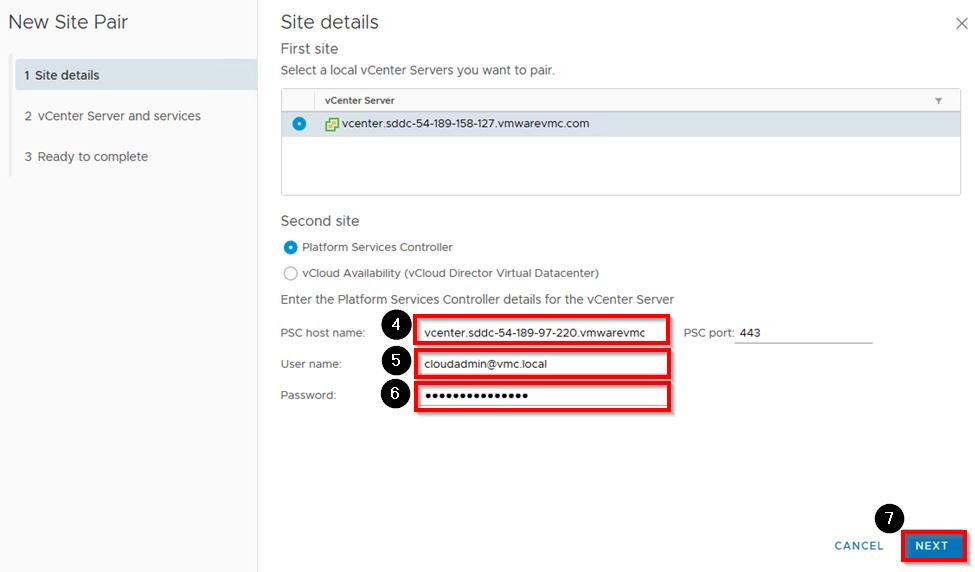
Enter the vCenter FQDN of your partner’s SDDC in the format vcenter.sddc-xx-xxx-xx-xx.vmc.vmware.com in the PSC host name field
Enter cloudadmin@vmc.local in the User name field
Enter the cloudadmin password of your partner’s SDDC into the Password field
Click NEXT
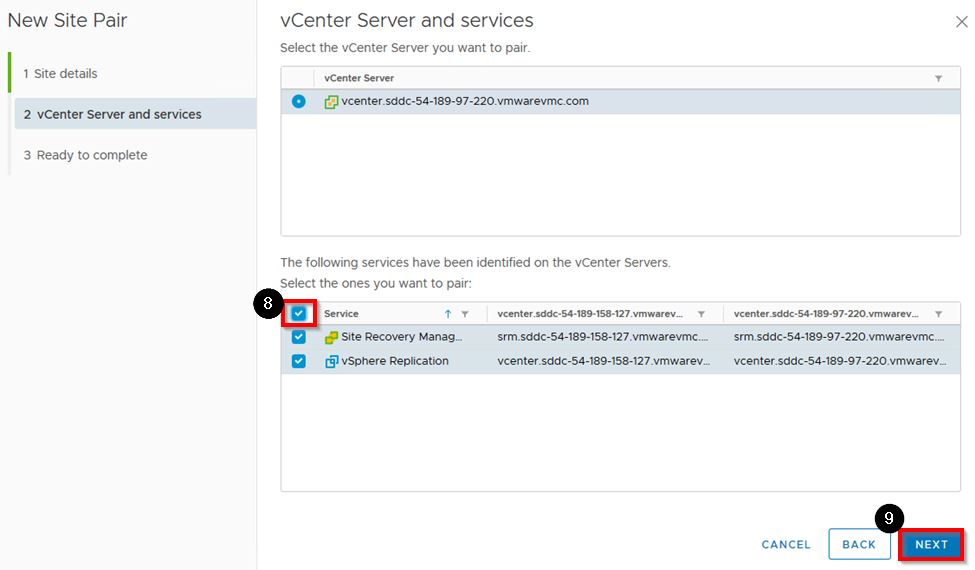
Click the top-level checkbox to select all Services
Click NEXT

Click FINISH
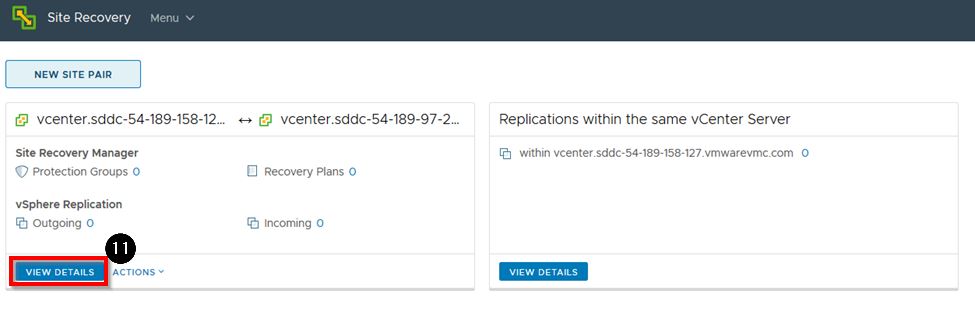
Click VIEW DETAILS
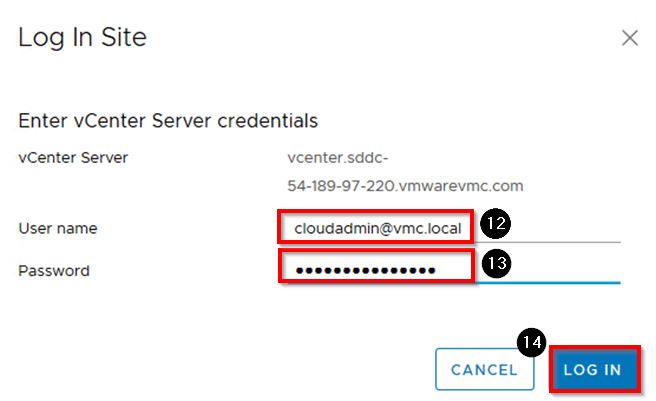
Enter cloudadmin@vmc.local for the User name
Enter the cloudadmin password for your partner’s SDDC for the Password
Click LOG IN
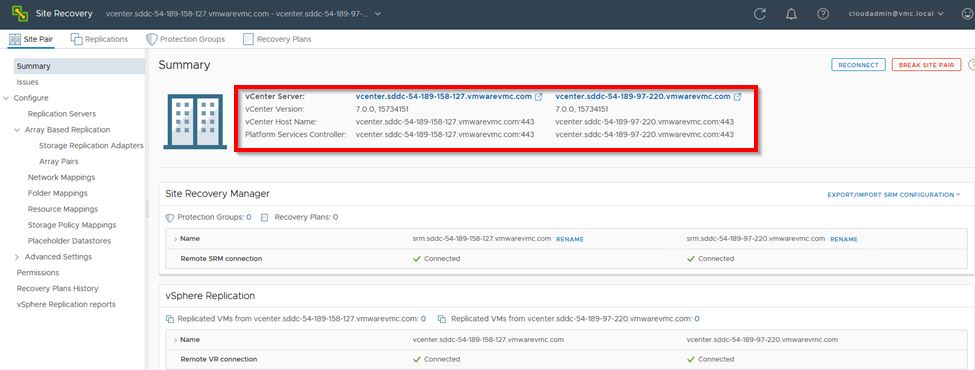
Once logged in to your partner’s SDDC, you will see the Site Pair Summary
Configure Mappings
Configure Network Mappings
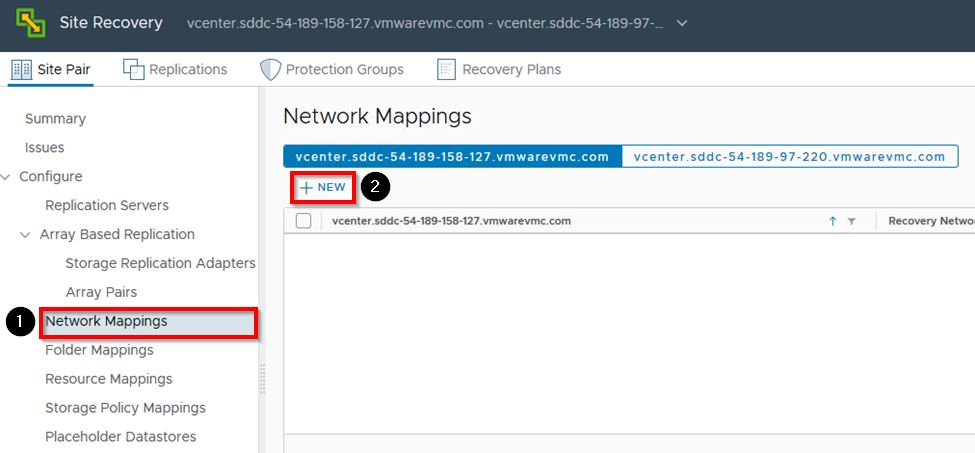
- Click Network Mappings in the left pane of the Site Recovery page
Click + NEW
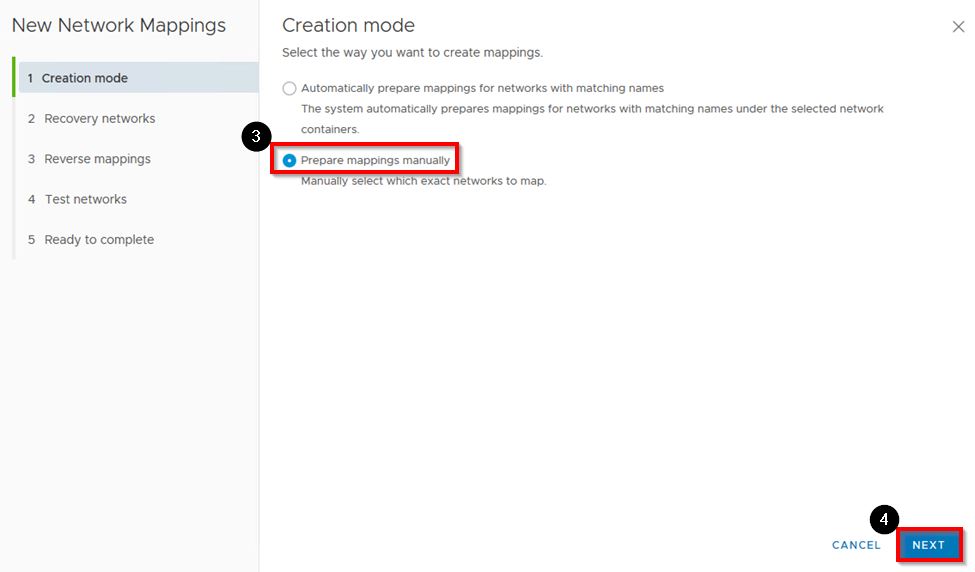
Select Prepare mappings manually
Click NEXT
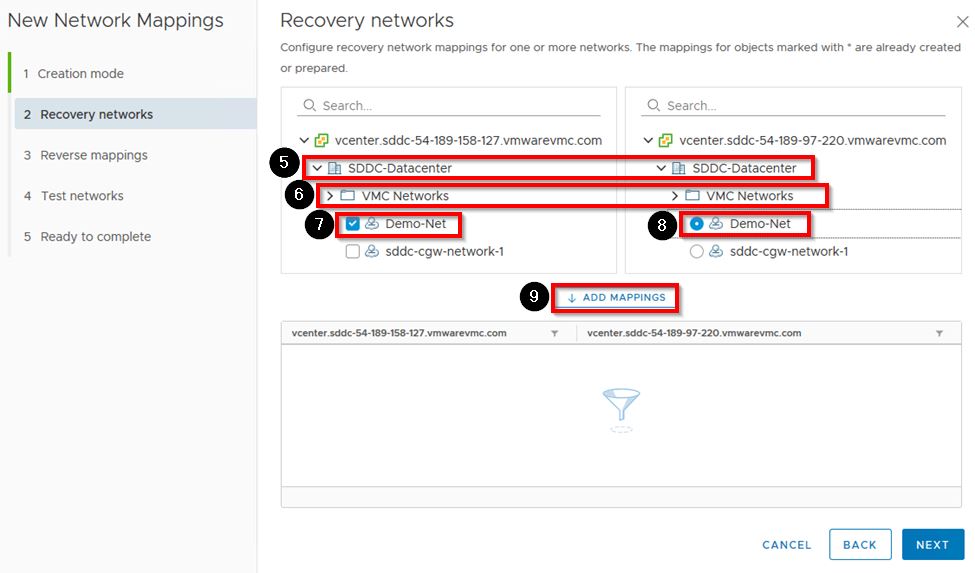
Expand SDDC Datacenter on both sides
Expand VMC Networks on both sides
Click the checkbox next to Demo-Net on the left
Click the radio button next to Demo-Net on the right
Click ADD MAPPINGS
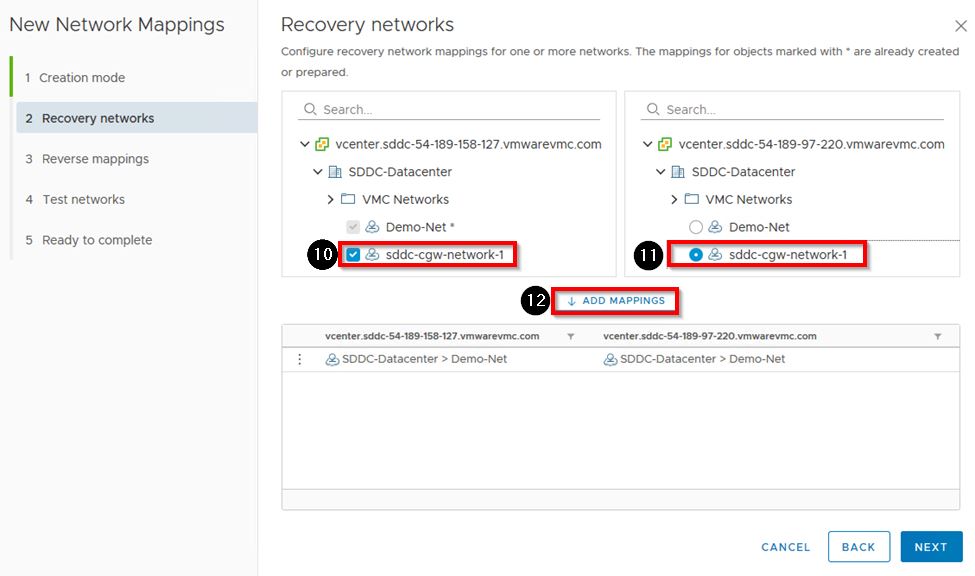
Click the checkbox next to sddc-cgw-network-1 on the left
Click the radio button next to sddc-cgw-network-1 on the right
Click ADD MAPPINGS
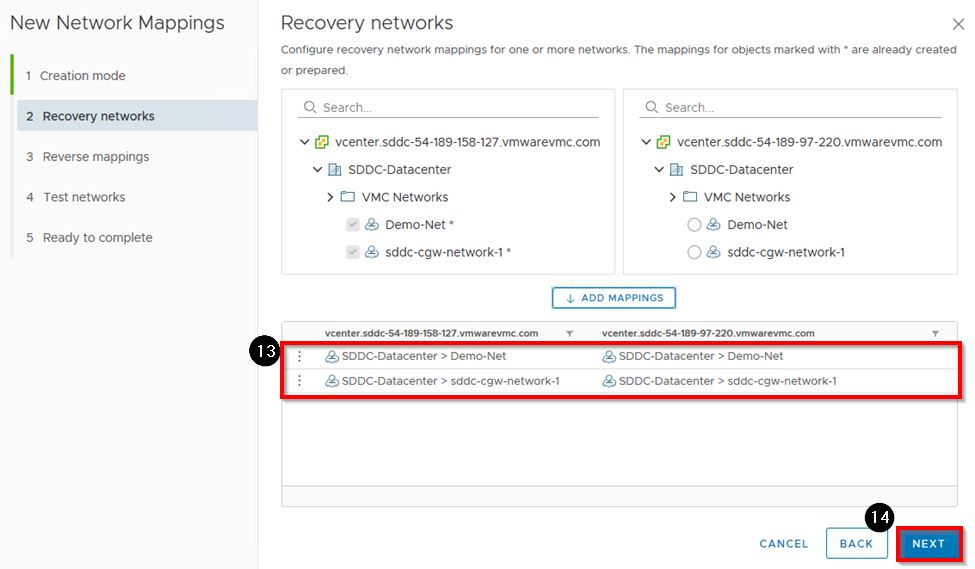
Ensure both network mappings have been created
Click NEXT
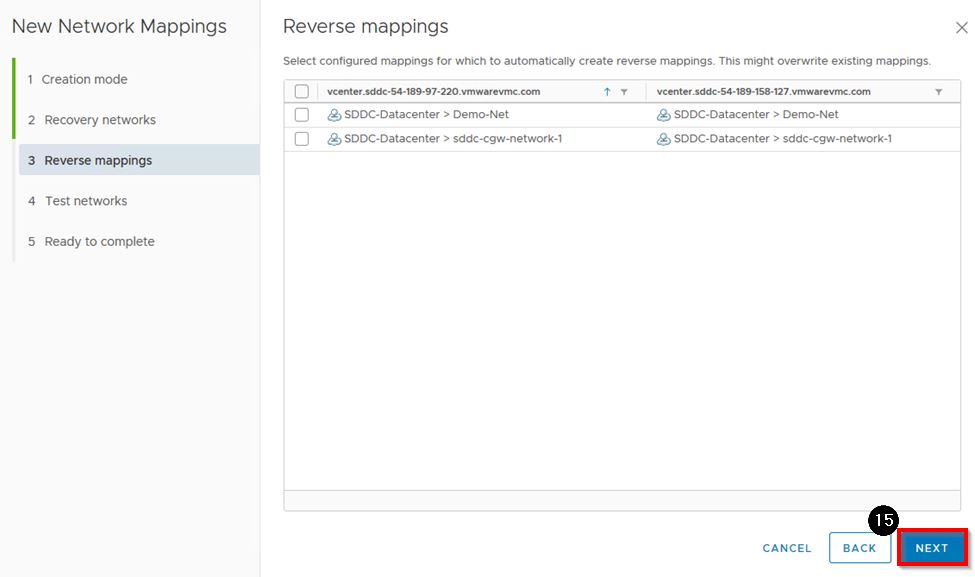
DO NOT select anything in Reverse Mappings
Click NEXT
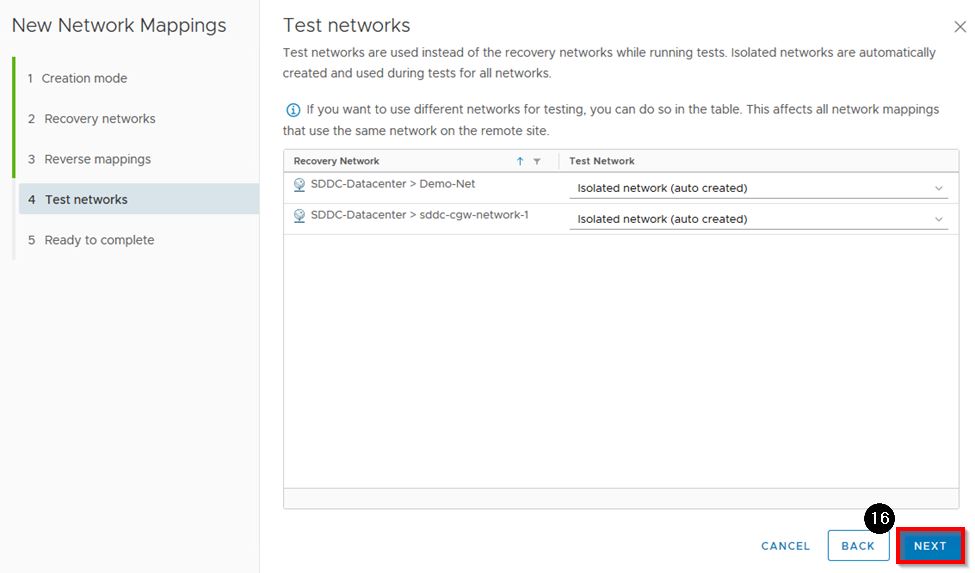
Click NEXT
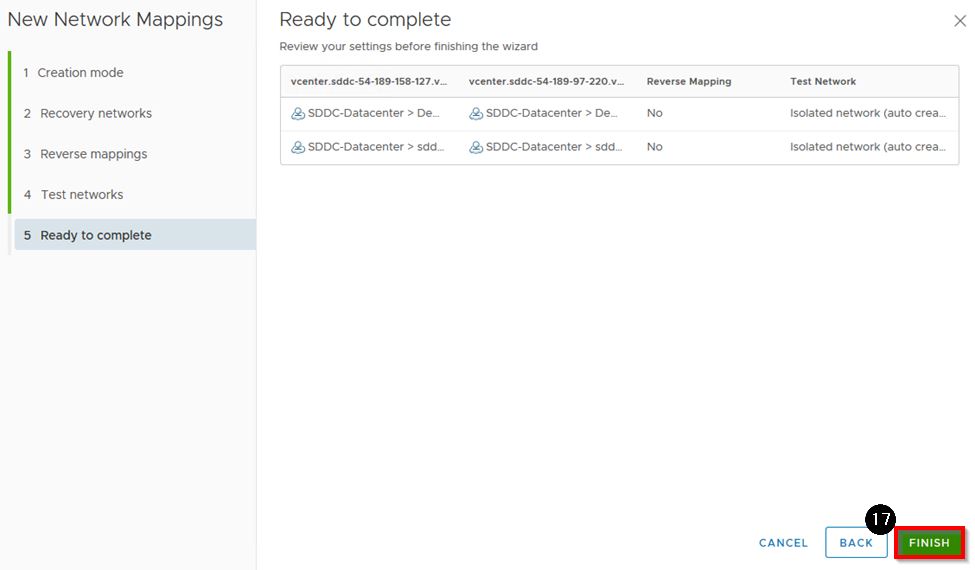
Click FINISH
Folder mappings
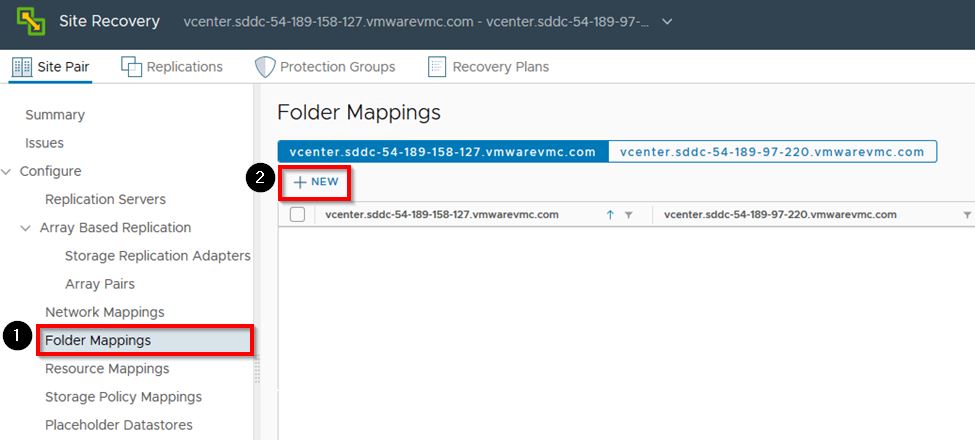
- Select Folder Mappings in the left pane
Click *+ NEW
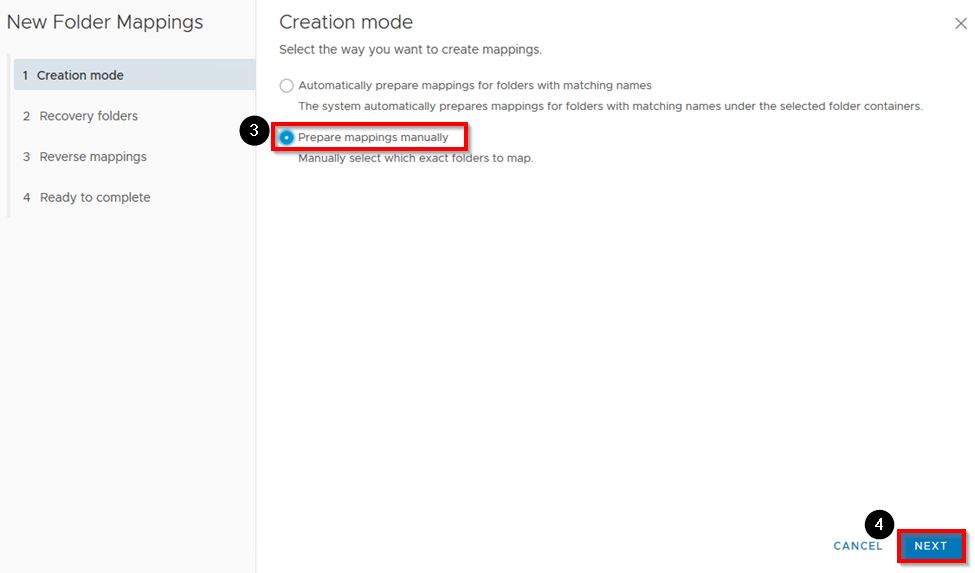
Select Prepare mappings manually
Click Next
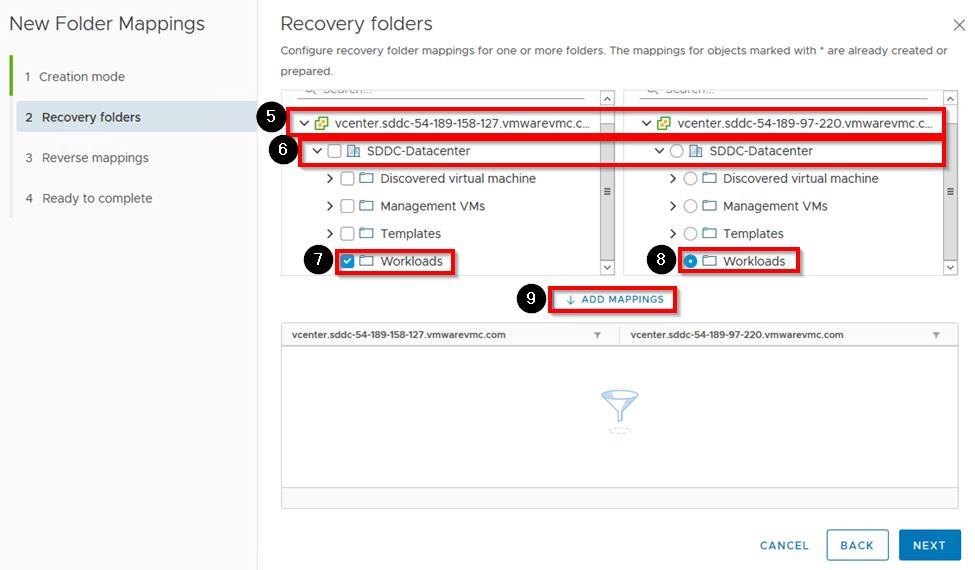
Expand vcenter… on both sides
Expand SDDC-Datacenter on both sides
Click the checkbox next to Workloads on the left
Click the radio button next to Workloads on the right
Click ADD MAPPINGS
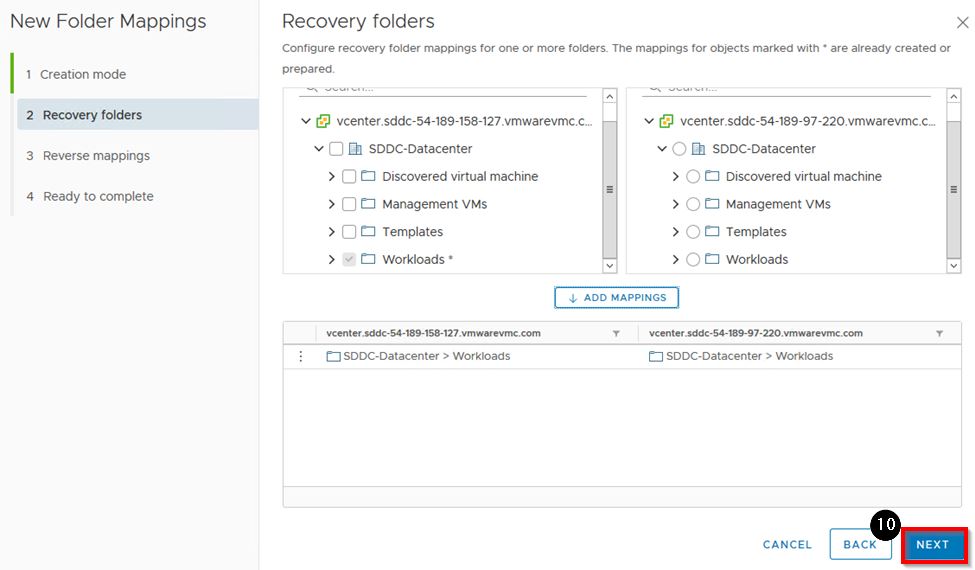
Click NEXT
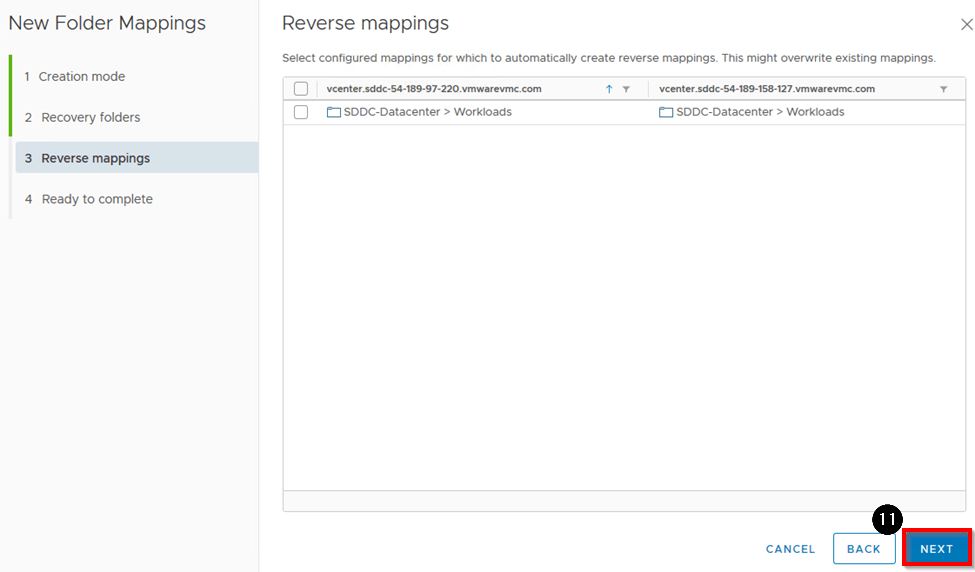
DO NOT select any Reverse mappings
Click NEXT
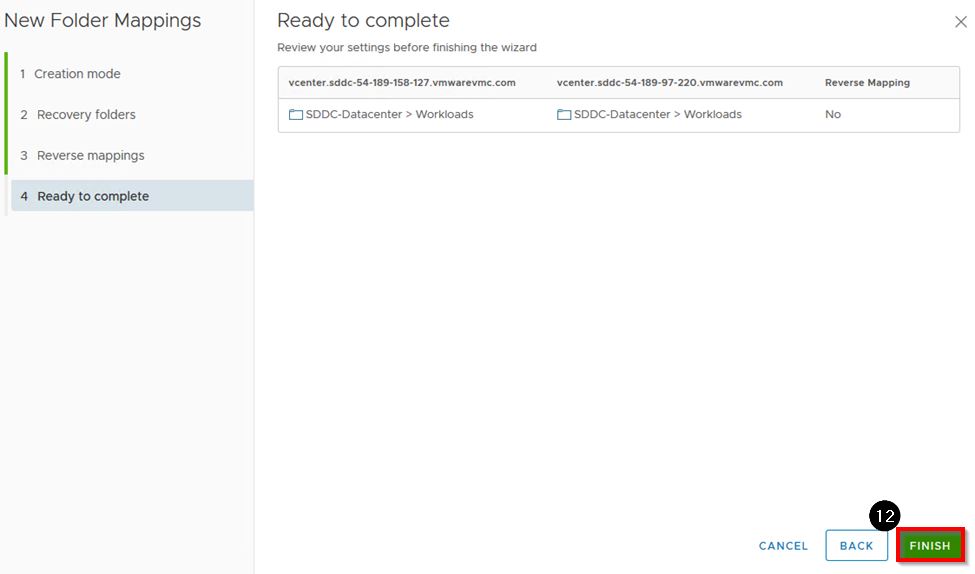
Click FINISH
Resource Mappings

- Click Resource Mappings in the left pane
Click + NEW
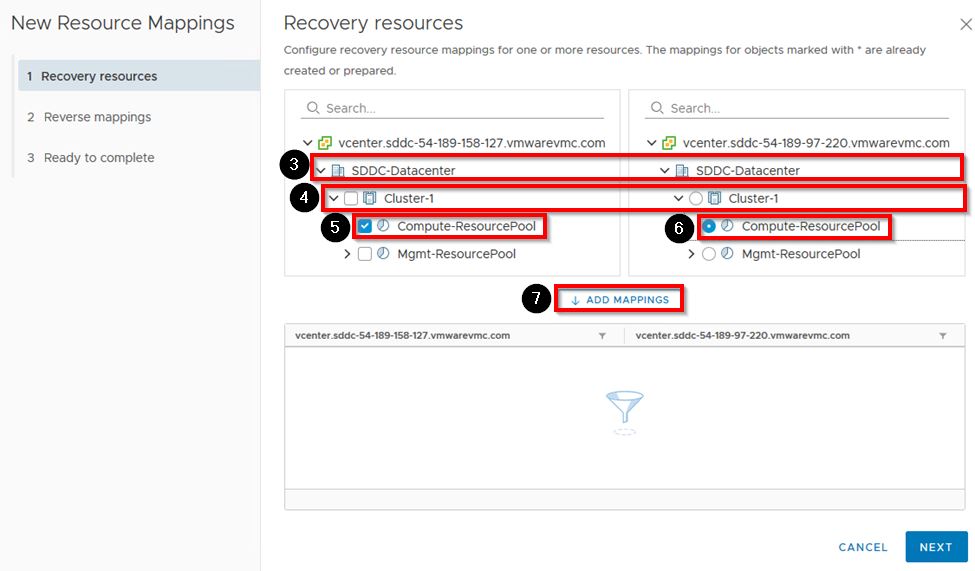
Expand SDDC-Datacenter on both sides
Expand Cluster-1 on both sides
Click the checkbox next to Compute-ResourcePool on the left
Click the radio button next to Compute-ResourcePool on the right
Click ADD MAPPINGS
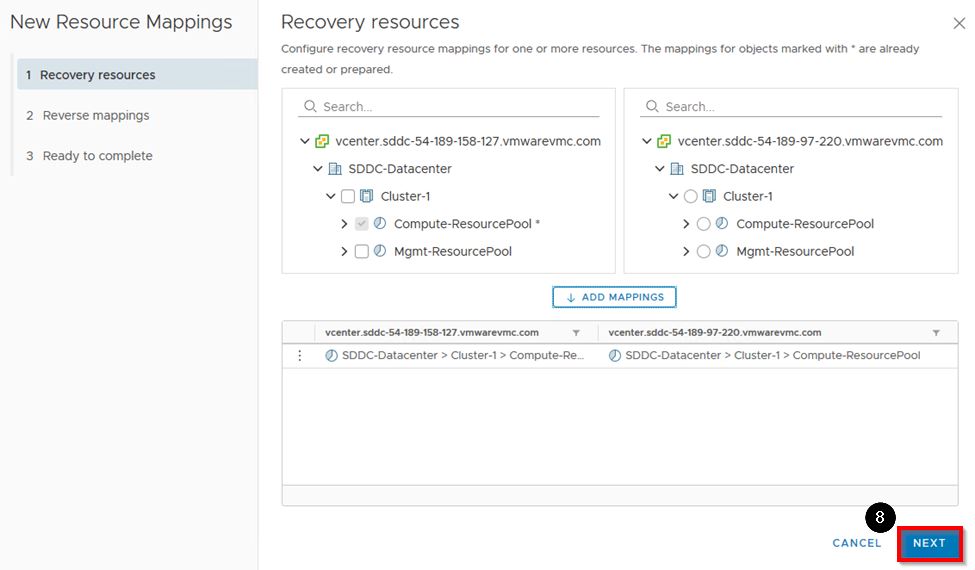
Click NEXT
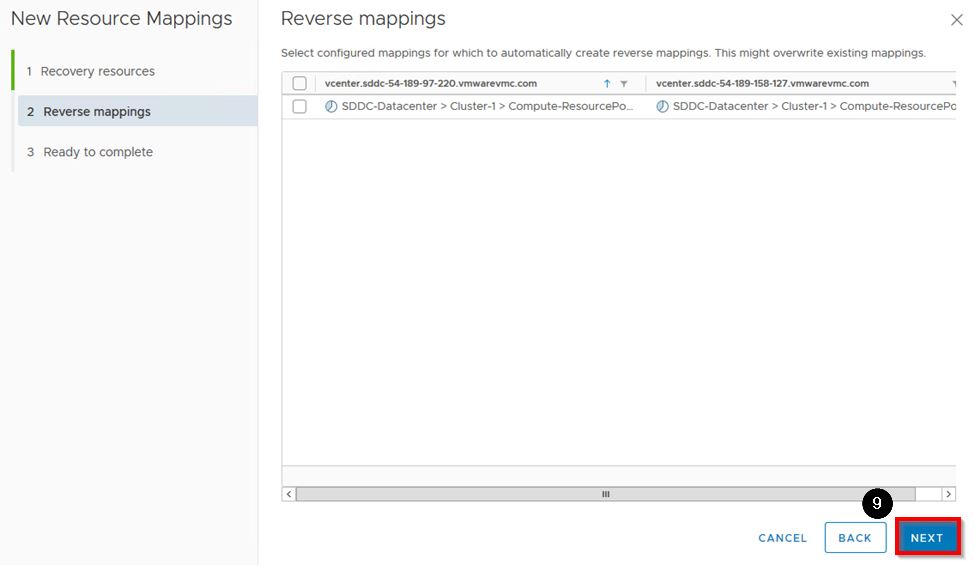
DO NOT select any reverse mappings
Click NEXT
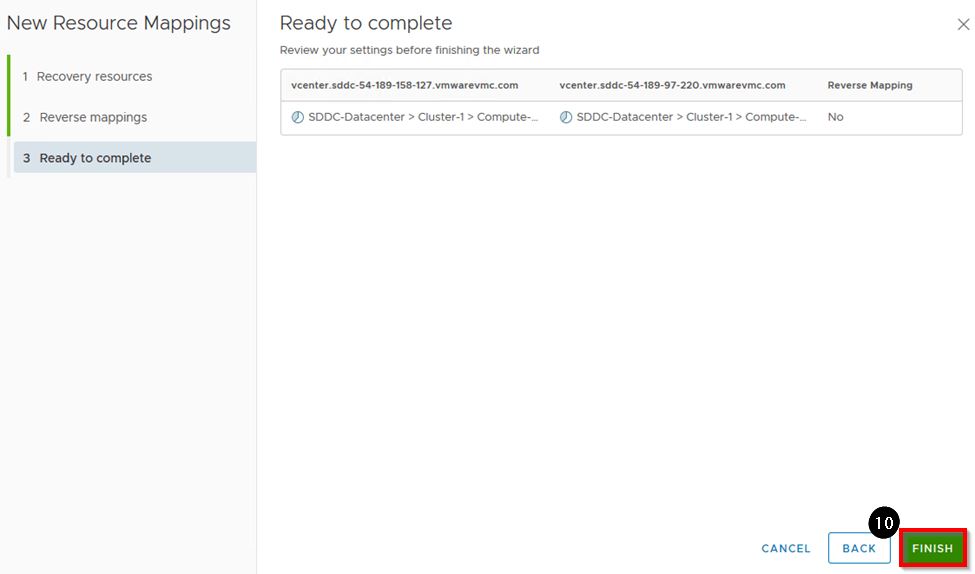
Click FINISH
Storage Policy Mappings
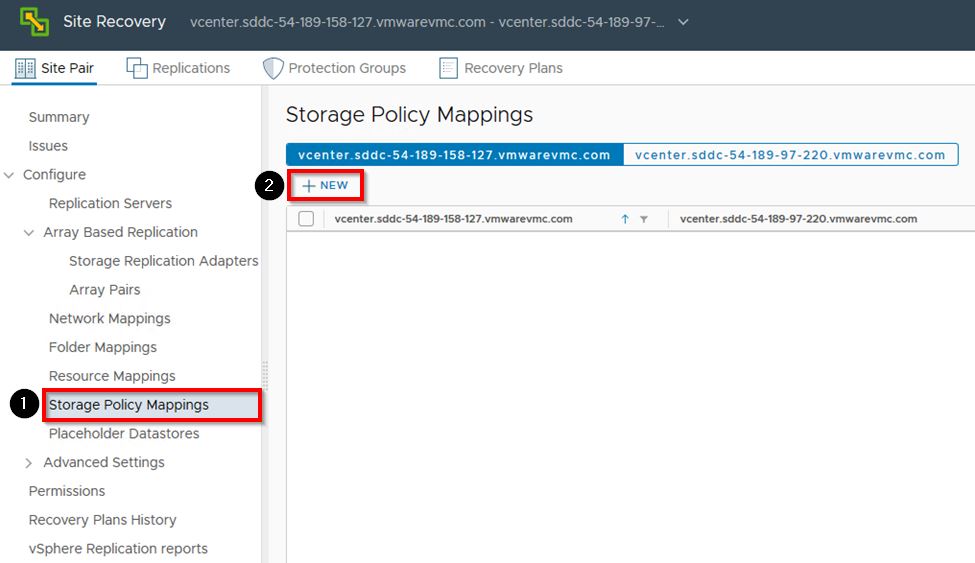
- Select Storage Policy Mappings in the left pane
Click + NEW
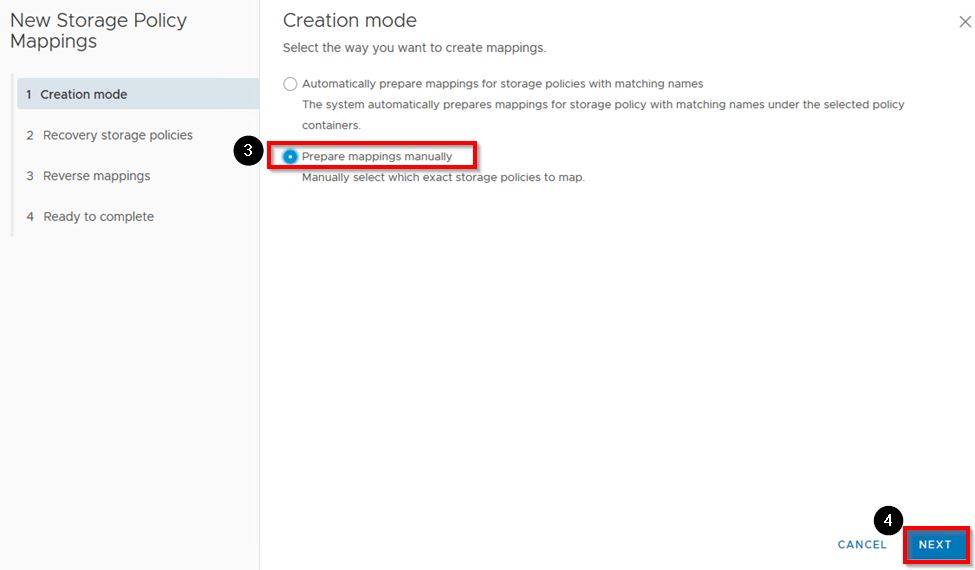
Select Prepare mappings manually
Click NEXT
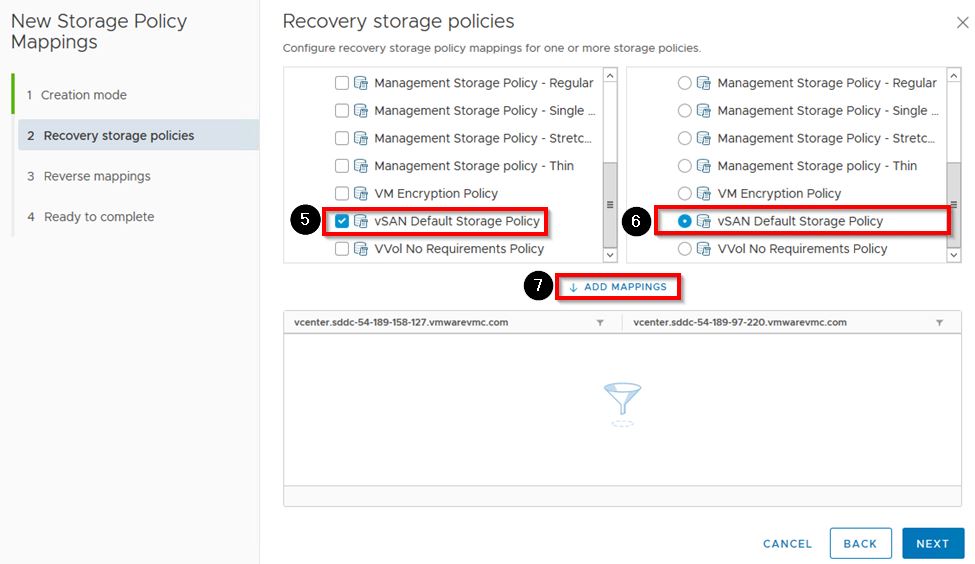
Click the checkbox next to vSAN Default Storage Policy on the left
Click the radio button next to vSAN Default Storage Policy on the right
Click ADD MAPPINGS
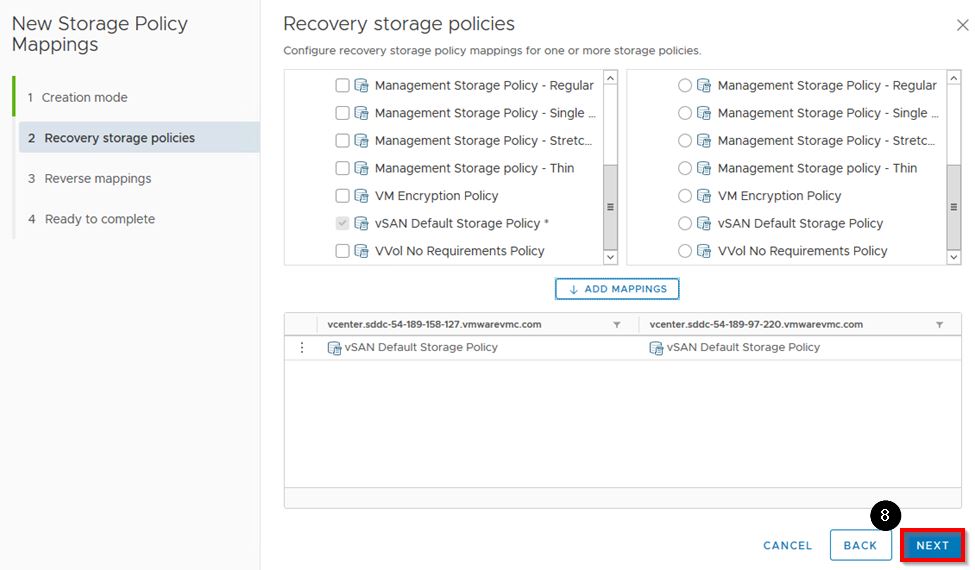
Click NEXT
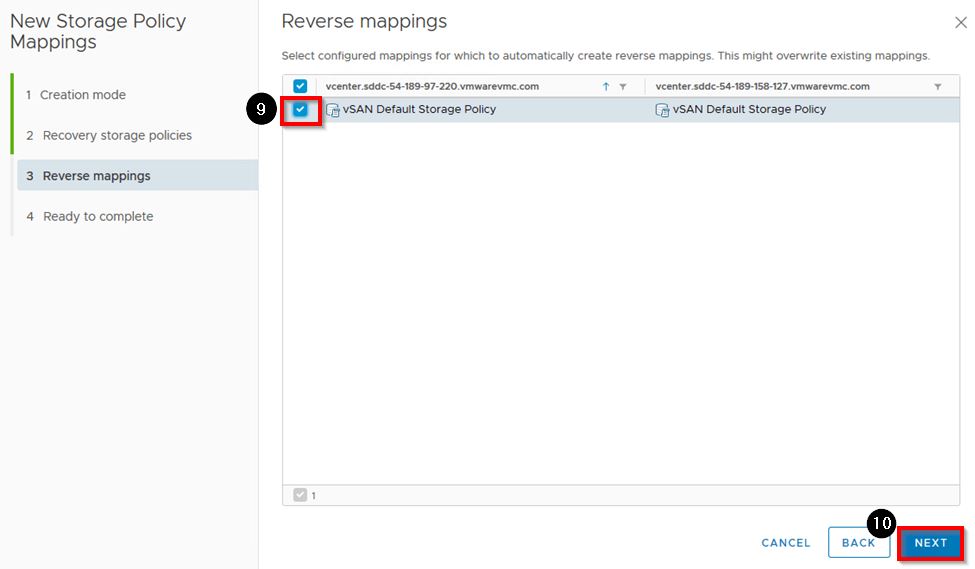
Click the checkbox next to vSAN Default Storage Policy for Reverse mappings
Click NEXT
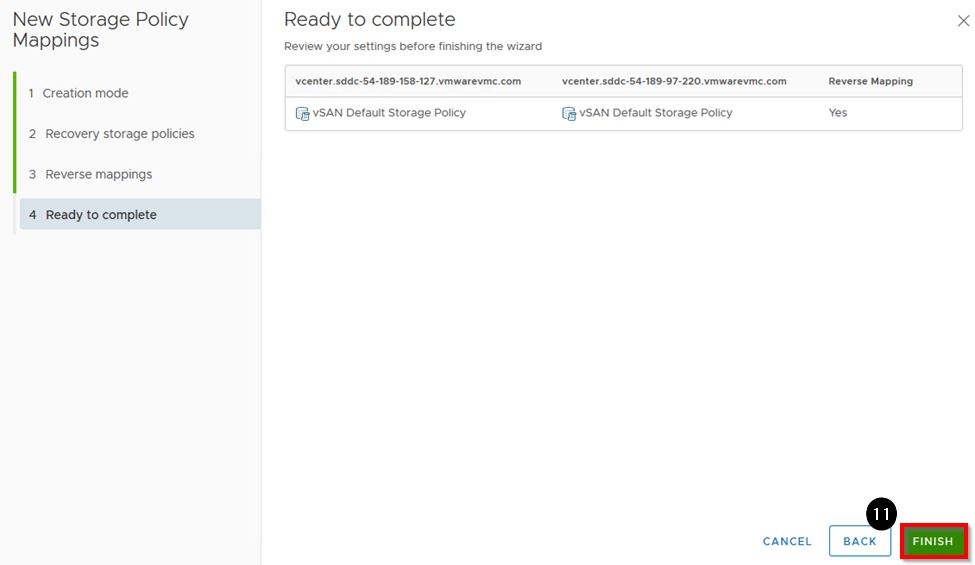
Click FINISH
Placeholder Datastores
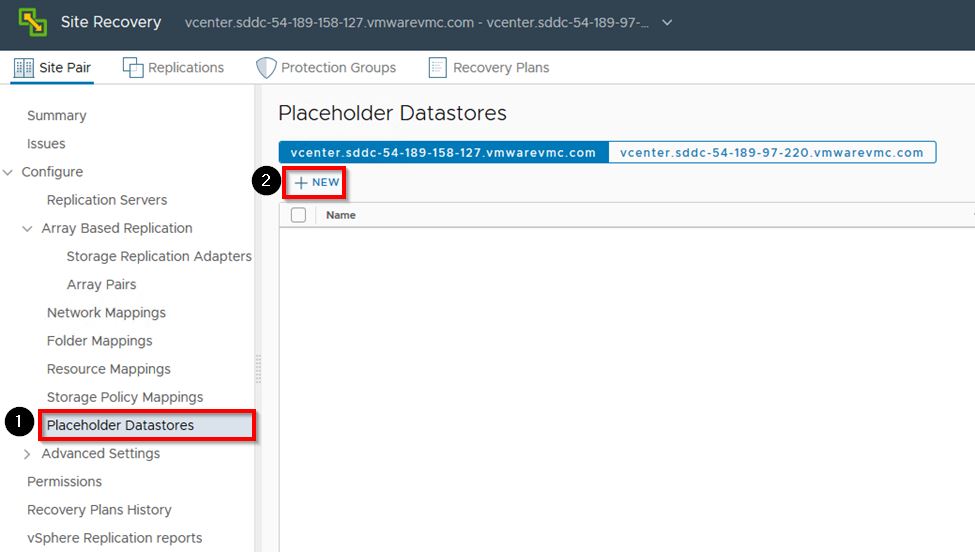
- Select Placeholder Datastores in the left pane
Click + NEW
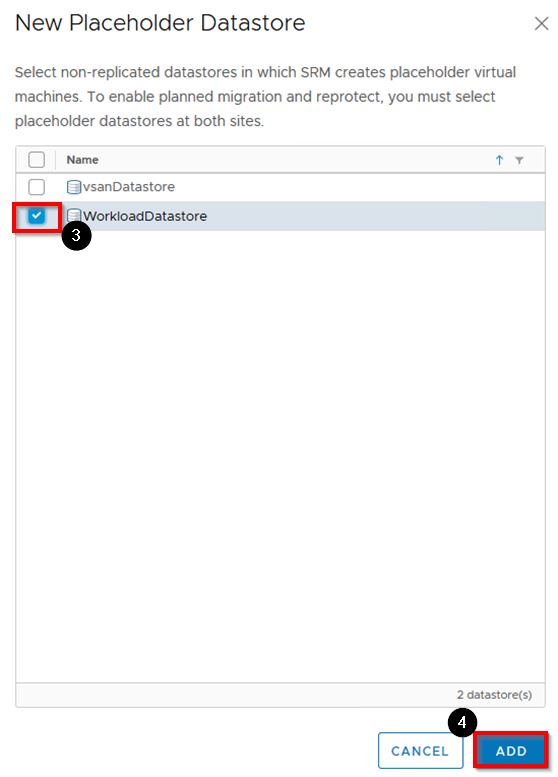
Click the checkbox next to WorkloadDatastore
Click ADD
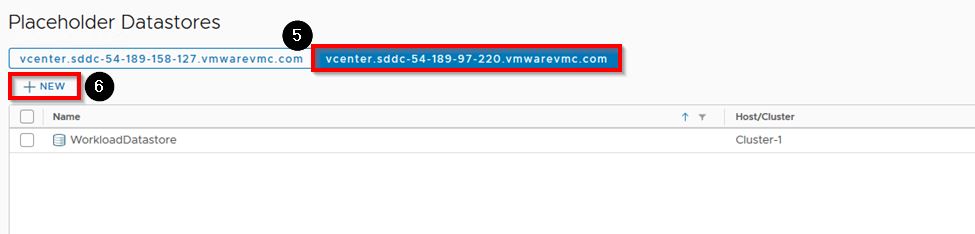
For Placeholder Datastores, you must select a datastore at each side, so you’ll repeat the same steps for the other vCenter.
Click the vCenter entry for the vCenter that you are paired with
Click + NEW
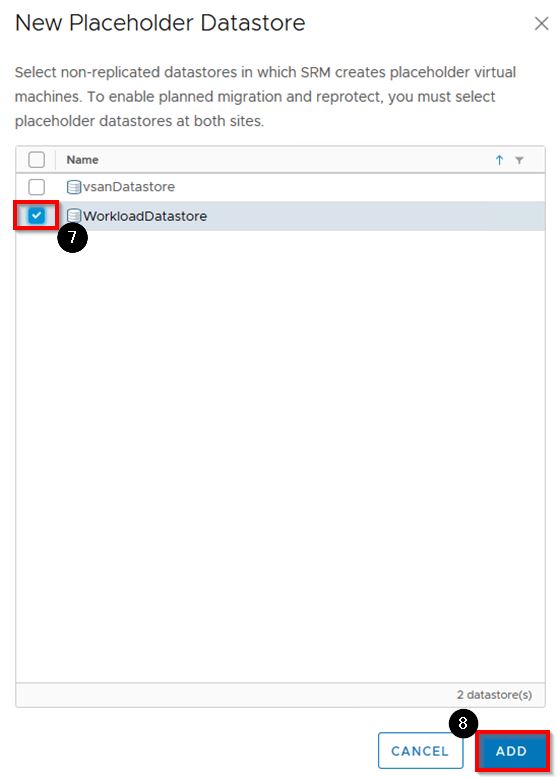
Click the checkbox next to WorkloadDatastore
Click ADD
Create VMs to use with Site Recovery
You will now create four VMs to use for Site Recovery.
Navigate back to the vSphere client for YOUR SDDC
If you need to log back in to your SDDC thru the VMC console, use the cedxx@vmware-hol.com userid provided to you at the beginning and the password of VMware1!
From YOUR SDDC vSphere Client, Click Menu
Click Content Libraries
Click the Windows-Content-Library
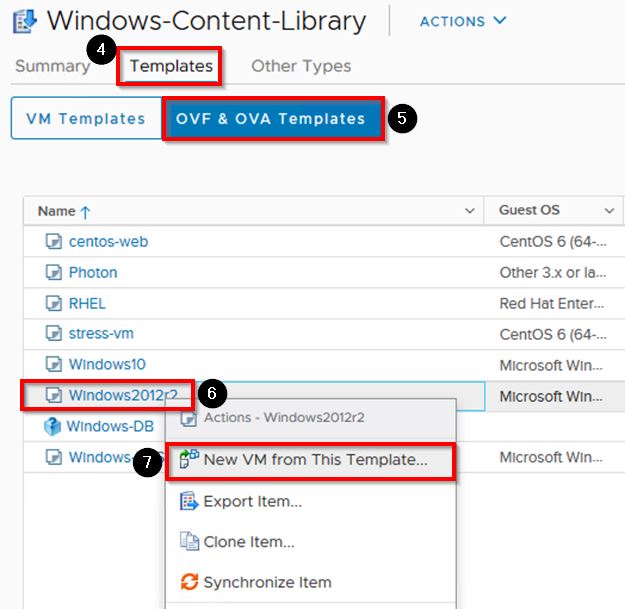
Click Templates
Click OVF & OVA Templates
Right-click the Windows2012r2 template
Click New VM from This Template…
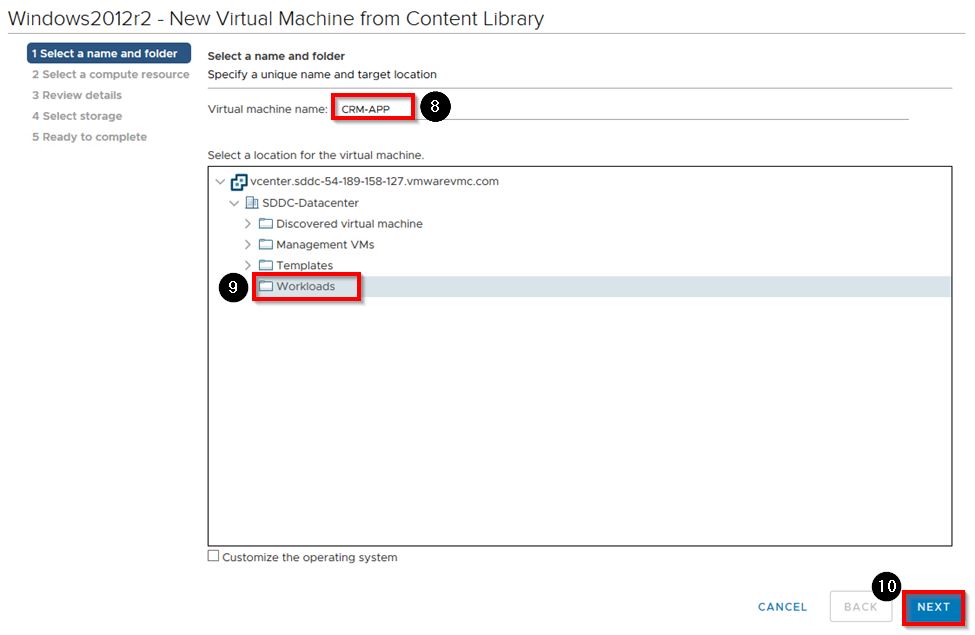
Enter CRM-APP-xx where xx is your student ID number
Select Workloads
Click NEXT

Select Compute-ResourcePool
Click NEXT
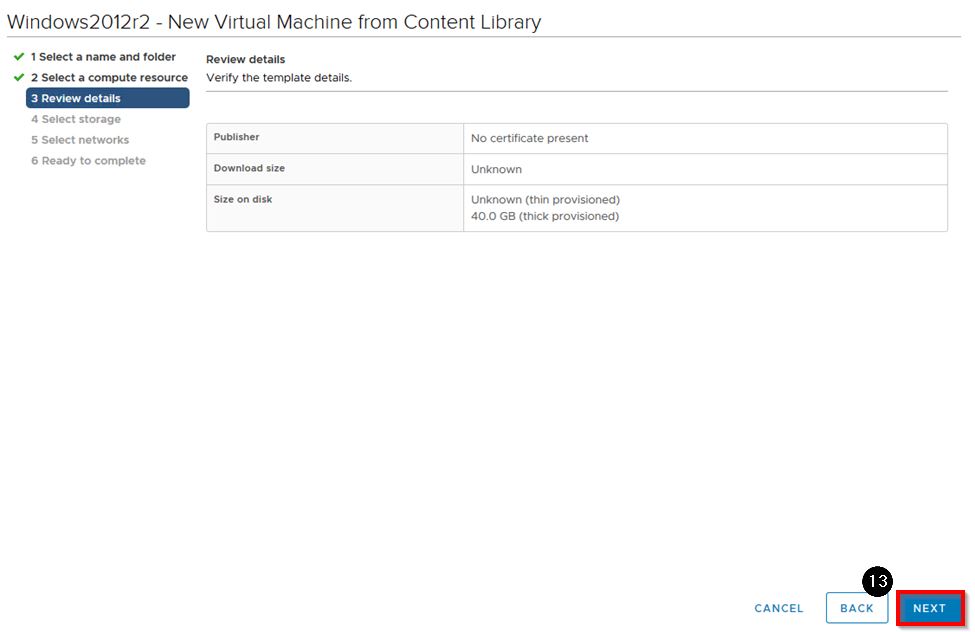
Click NEXT
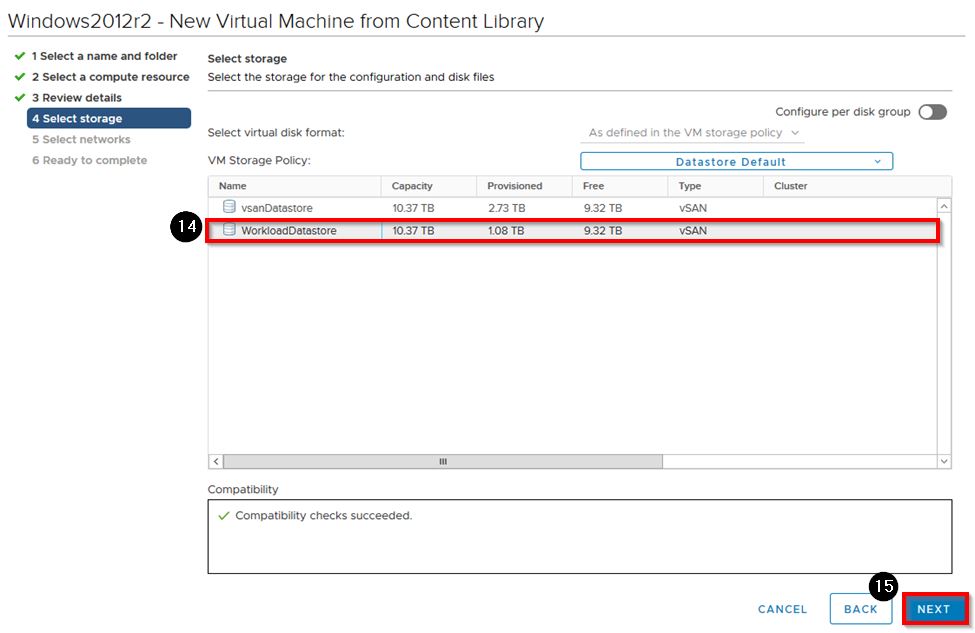
Select WorkloadDatastore
Click NEXT
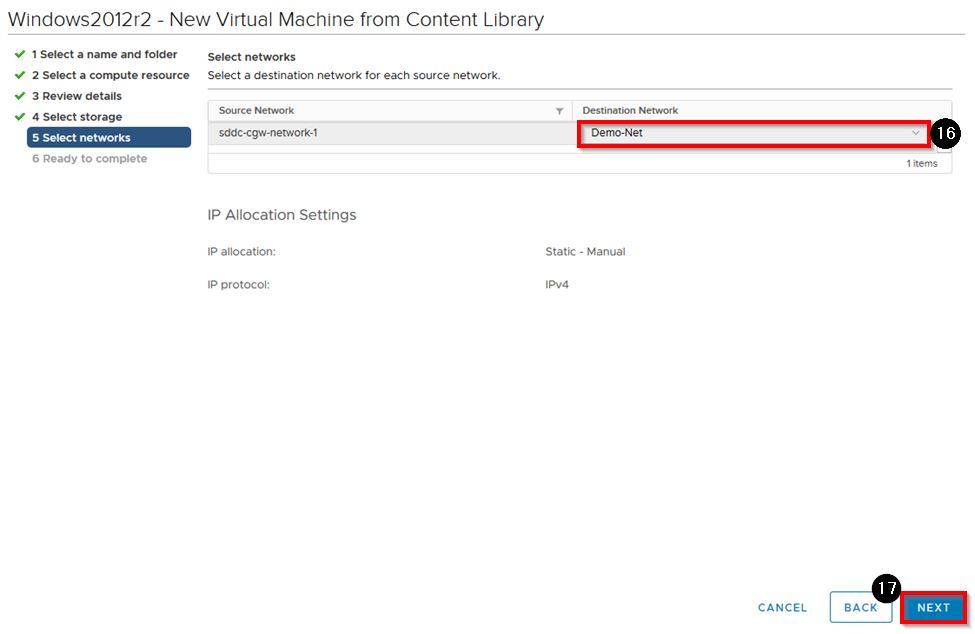
Select Demo-Net from teh Destination Network dropdown listbox
Click NEXT
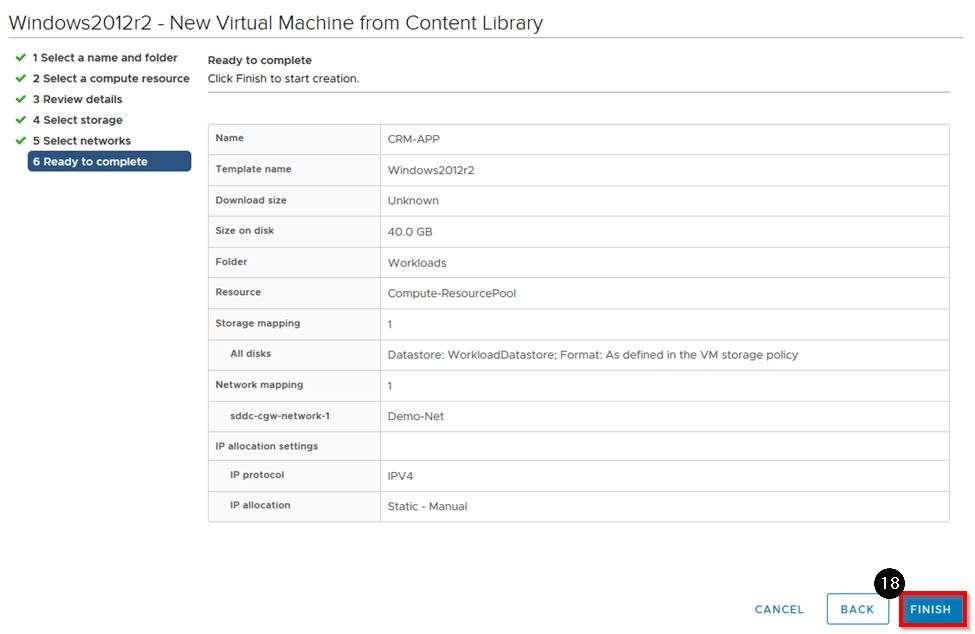
Click FINISH
REPEAT the steps above three more times and create VMs named CRM-DB-xx, FIN-APP-xx, and FIN-DB-xx where xx is your Student ID number
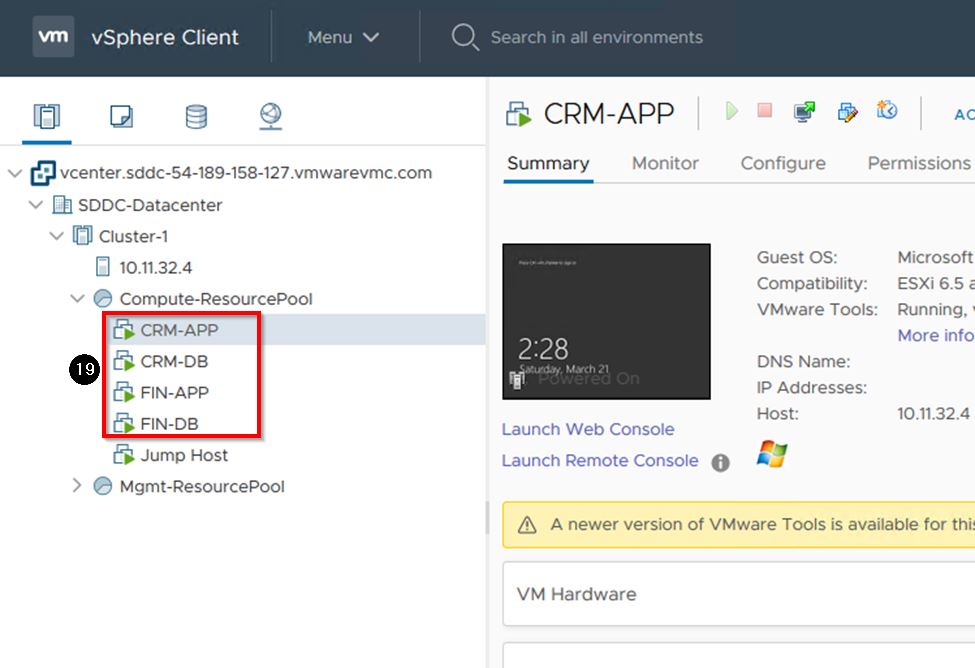
After you have created all four of your VMs, navigate to the VMs in the vSphere Client and Power On all four VMs.
Using Site Recovery
We will use Site Recovery to replicate the VMs we want to protect, create protection groups for those VMs, and create and test recovery plans. Navigate back to Site Recovery for your SDDC
Replicate VMs to Recovery Site
We will use Site Recovery to Navigate back to Site Recovery for your SDDC
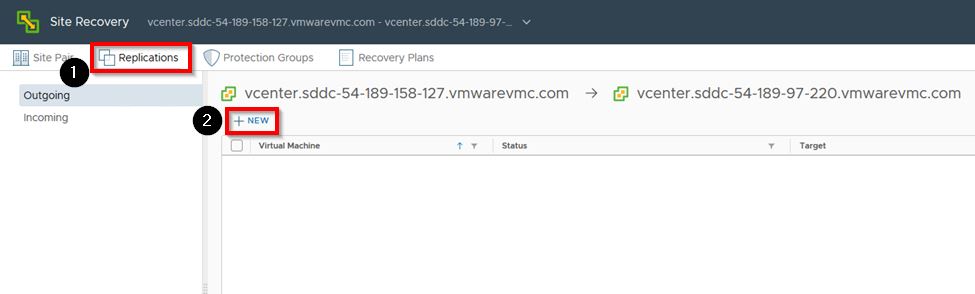
- Click Replications from the top menu bar
Click + NEW
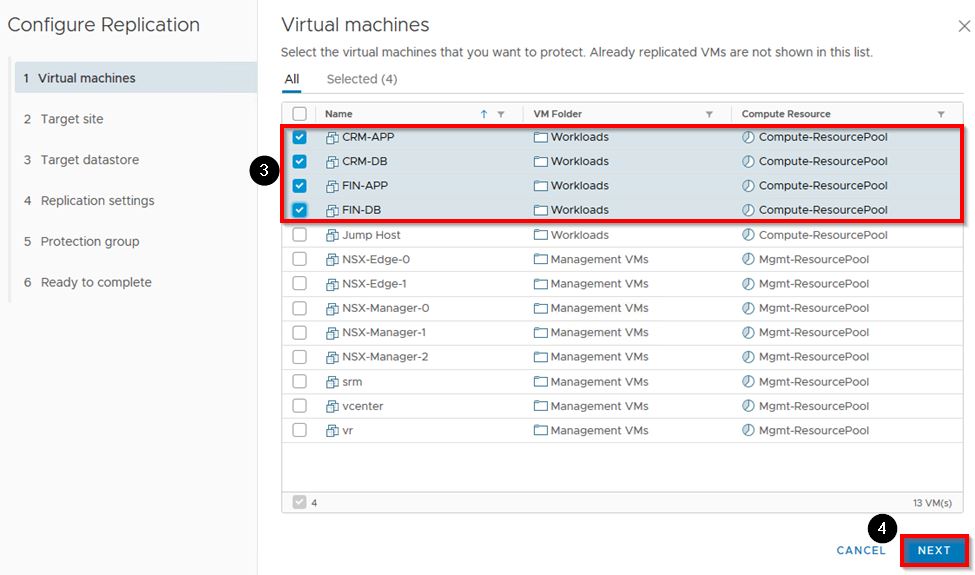
Select ALL FOUR of the VMs you created previously
Click NEXT
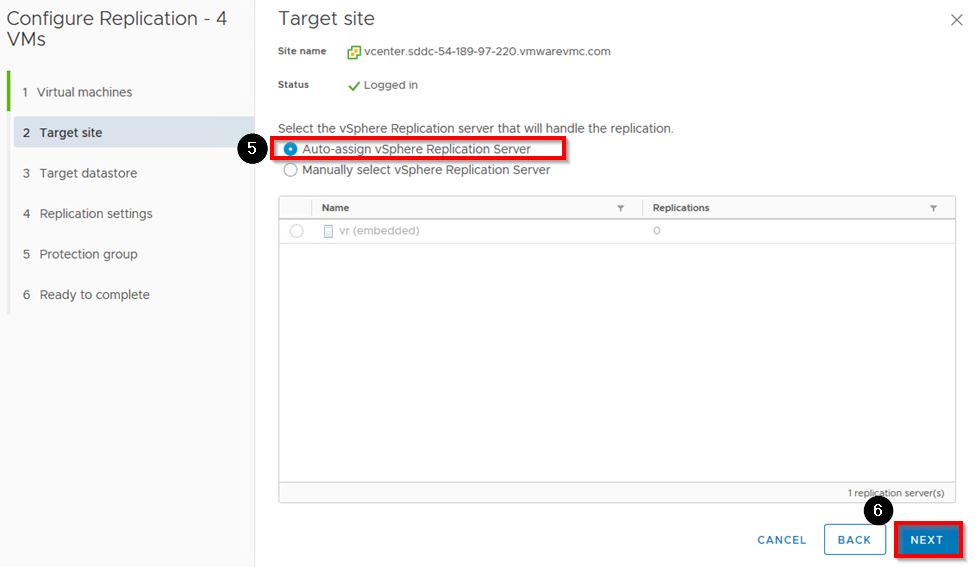
Ensure Auto-assign vSphere Replication Server is selected
Click NEXT

Select WorkloadDatastore
Click NEXT
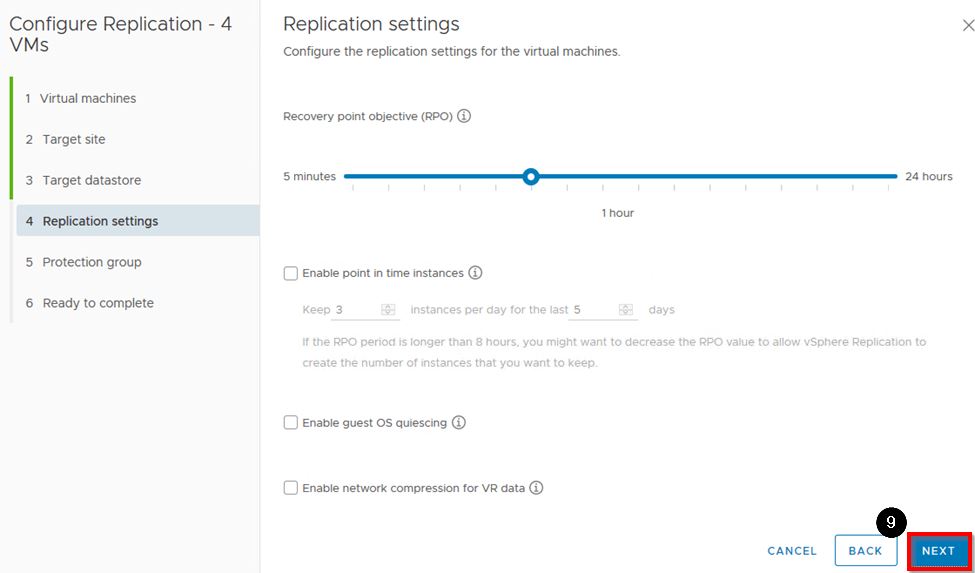
Leave all defaults for the RPO and click NEXT
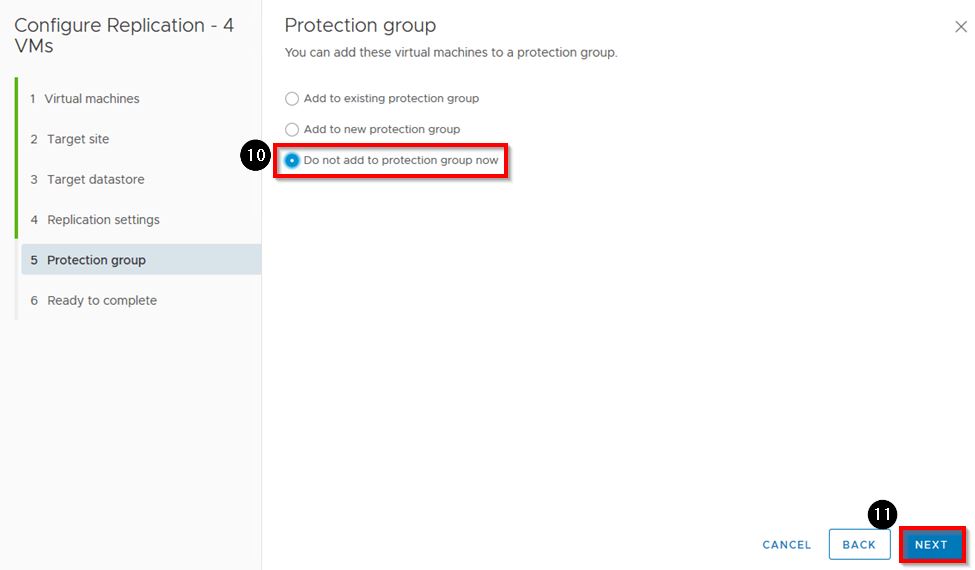
Select Do not add to protection group now
Click NEXT
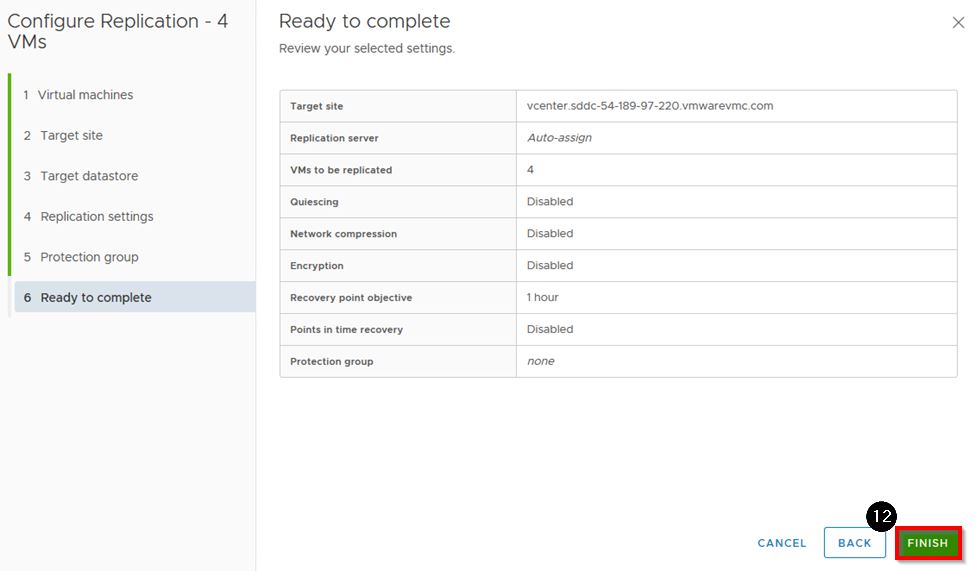
Click *FINISH
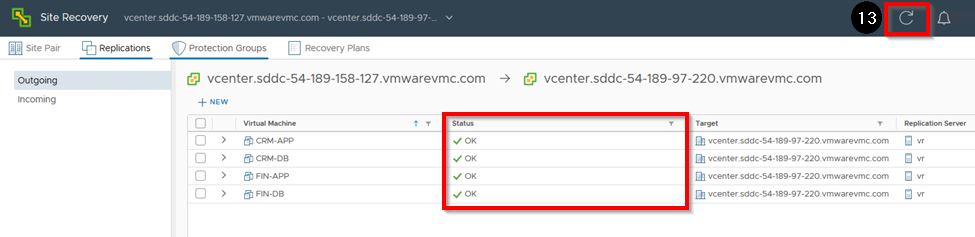
Click Refresh until all VMs show a status of OK (this may take a couple of minutes)
Create Protection Groups and Recovery Plans
We will create 2 Protection Groups, one for our CRM application and one for our Finance application. A VM can only belong to one Protection Group, but a Protection Group can belong to more than one Recovery Plan.

- Click Protection Groups
Click + NEW*

Enter CRM-PG-XX where XX is your Student ID for Name
Click NEXT
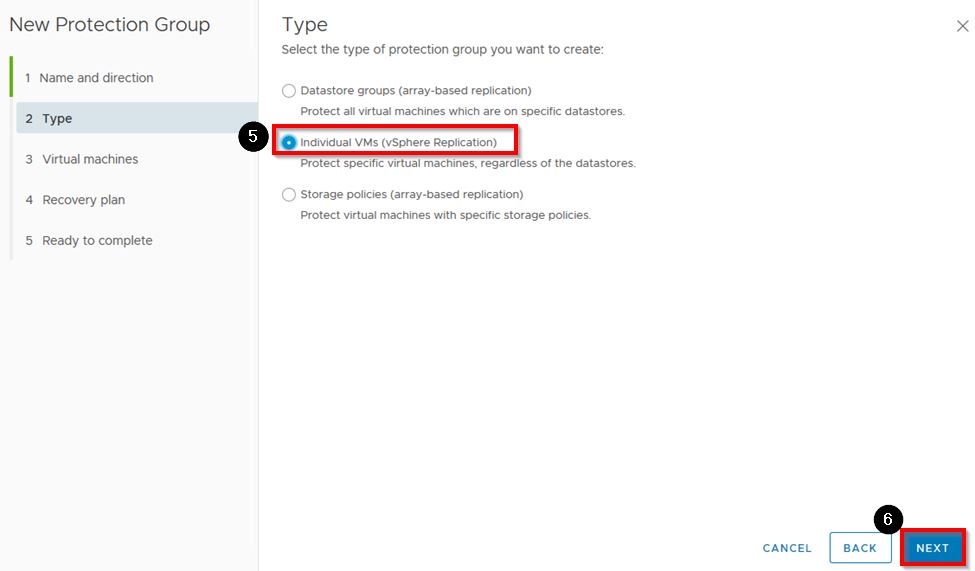
Select *Individual VMs (vSphere Replication)
Click NEXT
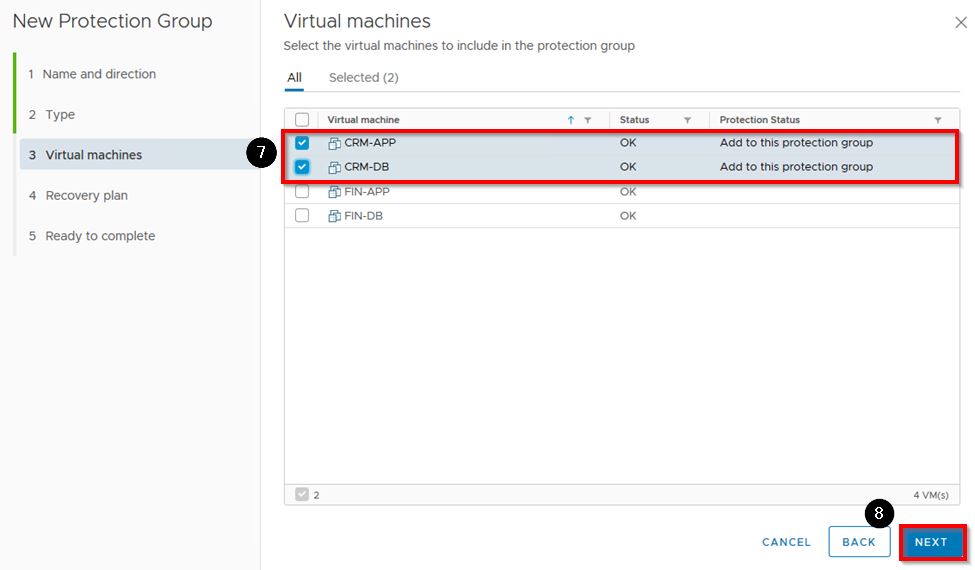
Select both your CRM VMs
Click NEXT
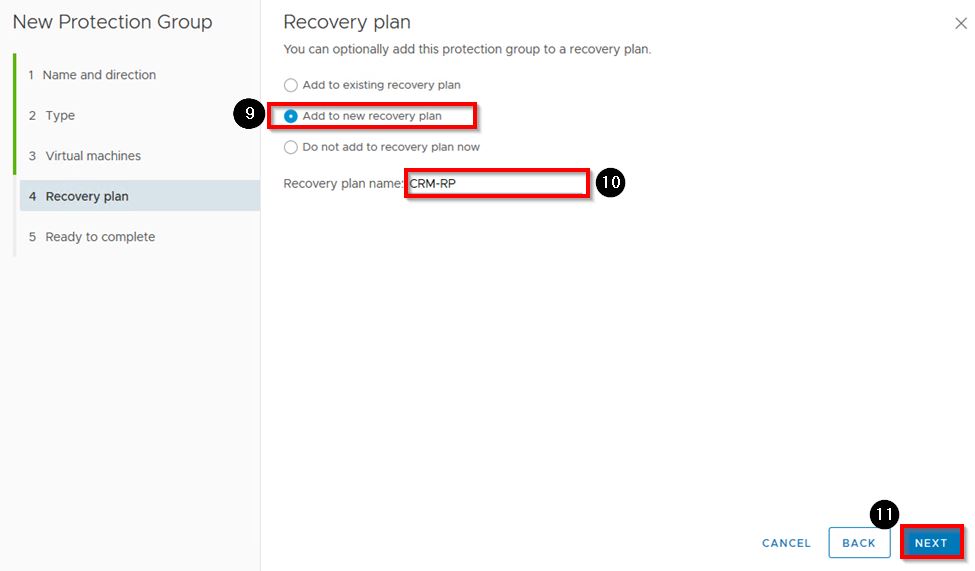
We will create a Recovery Plan that will just recover our CRM application
Select Add to new recovery plan
Enter CRM-RP-XX where XX is your Student ID for the Recovery Plan Name
Click NEXT
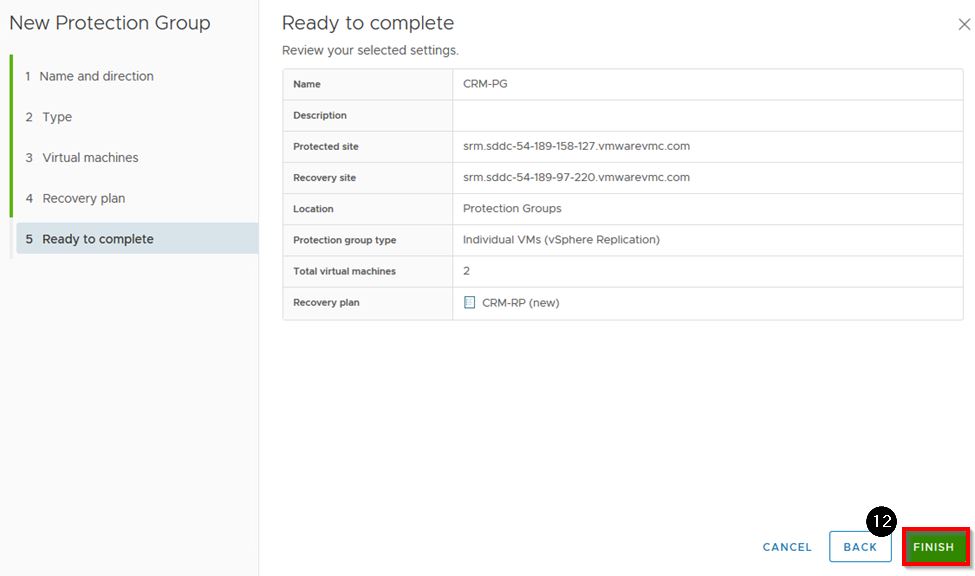
Click FINISH
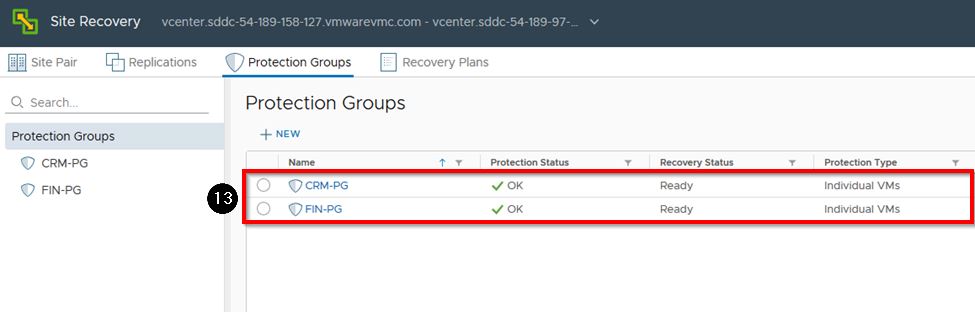
Repeat steps 2 thru 12 above for the FIN VMs to create the FIN-PG-XX protection group
If you get a Not configured error when creating the protection groups, ensure under Site Pair that you have configured Placeholder Datastores for each side. Once that is done, you will need to Restore all Placeholder VMs for each protection group
Create a Recovery Plan for All Applications
We will create another Recovery Plan that will recover all of our applications. As stated before, a VM can only belong to one Protection Group, but a Protection Group can belong to more than one Recovery Plan.
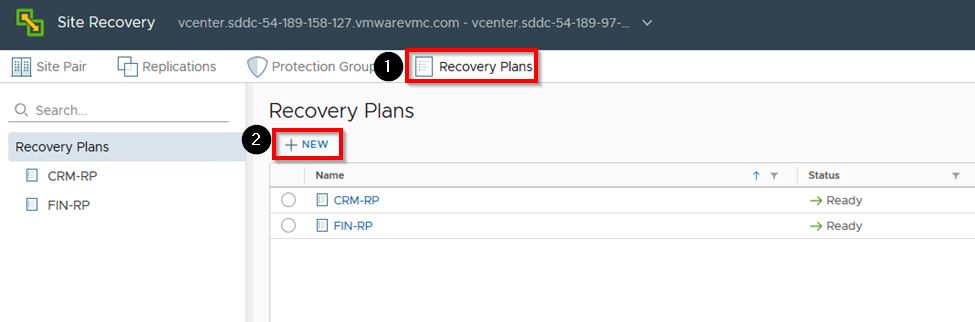
- Click Recovery Plans
Click + NEW*
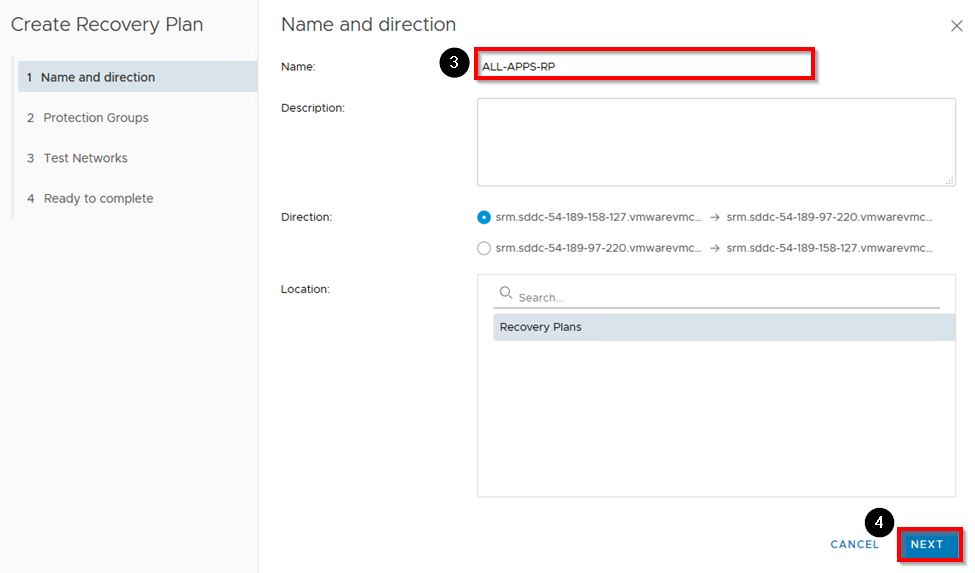
Enter ALL-APPS-RP-XX where XX is your Student ID for Name
Click NEXT
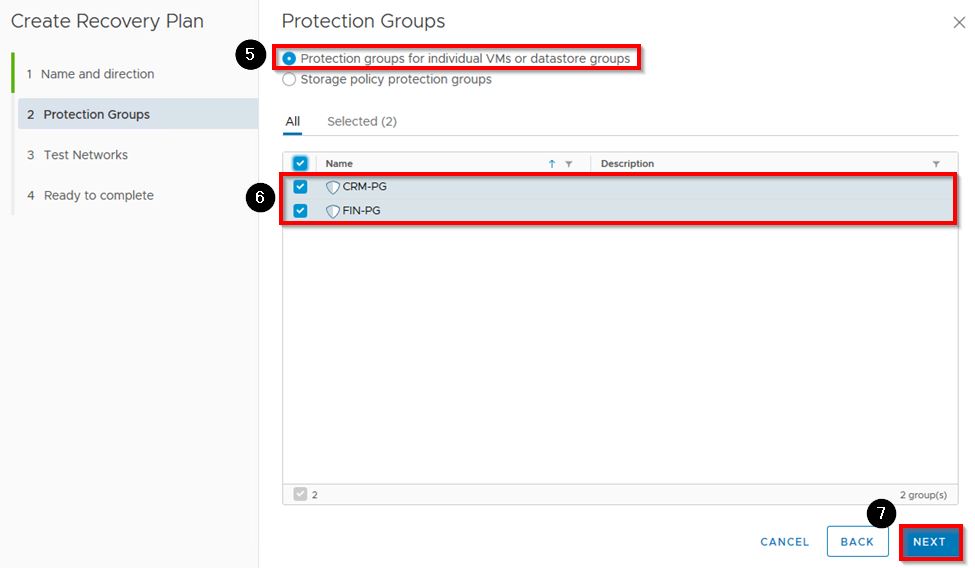
Select Protection groups for individual VMs or datastore groups
Select both the CRM and FIN Protection Groups
Click NEXT
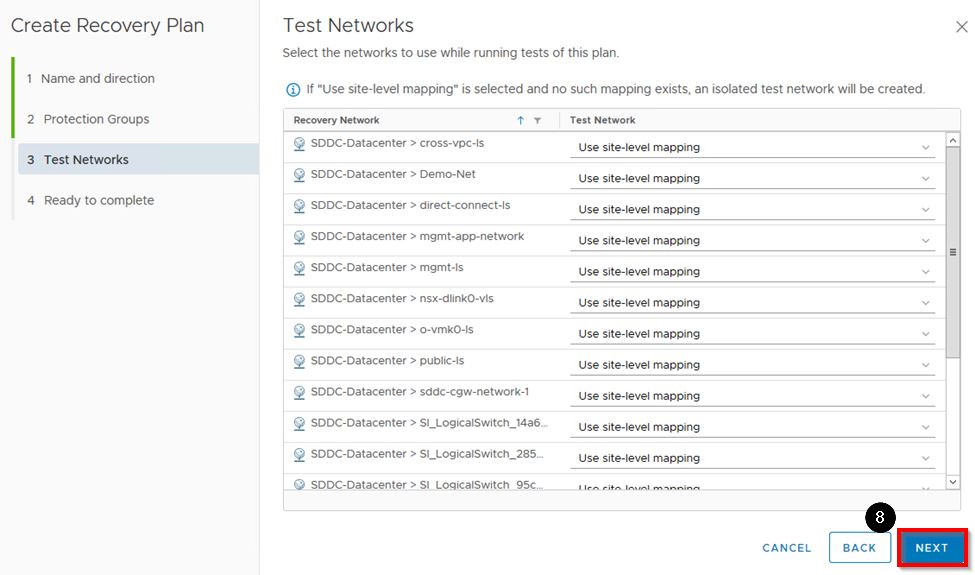
Click NEXT
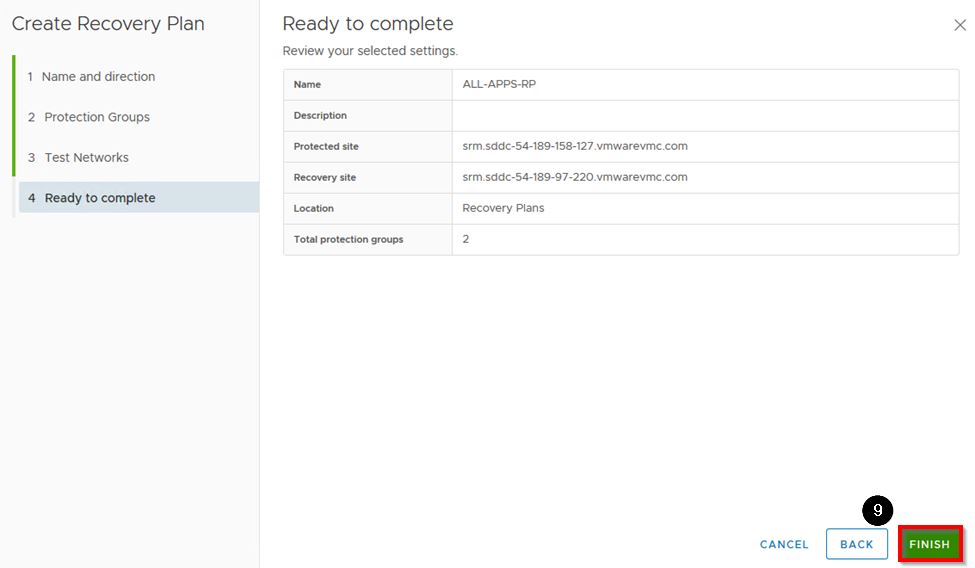
Click FINISH
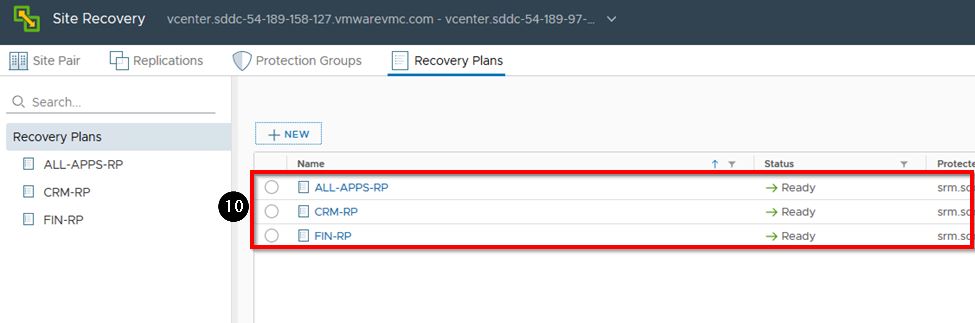
You should now have three Recovery Plans, one just for the CRM app, one just for the FIN app, and one for all apps.
Perform a Recovery Test
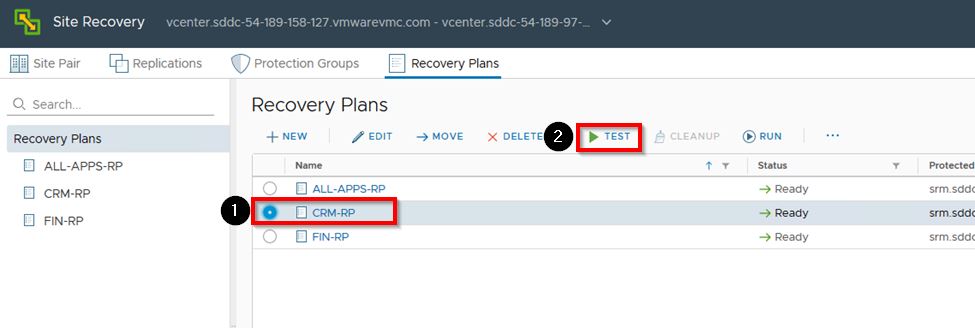
- Click the radio button next to the CRM-RP-XX Recovery Plan where XX is your Student ID
Click TEST
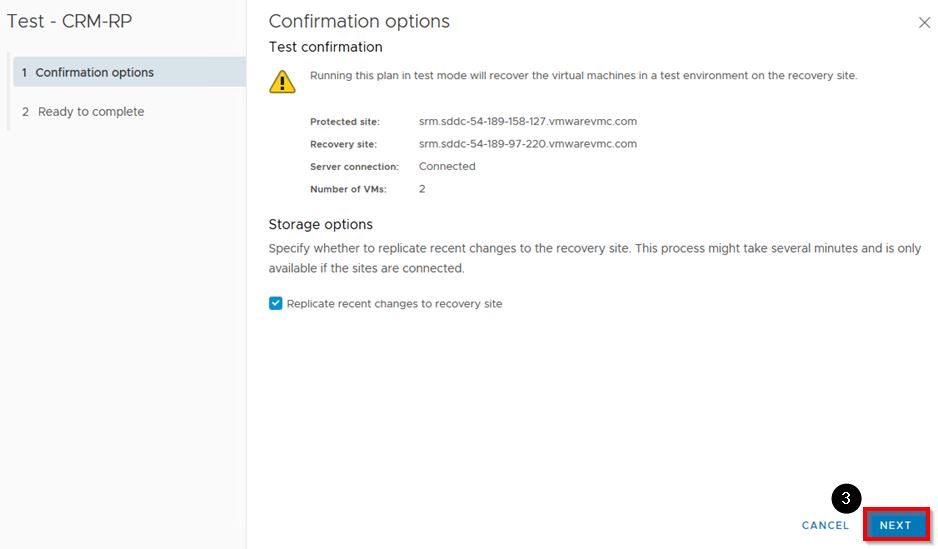
Click NEXT
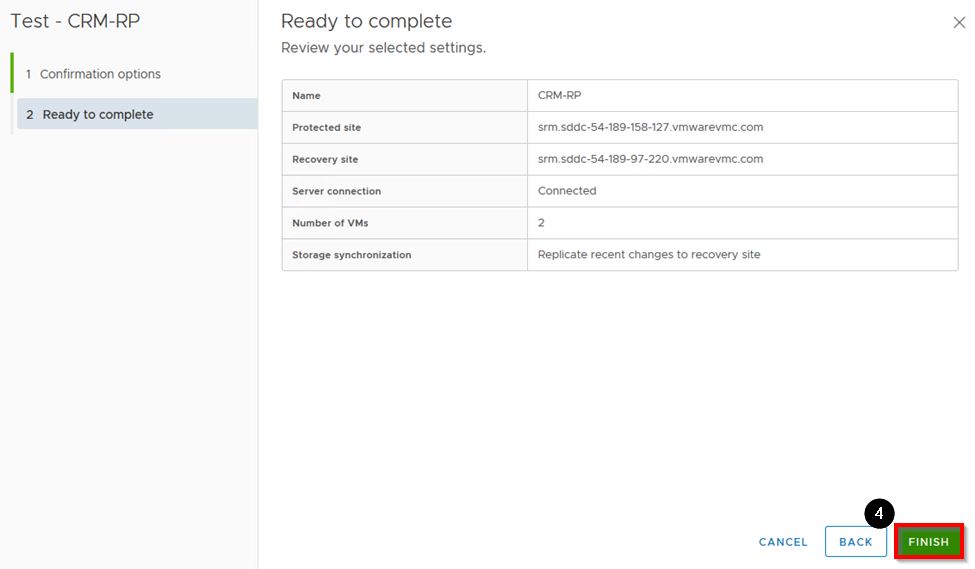
Click FINISH
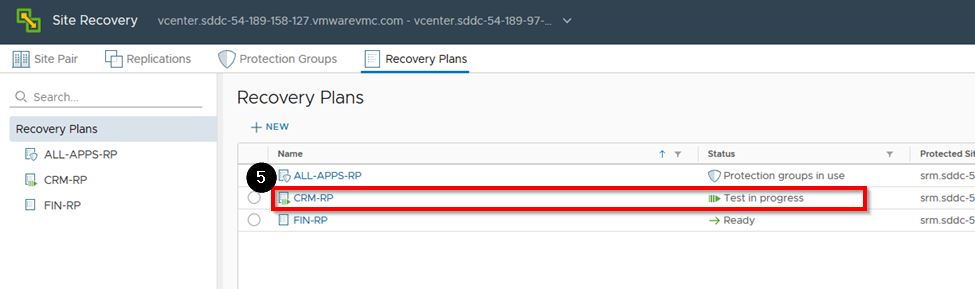
Click the CRM-RP-XX Recovery Plan where XX is your Student ID
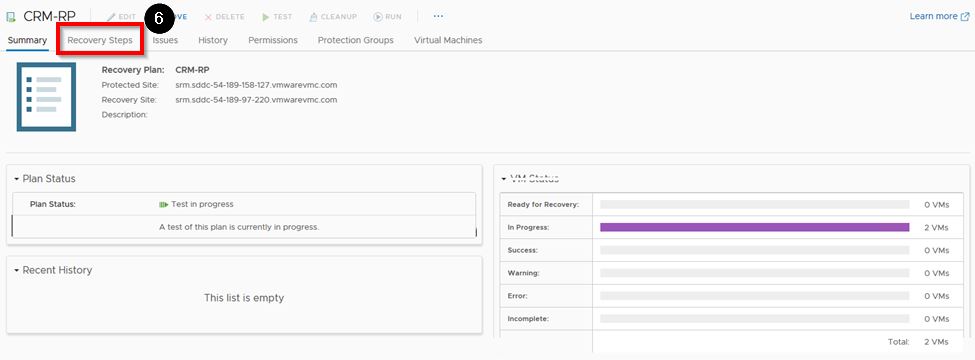
Click Recovery Steps
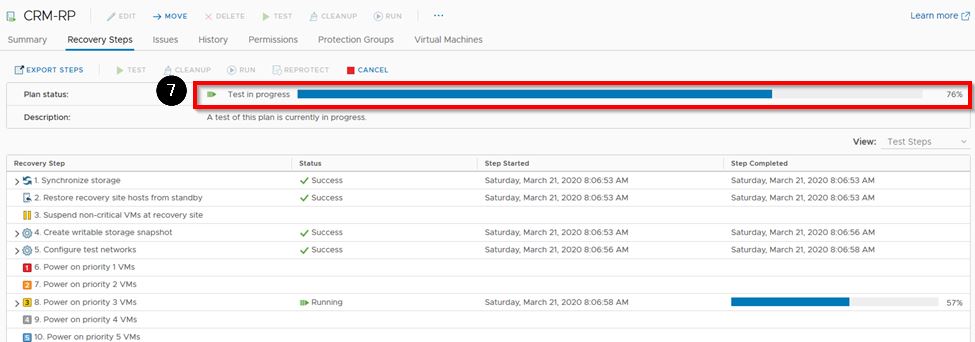
Note the status of the test
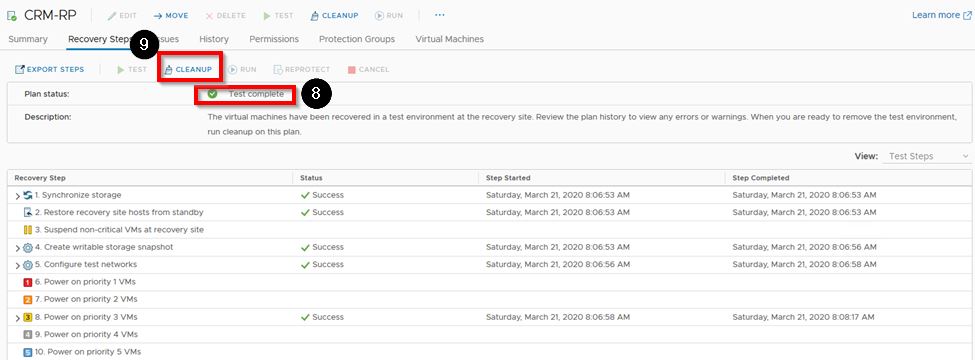
Ensure the status shows Test complete
Click CLEANUP to cleanup the activity and return the environment to its normal state
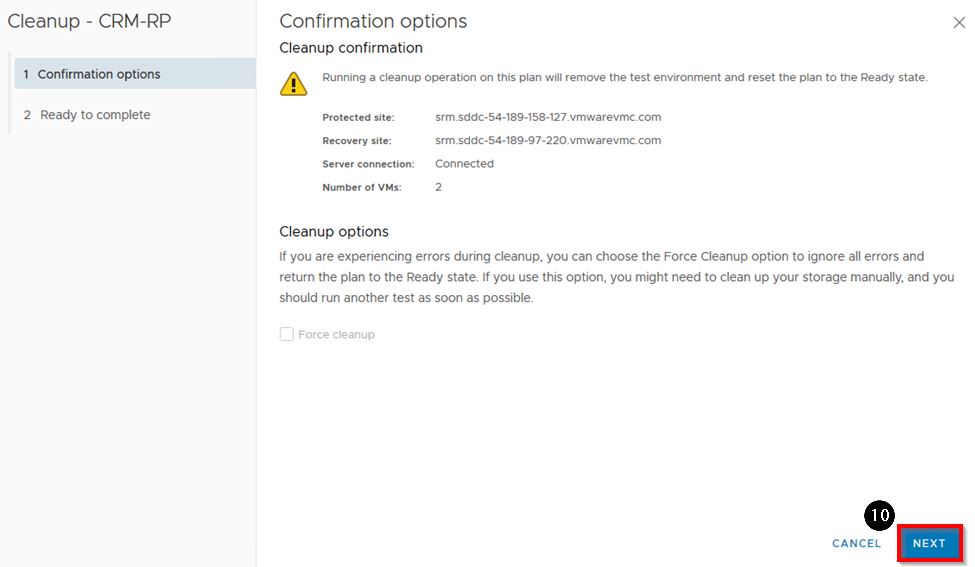
Click NEXT
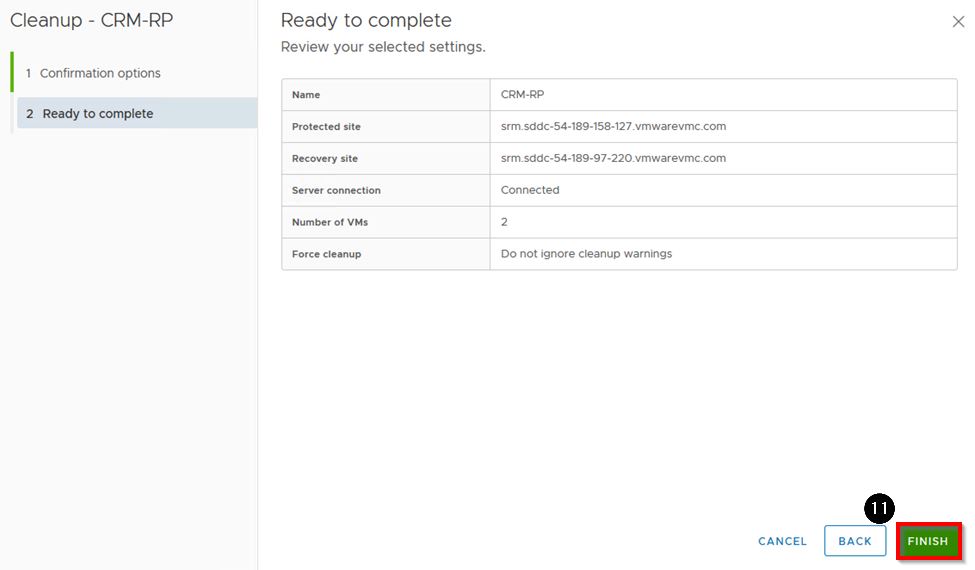
Click FINISH
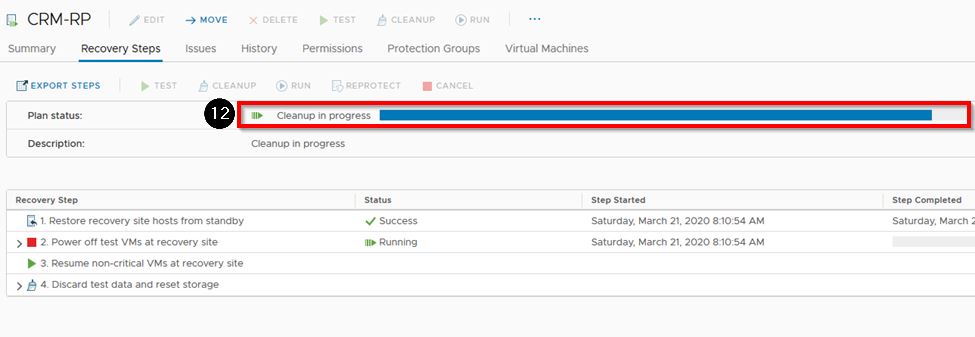
Note the status of the cleanup until it is complete

Once the cleanup is complete, the Recovery Plan is in a Ready status and is ready for a test or a recovery.
Feedback
Was this page helpful?
Glad to hear it! Please tell us how we can improve.
Sorry to hear that. Please tell us how we can improve.